![]()
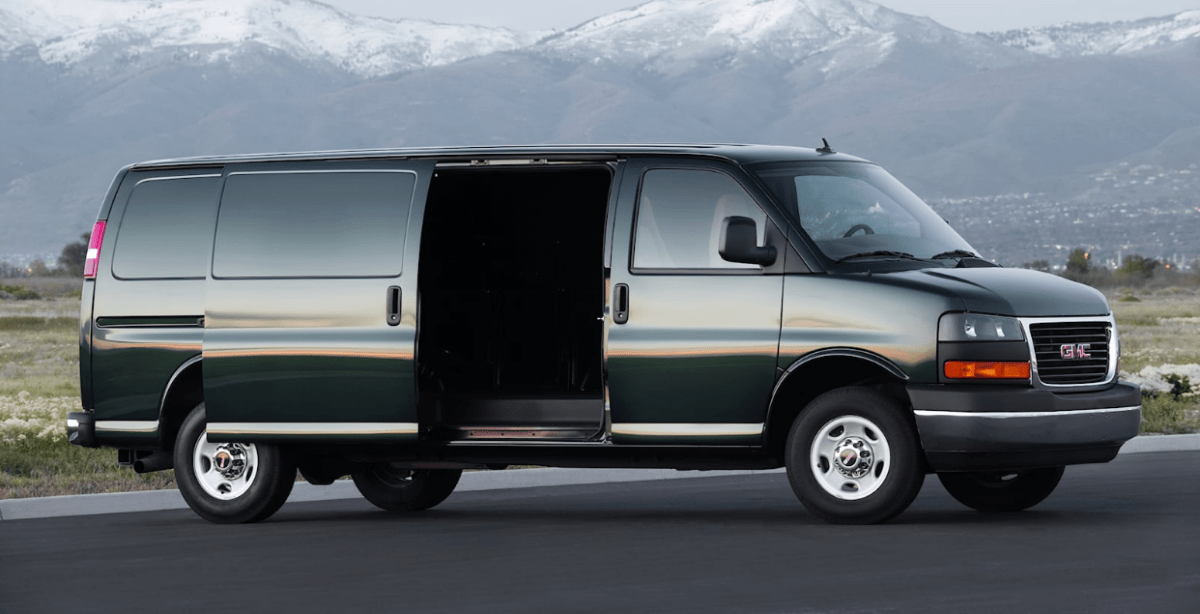
2024 GMC Savana Engine Oil and Fluids Owner’s Manual
En 2024, la division de GMC Savana continues its history of dependability and performance. It comes with a variety of carefully designed fluids and oils to make sure it works at its best.
Spécifications, prix, caractéristiques, kilométrage et examen du GMC SAVANA 2023-2024
2024 GMC Engine Compartment Overview

- Battery North America.
- Radiator Pressure Cap. See Cooling System.
- Coolant Recovery Tank. See Cooling System.
- Engine Oil Dipstick. See “Checking Engine Oil” under Engine Oil
- Ventilateur de refroidissement du moteur (hors de vue). Voir Système de refroidissement.
- Filtre/filtre à air du moteur.
- Bouchon de remplissage d'huile moteur. Voir «Quand ajouter de l'huile moteur» sous Huile moteur.
- Power Steering Fluid Reservoir. See Power Steering Fluid.
- Bloc-fusibles du compartiment moteur.
- Brake Master Cylinder Reservoir. See Brake Fluid.
- Réservoir de liquide lave-glace. Voir «Ajout de liquide de lave-glace» sous Liquide de lave-glace.
Huile moteur
Pour assurer une bonne performance et une longue durée de vie du moteur, une attention particulière doit être portée à l'huile moteur. Suivre ces étapes simples mais importantes vous aidera à protéger votre investissement :
- Utilisez de l'huile moteur approuvée selon les spécifications appropriées et de la classe de viscosité appropriée. Voir « Sélection de la bonne huile moteur » dans cette section.
- Vérifiez régulièrement le niveau d'huile moteur et maintenez le niveau d'huile approprié. Voir « Vérification de l'huile moteur » et « Quand ajouter de l'huile moteur » dans cette section.
- Change the engine oil at the appropriate time. See Engine Oil Life System. Always dispose of engine oil properly. See “What to Do with Used Oil” in this section
Vérification de l'huile moteur
Check the engine oil level regularly, every 650 km (400 mi), especially prior to a long trip. The engine oil dipstick handle is a loop. See Engine Compartment Overview for the location
The engine oil dipstick handle may be hot; it could burn you. Use a towel or glove to touch the dipstick handle
Si un message de bas niveau d'huile du centralisateur informatique de bord (CIB) s'affiche, vérifiez le niveau d'huile. Suivez ces directives :
- Pour obtenir une lecture précise, garez le véhicule sur un terrain plat. Vérifiez le niveau d'huile moteur après que le moteur soit arrêté pendant au moins deux heures. Vérifier le niveau d'huile moteur sur des pentes raides ou trop tôt après l'arrêt du moteur peut entraîner des lectures incorrectes. La précision s'améliore lors de la vérification d'un moteur froid avant le démarrage. Retirez la jauge et vérifiez le niveau.
- If unable to wait two hours, the engine must be off for at least 15 minutes if the engine is warm, or at least 30 minutes if the engine is not warm. Pull out the dipstick, wipe it with a clean paper towel or cloth, and then push it back in all the way. Remove it again, keeping the tip down, and check the level.
Quand ajouter de l'huile moteur

Si l'huile est inférieure à la zone hachurée à l'extrémité de la jauge et que le moteur est arrêté depuis au moins 15 minutes, ajoutez 1 L (1 pinte) de l'huile recommandée, puis vérifiez à nouveau le niveau. Voir « Sélection de l'huile moteur appropriée » plus loin dans cette section pour une explication du type d'huile à utiliser.
Attention
N'ajoutez pas trop d'huile. Les niveaux d'huile supérieurs ou inférieurs à la plage de fonctionnement acceptable indiquée sur la jauge sont nocifs pour le moteur. Si le niveau d'huile est au-dessus de la plage de fonctionnement (c'est-à-dire que le moteur contient tellement d'huile que le niveau d'huile dépasse la zone hachurée indiquant la plage de fonctionnement appropriée), le moteur peut être endommagé. Vidangez l'excès d'huile ou limitez la conduite du véhicule et demandez à un professionnel de l'entretien d'éliminer l'excès d'huile.
Ajoutez suffisamment d'huile pour placer le niveau quelque part dans la plage de fonctionnement appropriée. Repoussez la jauge une fois terminée.
Choisir la bonne huile moteur
La sélection de la bonne huile moteur dépend à la fois des spécifications de l'huile et du degré de viscosité appropriés.
Spécification
Utilisez des huiles moteur entièrement synthétiques conformes à la spécification dexos1. Les huiles moteur qui ont été approuvées par GM comme répondant à la spécification dexos1 sont marquées du logo approuvé dexos1. Voir www.gmdexos.com.

Attention
La non-utilisation de l'huile moteur recommandée ou d'un équivalent peut entraîner des dommages au moteur non couverts par la garantie du véhicule.
Grade de viscosité
Use SAE 5W-30 viscosity grade engine oil. Cold Temperature Operation: In an area of extreme cold, where the temperature falls below −29 °C (−20 °F), an SAE 0W-30 oil may be used. An oil of this viscosity grade will provide easier cold starting for the engine at extremely low temperatures. When selecting an oil of the appropriate viscosity grade, it is recommended to select an oil of the correct specification. See “Specification” earlier in this section.
Additifs d'huile moteur/rinçages d'huile moteur
Do not add anything to the oil. The recommended oils meeting the dexos1 specification is all that is needed for good performance and engine protection.
Les rinçages du système d'huile moteur ne sont pas recommandés et pourraient causer des dommages au moteur non couverts par la garantie du véhicule.
Que faire de l'huile usagée
L'huile moteur usagée contient certains éléments qui peuvent être nocifs pour la peau et même causer le cancer. Ne laissez pas l'huile usée rester très longtemps sur votre peau. Nettoyez votre peau et vos ongles avec de l'eau et du savon ou un bon nettoyant pour les mains. Lavez ou éliminez correctement les vêtements ou les chiffons contenant de l'huile moteur usagée. Voir les avertissements du fabricant concernant l'utilisation et l'élimination des produits pétroliers.
Used oil can be a threat to the environment. If you change your own oil, be sure to drain all the oil from the filter before disposal. Never dispose of oil by putting it in the trash or pouring it on the ground, into sewers, streams or bodies of water. Recycle it by taking it to a place that collects used oil
Engine Oil Life System User Manual
Quand changer l'huile moteur
If equipped, this vehicle may have a computer system that indicates when to change the engine oil and filter. This is based on a combination of factors which include engine revolutions, engine temperature and miles driven. Based on driving conditions, the mileage at which an engine oil change is indicated can vary considerably. For the oil life system to work properly, the system must be reset every time the oil is changed.
When the system has calculated that oil life has been diminished, it indicates that an oil change is necessary. A CHANGE ENGINE OIL SOON message comes on. Change the oil as soon as possible within the next 1,000 km (600 mi). It is possible that, if driving under the best conditions, the oil life system might indicate that an oil change is not necessary for up to a year. The engine oil and filter must be changed at least once a year and, at this time, the system must be reset. Your dealer has trained service people who will perform this work and reset the system. It is also important to check the oil regularly throughout an oil drain interval and keep it at the proper level.
Si le système est réinitialisé accidentellement, l'huile doit être changée 5,000 3,000 km (XNUMX XNUMX mi) depuis la dernière vidange d'huile. N'oubliez pas de réinitialiser le système de durée de vie de l'huile à chaque fois que l'huile est changée.
Comment réinitialiser le système de durée de vie de l'huile moteur
Réinitialisez le système chaque fois que l'huile moteur est changée afin que le système puisse calculer la prochaine vidange d'huile moteur.
Pour réinitialiser le système de durée de vie de l'huile moteur sur la plupart des modèles :
- Display the OIL LIFE REMAINING on the DIC. See Driver Information Center (DIC).
- Maintenez la touche enfoncée
 sur le DIC pendant que l'affichage de la durée de vie de l'huile est actif. La durée de vie de l'huile passera à 100 %.
Le système de durée de vie de l'huile peut également être réinitialisé comme suit :
- Display the OIL LIFE REMAINING on the DIC. See Driver Information Center (DIC).
- Fully press and release the accelerator pedal three times within five seconds. If the display shows 100%, the system is reset.
Si le message CHANGE ENGINE OIL BIENTÔT réapparaît au démarrage du véhicule, le système de durée de vie de l'huile moteur n'a pas été réinitialisé. Répétez la procédure.
Fluide de transmission automatique
Comment vérifier le liquide de transmission automatique
Il n'est pas nécessaire de vérifier le niveau du liquide de transmission. Une fuite de liquide de transmission est la seule raison de la perte de liquide. En cas de fuite, emmenez le véhicule chez votre concessionnaire et faites-le réparer dans les plus brefs délais.
Il existe une procédure spéciale pour vérifier et changer le liquide de transmission. Cette procédure étant difficile, elle doit être effectuée chez votre revendeur. Contactez votre revendeur pour plus d'informations.
Attention
L'utilisation d'un liquide de transmission automatique incorrect peut endommager le véhicule et les dommages peuvent ne pas être couverts par la garantie du véhicule. Utilisez toujours le bon liquide de transmission automatique.
Change the fluid and filter at the intervals listed in the Maintenance Schedule, and be sure to use the fluid listed in Recommended Fluids and Lubricants.
Filtre/filtre à air moteur
The air cleaner/filter assembly is on the front of the engine compartment on the driver’s side of the vehicle.
Quand inspecter le filtre à air du moteur
For intervals of changing and inspecting the engine air filter, see Maintenance Schedule.
Comment inspecter/remplacer le filtre/filtre à air du moteur
Ne démarrez pas le moteur et ne le faites pas tourner avec le boîtier du filtre à air du moteur ouvert. Avant de retirer le filtre à air du moteur, assurez-vous que le boîtier du filtre à air du moteur et les composants à proximité sont exempts de saleté et de débris. Ne nettoyez pas le filtre à air du moteur ou ses composants avec de l'eau ou de l'air comprimé.
Pour inspecter et remplacer le filtre :
- Retirez les six vis, faites glisser le couvercle supérieur vers l'avant et soulevez-le pour accéder au filtre à air/filtre.
- Retirez le filtre à air/filtre de la base du boîtier. Veillez à déloger le moins de saletés possible.
Si un remplacement de pièce est nécessaire, la pièce doit être remplacée par une pièce du même numéro de pièce ou par une pièce équivalente. L'utilisation d'une pièce de rechange sans le même ajustement, la même forme et la même fonction peut entraîner des blessures corporelles ou des dommages au véhicule. - Nettoyer la surface d'étanchéité du filtre à air/filtre et la base du boîtier.
- Inspectez ou remplacez le filtre à air du moteur.
- Install the top cover by sliding it into position on the housing base, and secure using six screws.
See the Maintenance Schedule to determine when to replace the engine air cleaner/filter.
Faire fonctionner le moteur avec le filtre à air éteint peut vous brûler ou brûler d'autres personnes. Soyez prudent lorsque vous travaillez sur le moteur. Ne démarrez pas le moteur et ne conduisez pas le véhicule avec le filtre à air éteint, car des flammes peuvent être présentes si le moteur se retourne contre lui.
Attention
Si le filtre à air est désactivé, la saleté peut facilement pénétrer dans le moteur, ce qui pourrait l'endommager. Ayez toujours le filtre à air en place lorsque vous conduisez.
Système de refroidissement
Le système de refroidissement permet au moteur de maintenir la bonne température de travail

- Bouchon de pression de radiateur
- Réservoir de récupération du liquide de refroidissement
- Ventilateur de refroidissement du moteur (hors de vue)

- Bouchon de pression de radiateur
- Réservoir de récupération du liquide de refroidissement
- Ventilateur de refroidissement du moteur (hors de vue)
Un ventilateur électrique sous le capot peut démarrer même lorsque le moteur ne tourne pas et provoquer des blessures. Gardez les mains, les vêtements et les outils éloignés de tout ventilateur électrique situé sous le capot.
Ne touchez pas les durites du radiateur de chauffage ou d’autres pièces du moteur. Ils peuvent être très chauds et vous brûler. Ne faites pas tourner le moteur en cas de fuite ; tout le liquide de refroidissement pourrait s'échapper. Cela pourrait provoquer un incendie du moteur et vous brûler. Réparez toute fuite avant de conduire le véhicule.
Liquide de refroidissement moteur
The cooling system in the vehicle is filled with DEX-COOL engine coolant. This coolant is designed to remain in the vehicle for 6 years or 240,000 km (150,000 mi), whichever occurs first.
The following explains the cooling system and how to check and add coolant when it is low. If there is a problem with engine overheating, see Engine Overheating.
Quoi utiliser
Plain water, or other liquids such as alcohol can boil before the proper coolant mixture will. With plain water or the wrong mixture, the engine could get too hot but there would not be an overheat warning. The engine could catch fire and you or others could be burned.
Utilisez un mélange 50/50 d’eau propre et potable et de liquide de refroidissement DEX-COOL. Si vous utilisez ce mélange, rien d’autre ne doit être ajouté. Ce mélange :
- Offre une protection contre le gel jusqu'à −37 °C (−34 °F), température extérieure.
- Offre une protection contre l'ébullition jusqu'à 129 °C (265 °F), température du moteur.
- Protège contre la rouille et la corrosion.
- N'endommage pas les pièces en aluminium.
- Aide à maintenir la bonne température du moteur
Attention
N'utilisez rien d'autre qu'un mélange de liquide de refroidissement DEX-COOL conforme à la norme GM GMW3420 et d'eau propre et potable. Tout autre élément peut endommager le système de refroidissement du moteur et le véhicule, ce qui ne serait pas couvert par la garantie du véhicule.
Never dispose of engine coolant by putting it in the trash, pouring it on the ground, or into sewers, streams, or bodies of water. Have the coolant changed by an authorized service centre, familiar with legal requirements regarding used coolant disposal. This will help protect the environment and your health.
Vérification du liquide de refroidissement
The vehicle must be on a level surface when checking the coolant level. Check to see if coolant is visible in the coolant recovery tank. If the coolant inside the coolant recovery tank is boiling, do not do anything else until it cools down. If the coolant is visible but the coolant level is not at or above the indicated mark, add a 50/50 mixture of clean, drinkable water and DEX-COOL coolant at the coolant recovery tank, but be sure the cooling system is cool before this is done

The coolant recovery tank cap has this symbol on it.

When the engine is cold, the coolant level should be at or above the COLD FILL mark. If it is not, there could be a leak in the cooling system.
If the coolant is low, add the coolant or take the vehicle to a dealer for service.
How to Add Coolant to the Recovery Tank for Gasoline Engines
Renverser du liquide de refroidissement sur des pièces chaudes du moteur peut vous brûler. Le liquide de refroidissement contient de l'éthylène glycol et il brûlera si les pièces du moteur sont suffisamment chaudes.
L'eau ordinaire ou d'autres liquides tels que l'alcool peuvent bouillir avant que le mélange de liquide de refroidissement approprié ne le fasse. Avec de l'eau ordinaire ou un mauvais mélange, le moteur pourrait devenir trop chaud mais il n'y aurait pas d'avertissement de surchauffe. Le moteur pourrait prendre feu et vous ou d'autres personnes pourriez être brûlés.
Steam and scalding liquids from a hot cooling system are under pressure. Turning the pressure cap, even a little, can cause them to come out at high speed and you could be burned. Never turn the cap when the cooling system, including the pressure cap, is hot. Wait
for the cooling system and pressure cap to cool.
Attention
Le non-respect de la procédure spécifique de remplissage du liquide de refroidissement peut entraîner une surchauffe du moteur et endommager le système. Si le liquide de refroidissement n'est pas visible dans le réservoir d'équilibre, contactez votre revendeur.
If coolant is needed, add the proper DEX-COOL coolant mixture at the coolant recovery tank.
How to Add Coolant to the Radiator
Steam and scalding liquids from a hot cooling system are under pressure. Turning the pressure cap, even a little, can cause them to come out at high speed and you could be burned. Never turn the cap when the cooling system, including the pressure cap, is hot. Wait
for the cooling system and pressure cap to cool.
If coolant is needed, add the proper mixture directly to the radiator, but be sure the cooling system is cool before this is done.

- Remove the radiator pressure cap when the cooling system, including the radiator pressure cap and upper radiator hose, is no longer hot. Turn the pressure cap slowly counterclockwise until it first stops. Do not press down while turning the pressure cap.
If a hiss is heard, wait for that to stop. A hiss means there is still some pressure left. - Keep turning the pressure cap, but now push it down as you turn it. Remove the pressure cap.
- Fill the radiator with the proper mixture, up to the base of the filler neck. See Recommended Fluids and Lubricants for more information about the proper coolant mixture.

- Remove the coolant recovery tank cap and fill to the COLD FILL mark.
- Reinstall the cap back on the coolant recovery tank, but leave the radiator pressure cap off.
- Start the engine and let it run until the upper radiator hose can be felt getting hot. Watch out for the engine cooling fan.
- By this time, the coolant level inside the radiator filler neck may be lower. If the the level is lower, add more of the proper mixture through the filler neck until the level reaches the base of the filler neck.
- Replace the pressure cap. At any time during this procedure if coolant begins to flow out of the filler neck, reinstall the pressure cap.
Attention
Si le bouchon de pression n'est pas bien installé, une perte de liquide de refroidissement et des dommages au moteur peuvent se produire. Assurez-vous que le capuchon est correctement et fermement fixé.
Surchauffe du moteur
Attention
Ne faites pas tourner le moteur s'il y a une fuite dans le système de refroidissement du moteur. Cela peut entraîner une perte de tout le liquide de refroidissement et endommager le système et le véhicule. Des fuites ont-elles été réparées immédiatement ?
The vehicle has an indicator to warn of engine overheating
There is an engine coolant temperature gauge on the vehicle’s instrument cluster. See Engine Coolant Temperature Gauge.
If the decision is made not to lift the hood when this warning appears, but instead get service help right away, see Roadside Assistance Program.
Si la décision est prise de soulever le capot, assurez-vous que le véhicule est garé sur une surface plane.
Then check to see if the engine cooling fans are running. If the engine is overheating, the fan should be running. If it is not, do not continue to run the engine and have the vehicle serviced.
See if the engine cooling fan speed increases when idle speed is doubled by pushing the accelerator pedal down. If it does not, the vehicle needs service. Turn off the engine.
Si de la vapeur provient du compartiment moteur
Steam and scalding liquids from a hot cooling system are under pressure. Turning the pressure cap, even a little,can cause them to come out at high speed and you could be burned. Never turn the cap when the cooling system, including the pressure cap, is hot. Wait for the cooling system and pressure cap to cool.
Si aucune vapeur ne sort du compartiment moteur
Si un avertissement de surchauffe du moteur s'affiche mais qu'aucune vapeur n'est visible ou entendue, le problème n'est peut-être pas trop grave. Parfois, le moteur peut devenir un peu trop chaud lorsque le véhicule :
- Escalade une longue colline par une chaude journée.
- S'arrête après une conduite à grande vitesse.
- Reste au ralenti pendant de longues périodes dans la circulation.
- Tows a trailer.
Si l'avertissement de surchauffe s'affiche sans aucun signe de vapeur :
- Éteignez la climatisation.
- Allumez le radiateur à la température la plus élevée et à la vitesse de ventilateur la plus élevée. Ouvrez les fenêtres si nécessaire.
- Lorsque vous pouvez le faire en toute sécurité, quittez la route, passez en position P (stationnement) ou N (point mort) et laissez le moteur tourner au ralenti.
If the engine coolant temperature gauge is no longer in the overheat zone or an overheat warning no longer displays, the vehicle can be driven. Continue to drive the the vehicle slowly for about 10 minutes. Keep a safe vehicle distance from the vehicle in front. If the warning does not come back on, continue to drive normally and have the cooling system checked for proper fill and function.
Si l'avertissement persiste, arrêtez-vous, arrêtez-vous et garez immédiatement le véhicule.
If there is still no sign of steam, push down the accelerator until the engine speed is about twice as fast as the normal idle speed for at least three minutes while parked. If the warning is still on, turn off the engine until it cools down.
If the decision is made not to lift the hood, get service help right away.
Ventilateur moteur
The vehicle has a clutched engine cooling fan. When the clutch is engaged, the fan spins faster to provide more air to cool the engine. In most everyday driving conditions, the fan is spinning slower and the clutch is not fully engaged. This improves fuel economy and reduces fan noise. Under heavy vehicle loading, trailer towing, and/or high outside temperatures, the fan speed increases as the clutch more fully engages, so an increase in fan noise may be heard. This is normal and should not be mistaken as the transmission slipping or making extra shifts. It is merely the cooling system functioning properly. The fan will slow down when additional cooling is not required and the clutch partially disengages.
This fan noise may be heard when starting the engine. It will go away as the fan clutch partially disengages.
Liquide de direction assistée

The power steering fluid reservoir is in the engine compartment on the driver’s side of the vehicle.
When to Check Power Steering Fluid
It is not necessary to regularly check the power steering fluid unless there is a leak suspected in the system or an unusual noise is heard. A fluid loss in this system could indicate a problem. Have the system inspected and repaired.
Wait for the power steering system to cool, with the engine off, before checking the fluid.
How to Check Power Steering Fluid
To check the power steering fluid:
- Set the ignition off and let the engine compartment cool down.
- Wipe the cap and the top of the reservoir clean.
- Unscrew the cap and wipe the dipstick with a clean rag.
- Replace the cap and completely tighten it.
- Remove the cap again and look at the fluid level on the dipstick.
The level should be between the ADD and FULL marks. If necessary, add only enough fluid to bring the level up to the hashed the area between the ADD and FULL marks does not overfill.
To prevent contamination of brake fluid, never check or fill the power steering reservoir with the brake master cylinder cover.
Quoi utiliser
Attention
Use of the incorrect fluid may damage the vehicle and the damages may not be covered by the vehicle warranty. Always use the correct fluid listed in Recommended Fluids and Lubricants.
To determine what kind of fluid to use, see Recommended Fluids and Lubricants. Always use the proper fluid. Failure to use the proper fluid can cause leaks and damage to hoses and seals.
Washer Fluid Owner’s Manual
Quoi utiliser
When the vehicle needs a windshield washer fluid, be sure to read the manufacturer’s instructions before use. If operating the vehicle in an area where the temperature may fall below freezing, use a fluid that has sufficient protection against freezing. Adding Washer Fluid

Open the cap with the washer symbol on it. Add washer fluid until the tank is full. See Engine Compartment Overview for reservoir location.
Attention
- N'utilisez pas de liquide lave-glace contenant un quelconque type de revêtement hydrofuge.
Cela peut faire claquer ou sauter les balais d'essuie-glace. - N'utilisez pas de liquide de refroidissement moteur (antigel) dans le lave-glace. Cela peut endommager le système de lave-glace et la peinture.
- Ne mélangez pas de l'eau avec du liquide lave-glace prêt à l'emploi. L'eau peut faire geler la solution et endommager le réservoir de liquide de lave-glace et d'autres pièces du système de lave-glace.
- Lorsque vous utilisez du liquide de lave-glace concentré, suivez les instructions du fabricant pour ajouter de l'eau.
- Fill the washer fluid tank only three-quarters full when it is very cold. This allows for fluid expansion if freezing occurs, which could damage the tank if it is full.
Freinage
Les garnitures de frein à disque ont des indicateurs d'usure intégrés qui émettent un son d'avertissement aigu lorsque les garnitures de frein sont usées et que de nouvelles garnitures sont nécessaires. Le son peut aller et venir ou peut être entendu tout le temps lorsque le véhicule roule, sauf lorsque vous appuyez fermement sur la pédale de frein.
Le signal sonore d'avertissement d'usure des freins signifie que bientôt les freins ne fonctionneront plus correctement. Cela pourrait entraîner un crash. Lorsque le signal sonore d'avertissement d'usure des freins se fait entendre, faites réparer le véhicule.
Attention
Continuer à rouler avec des garnitures de frein usées peut entraîner des réparations coûteuses des freins.
Certaines conditions de conduite ou certains climats peuvent provoquer un grincement des freins lors de la première application des freins, qui s'éclaircit après plusieurs applications. Cela ne signifie pas que quelque chose ne va pas avec les freins.
Properly torqued wheel nuts are necessary to help prevent brake pulsation. When tyres are rotated, inspect brake linings for wear and evenly tighten wheel nuts in the proper sequence to torque specifications. See Capacities and Specifications.
Les plaquettes de frein doivent être remplacées sous forme de jeux d’essieux complets.
FAQ
Synthetic engine oil with a viscosity of 5W-30 is suggested for the 2024 GMC Savana.
Your 2024 GMC Savana should have its oil changed every 7,500 miles or once a year, whichever comes first.
The 2024 GMC Savana can hold between 6 and 8 quarts of oil, but this depends on the exact engine.
Even though regular oil can be used, synthetic oil is better for the 2024 GMC Savana’s engine because it lasts longer and works better.
Dexron VI automatic gearbox fluid is usually used in the 2024 GMC Savana.
You should check your 2024 GMC Savana’s transmission oil level once a month or whenever you notice any signs of transmission trouble.
Most of the time, the 2024 GMC Savana uses a 50/50 mix of antifreeze and pure water.
Every 100,000 miles or 5 years, whichever comes first.
If the aftermarket coolant additives aren’t allowed by GMC to be used in the 2024 GMC Savana, you shouldn’t use them.
The 2024 GMC Savana usually uses power steering oil that has been approved by GM.
Every month or whenever you notice any problems with the power steering.
To make sure the 2024 GMC Savana works well and is compatible, it is suggested that you use the power steering oil that has been approved by GM.
DOT 3 brake oil is usually used in the 2024 GMC Savana.
You should check your 2024 GMC Savana’s brake fluid amount once a month or whenever you notice any signs of brake problems.
Only DOT 3 brake fluid should be used in the 2024 GMC Savana. Using other types could damage or stop working the brakes.
Lien utile
Afficher le PDF complet : Manuel du propriétaire GMC Savana 2024 | Guide de l'utilisateur automatique
Spécifications, prix, caractéristiques, kilométrage et examen du GMC SAVANA 2023-2024
Guide de l'utilisateur du régulateur de vitesse intelligent (SCC) GMC Savana 2024