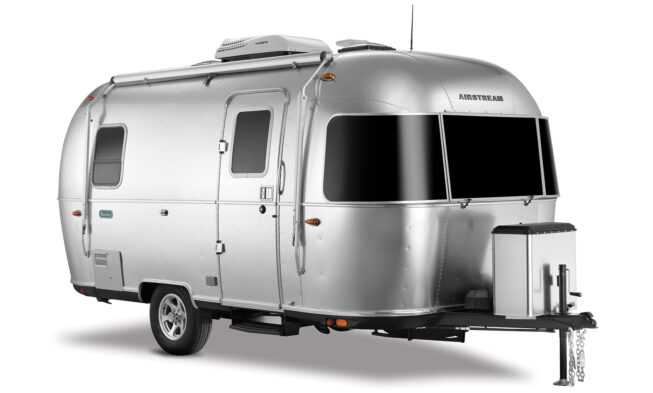
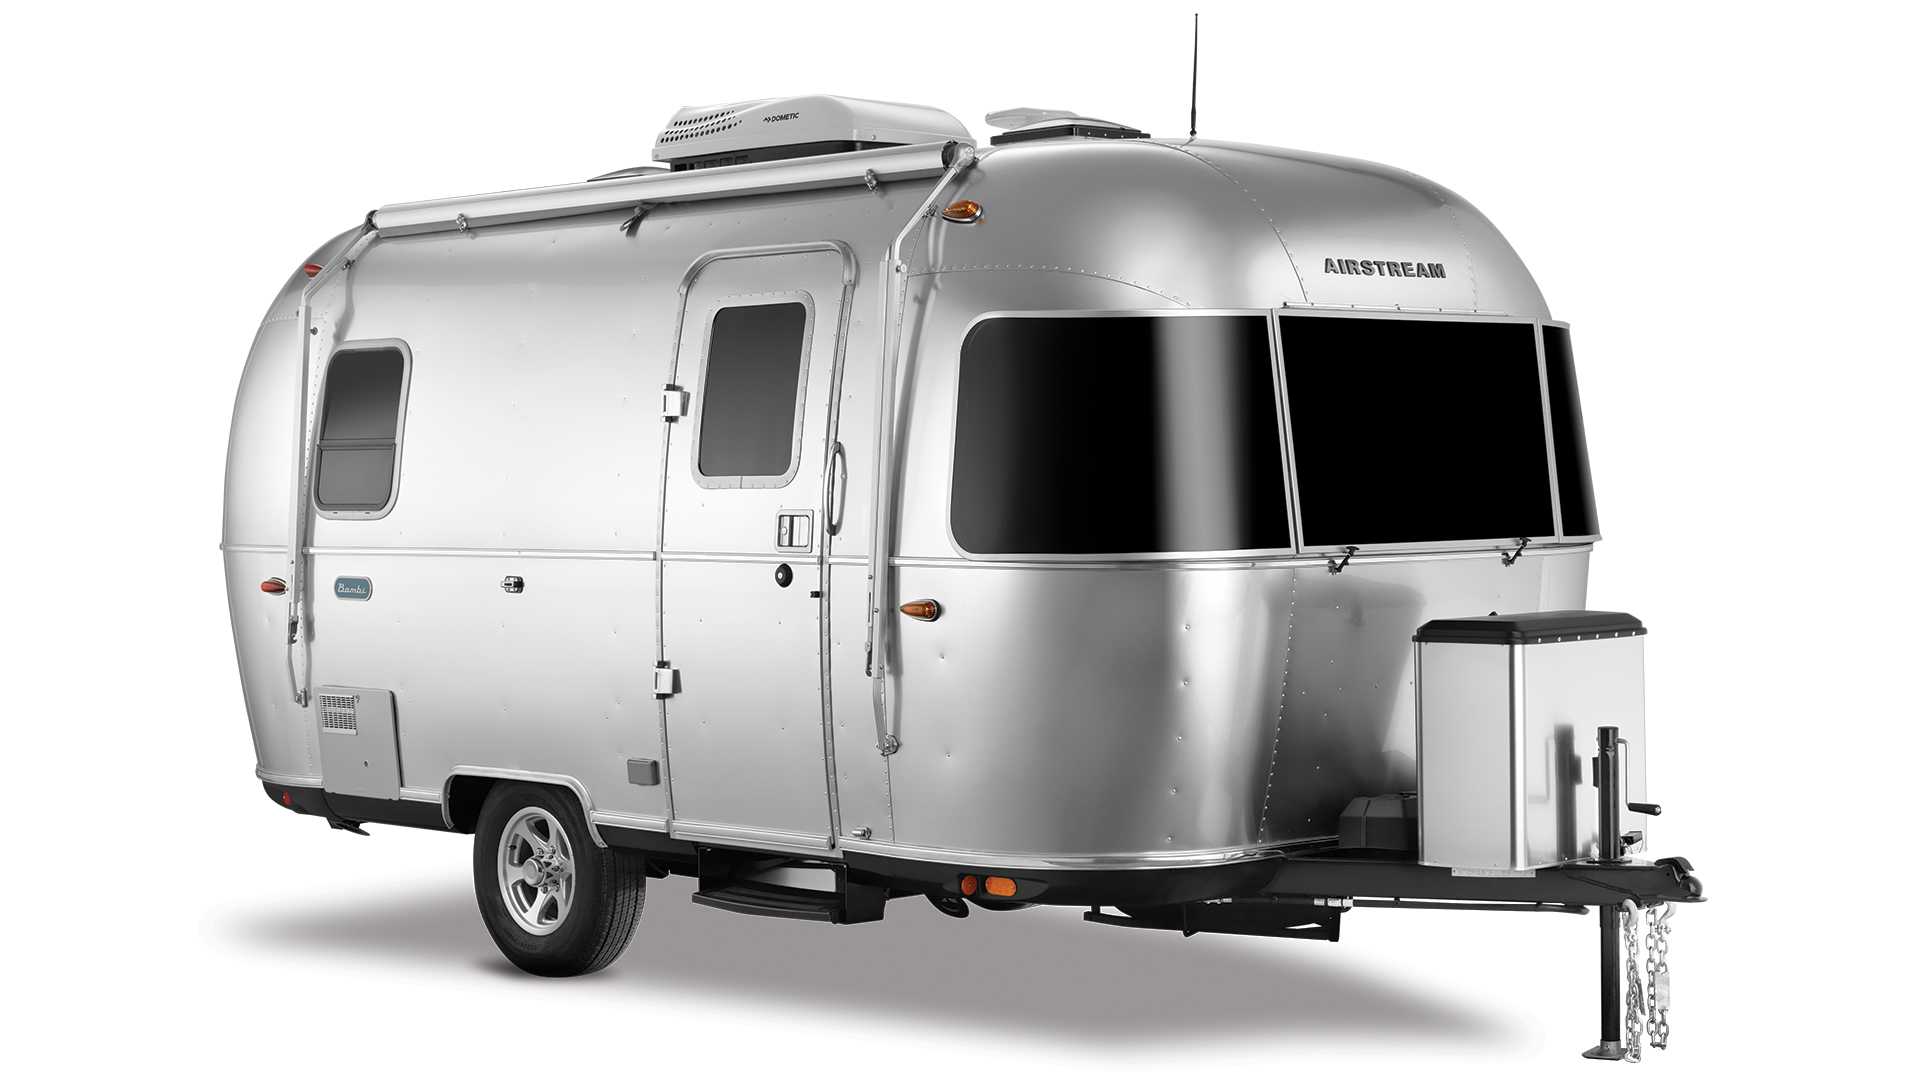
2023 Airstream Travel Trailer Bambi User Manual
Airstream Travel Trailer Bambi 2023 is a small, stylish getaway companion that reflects the spirit of adventure and wanderlust. This well-known vacation trailer captures the spirit of Airstream’s history in a smaller, but no less interesting, package. The Bambi is smooth and agile, which makes it easy to pull behind a car and move around on the open road. Inside, you’ll find a well-thought-out layout that makes the best use of room without sacrificing comfort. From the comfortable sleeping area and well-equipped kitchenette to the modern bathroom and plenty of storage space, every detail has been carefully chosen to make this a warm and useful place to live. With its lightweight construction, sturdiness, and high-quality craftsmanship, the Airstream Travel Trailer Bambi 2023 invites you to go on unforgettable trips, whether it’s a weekend camping trip or a cross-country adventure. Now is the time to enjoy the freedom of the open road and make memories that will last a lifetime in this small and flexible journey companion.
Airstream Travel Trailer Bambi 2023 Introduction and Safety Precautions User Manual
Introduction and Safety Precautions
The Owner’s Manual for your new Airstream trailer
is designed to respond to the most frequent inquiries regarding the operation, function, and care of the many systems that make modern trailering a joy. Airstream realizes our customers possess varying degrees of expertise in the area of maintaining and repairing the appliances in their trailers. For this reason, the service information found in this manual is directed toward those with average mechanical skills. We also realize that you may be more familiar with one area than you are with another. Only you know your capabilities and limitations. We want you to use this manual and hope you will find the information contained in it useful.
However, should you ever feel that you may be in need of assistance, please consult your Airstream dealer for advice on service that may be required. A brief explanation of the operation of the appliances such as refrigerator, furnace, water heater, and others, is explained in this manual. However, you will also find the manufacturer’s information, supplied in a packet included with this manual, to be more detailed. All information, illustrations, and specifications contained in this manual are based on the latest product information available at the time of publication approval. If and when new materials and production techniques are developed that can improve the quality of its product, or material substitutions are necessary due to availability, Airstream reserves the right to make such changes. We have provided many important safety messages in this manual. Always read and obey all safety messages.
WARNING
A warning is used for a hazardous situation that, if not avoided, could result in death or serious injury to persons.
CAUTION
Caution is used to advise caution when performing actions that could result in minor or moderate injury to persons and/or damage to equipment.
NOTE
A note is used to address practices not related to personal injury. This applies to hazardous situations involving property damage only. Optional items may be available on all, or particular models. Additionally, some optional items can only be included during the manufacturing phase and cannot later be added to the trailer. The inclusion of optional items information in this manual does not imply or suggest the availability, application, suitability, or inclusion for any specific unit.
Safety Precautions
Many things can be construed as safety-related, but the most important is your common sense. If you are careless with matches, cigarettes, flammable material, or any other hazardous material, you surely realize your potential for accidents is greatly increased. You will find many safety recommendations in this section and throughout the manual. The following recommendations are the ones we consider to be the most important.
Transporting of Passengers
The transporting of people in the trailer puts their lives at risk and may be illegal. The trailer does not have seat belts, therefore, it is not designed to carry passengers.
Towing and Weight Distribution
Weight distribution is an important factor when loading your travel trailer. A recreational vehicle with the cargo distributed properly will result in efficient, trouble-free towing; see Loading on pages 7-3.
Controlling Sway
Sway or fishtailing is the sideways action of a trailer caused by external forces. Excessive sway of your travel trailer can lead to the rollover of the trailer and tow vehicle, resulting in serious injury or death; see Controlling Sway or Fishtailing on pages 7-7.
Lug Nut Torquing
Making sure wheel mounting nuts (lug nuts) on trailer wheels are tight and properly torqued is an important responsibility that trailer owners and users need to understand and practice. Inadequate and/or inappropriate wheel nut torque (tightness) is a major cause of lug nuts loosening in service. Loose lug nuts can rapidly lead to a wheel separation resulting in potentially serious safety consequences; see Lug Nut Torquing on pages 8-8; see Specification Chart on pages 4-3.
Tire Safety
Properly maintained tires improve the steering, stopping, traction, and load-carrying capability of your vehicle; see Tire Care on pages 8-6. Also, be sure to read the Tire Safety Manual Addendum included with your owner’s packet.
Appliances and Equipment
The appliances (stove) and equipment (hot water heater, furnace, etc.) typically operate on LP gas. LP gas is flammable and is contained under high pressure. Improper use may result in a fire and/or explosion. Make sure to follow all instructions and warnings in this manual as well as those in the specific owner’s manuals of the appliances and equipment.
Mold
Mold and mold spores exist throughout indoor and outdoor environments. There is no practical way to eliminate all mold and mold spores in the indoor environment, however, the way to control indoor mold growth is to control moisture; see Inhibiting Mold Growth on pages 3-9.
Read all Instructions for Introduction and Safety User Manual
Airstream Travel Trailer Bambi 2023 Alarms and Detectors User Manual
Alarms and Detectors
Smoke Alarm
A smoke alarm is provided with your trailer. A manual pertaining to the alarm is included in the paperwork given to you at the dealership. Please read and follow all care, maintenance, and safety information contained in the smoke alarm manual. The smoke alarm will beep once a minute for at least 30 days when the battery is weak. The battery must immediately be replaced with a fresh one.
WARNING
The alarm battery is shipped and deactivated. Check your alarm for proper battery installation. To activate the battery, new Airstream owners must install included battery to the proper orientation.
WARNING
Smoke alarms have a limited life. The unit should be replaced immediately if it is not operating properly. You should always replace a smoke alarm after 10 years from the date of purchase. Write the purchase date on the space provided on the back of the unit.
If service is required or you have not received a smoke alarm user’s manual, please contact the manufacturer, your dealer, or Airstream Customer Service.
Liquid Propane Gas (LPG)/Carbon Monoxide (CO) Detector
This detector has a five-year life; see the end-of-life notification in the detector’s manual. Please read the entire detector manual before operating the unit.
The LPG/CO detector is located in the galley area. LPG is a mixture of gases produced and sold commercially as a fuel for heating and cooking appliances. LPG is highly flammable and, as a result, can be explosive if ignited under certain circumstances. LPG is heavier than air and, if confined in a closed space, will accumulate close to the floor. The LPG/CO detector is designed to alarm when propane gas exceeds 10% of the lower-explosive limit for more than 30 seconds or if CO gas reaches unsafe levels. When propane gas is detected the horn will sound with constant beeps and the red LED will be on. If CO gas is detected the horn will sound with 4 rapid chirps followed by a 4-second pause and the red LED will flash rapidly.
Your LPG/CO detector is wired directly to your trailer battery and incorporates a 1-amp, in-line fuse. It has no internal battery backup. In normal standby mode, the LED indicator will be green.
Low Voltage
The operating voltage for the detector is 12 VDC. The actual voltage supplied to the detector in a recreational vehicle may drop below the minimum 8 VDC. The detector provides the user with a low voltage warning before reaching that level and will provide additional distinct, clear warnings and alarms after the 8 VDC level is reached. However, if available power supplied to the unit is below the operating voltage of 8 VDC, the detector will not detect gas or provide protection against dangerous levels of LPG.
NOTE
If the low voltage warning sounds, the detector will need to be reset by disconnecting the battery, before the normal operation will occur.
Detector Test
If the Silence/Test button is pressed while in normal operation, the alarm will perform a self-test of the CO sensor, propane sensor, and battery voltage. It is recommended to perform a self-test weekly, after powering up from storage, and before each trip. If the self-test passes, the alarm will perform 2 cycles of the CO horn pattern (4 rapid chirps followed by a 4-second pause), followed by 2 cycles of the propane horn pattern (constantly beeping).
WARNING
Activation of this detector indicates the possible presence of LPG, which can cause an explosion and/or fire, causing serious injury or death. This normally indicates a leak in the LPG installation or an LPG appliance. Extinguish all open flames, open your windows and door, and evacuate the unit immediately. Do not activate any electrical switch. Turn off the LPG at your gas tank(s). Do not re-enter your unit until a qualified repair technician has corrected the problem and certified the system as safe.
WARNING
It is not recommended that the detector be disconnected from the battery during periods of storage. There is a small heater on the sensor of the device that burns away impurities in the air during periods of normal use. During periods when power is interrupted, impurities can build up on the sensor. When power is returned to the detector, the detector alarm may activate until the impurities are burned off. This could take a number of hours, during which time the alarm will be constantly on.
WARNING
Have a qualified technician check your LPG system annually or if you detect any signs of leaks or malfunctions.
NOTE
Refer to Section 5 – Interior and Section 6 – Exterior for additional LPG warnings and safety information.
WARNING
Failure to replace this product with the “REPLACE BY DATE” printed on the alarm may result in death by Carbon Monoxide poisoning. Replace By Date is five (5) years from the date of manufacture.
WARNING
Activation of your Carbon Monoxide alarm’s audible horn indicates the presence of Carbon Monoxide that can kill you. Leave the area immediately!
Read all Instructions for Alarms and Detectors User Manual
Airstream Travel Trailer Bambi 2023 Carbon Monoxide Detector User Manual
This Carbon Monoxide Detector Is Not
- Designed to detect smoke, fire, or any gas other than Carbon Monoxide.
- To be seen as a substitute for the proper servicing of fuel-burning appliances.
- To be used on an intermittent basis, or as a portable alarm for spillage of combustion products from fuel-burning appliances.
NOTE
This Carbon Monoxide detector is designed for indoor use only. Do not expose to rain or moisture. Do not knock or drop the alarm. Do not open or tamper with the alarm as this could cause a malfunction. The detector will not protect against the risk of Carbon Monoxide poisoning when the batteries are dead or missing. The alarm will only indicate the presence of CO gas at the sensor.
If the Silence/Test button is pressed while in normal operation, the alarm will perform a self-test of the CO sensor, propane sensor, and battery voltage. It is recommended to perform a self-test weekly, after powering up from storage, and before each trip. If the self-test passes, the alarm will perform 2 cycles of the CO horn pattern (4 rapid chirps followed by a 4-second pause), followed by 2 cycles of the propane horn pattern (constantly beeping).
What Is Carbon Monoxide
Carbon Monoxide (CO) is a highly poisonous gas that is released when fuels are burned. It is invisible, has no smell, and is, therefore, very difficult to detect with the human senses. Under normal conditions, in a room where fuel-burning appliances are well maintained and correctly ventilated, the amount of CO released into the room by appliances is not dangerous. These fuels include wood, coal, charcoal, oil, natural gas, gasoline, kerosene, and propane. Common appliances are often sources of CO. If they are not properly maintained, are improperly ventilated, or malfunction, CO levels can rise quickly. CO is a real danger in air-tight trailers with added insulation, sealed windows, and other weatherproofing that can trap CO inside.
Conditions that can result in potentially dangerous CO situations
- Excessive spillage or reverse-venting of fuel-burning appliances caused by outdoor conditions, such as:
- Wind direction and/or velocity, including high gusts of wind.
- Heavy air in the vent pipes (cold/humid air with extended periods between cycles).
- Negative pressure differential resulting from the use of exhaust fans.
- Simultaneous operation of several fuel-burning appliances competing for limited internal air.
- Vent-pipe connections vibrate loose from clothes dryers, furnaces, or water heaters.
- Obstructions in or unconventional vent-pipe designs can amplify the above situations.
- Extended use of un-vented fuel-burning devices. 3. Temperature increase that can trap exhaust gases near the ground.
Symptoms of Carbon Monoxide Poisoning
- Mild Exposure – Slight headache, nausea, vomiting, fatigue (flu-like symptoms).
- Medium Exposure – Throbbing headache, drowsiness, confusion, fast heart rate.
- Extreme Exposure – Convulsions, unconsciousness, heart and lung failure. Exposure to carbon monoxide can cause brain damage and/or death.
WARNING
Many causes of reported CARBON MONOXIDE POISONING indicate that while victims are aware that they are not well, they become so disoriented that they are unable to save themselves by either exiting the area or calling for assistance. Also young children and pets may be the first to be affected.
WARNING
Test units used in RVs after the vehicle has been in storage, before each trip, and once a week while in use. Failure to test units used in RV’s as described may remove your protection.
Fire Extinguisher
The fire extinguisher should be checked for the charge on a regular basis. Make sure your family knows how to release the extinguisher storage bracket, and how to properly operate the extinguisher. Check with your local fire department for professional advice on its operation and use if you find the directions on the extinguisher unclear. They will be able and willing to assist you and your family.
Safety
As always, safety should be a top priority. Ensure that you, and everyone traveling with you, can operate the main door and emergency exit window rapidly, without light. Contemplate other means of escape in case the designated exits are blocked. The escape windows(s) are identified by their red release handles. Lift up on both latches to release the escape window. Push out on the glass and it will swing clear.
WARNING
The window operation should be checked before each trip and the latches lubricated with silicon spray or an equivalent lubricant every 3 months.
WARNING
Read the directions on the fire extinguisher carefully. If you have any doubts as to its operation, you and your family should practice, then replace or recharge the extinguisher. Your local fire department will be able to assist you and answer any questions.
Read all Instructions for Carbon Monoxide Detector User Manual
Airstream Travel Trailer Bambi 2023 Limited Warranty User Manual
Limited Warranty Policy
This Limited Warranty Covers
- The first retail owner and any subsequent owners
- ONLY those portions of a NEW travel trailer not excluded under the section “What is Not Covered”, when sold by an authorized dealership and used for its intended purpose of recreational travel and camping; and,
- ONLY defects in workmanship performed and/or materials used to assemble those portions of your travel trailer not excluded under the section “What is Not Covered”. “Defect” means the failure of the workmanship performed and/or materials used to conform with the design and manufacturing specifications and tolerances of Airstream. The Limited Warranty is transferable and the subsequent owner’s warranty coverage period shall be the unexpired balance of the original warranty coverage period. A completed copy of the Warranty Transfer Form must be submitted to Airstream at the time of resale. When you request and accept the performance of warranty repairs under the terms of this Limited Warranty, you are accepting all terms of this Limited Warranty, including by way of example, warranty limitations and disclaimers, the forum selection clause, and the clause reducing the time period when a suit must be filed for breach. If any term or condition in this limited warranty conflicts with your state’s Uniform Commercial Code (“UCC”) as interpreted by courts within your state, the provisions of your state’s UCC are varied as allowed for by USS 1-302.
Coverage Ends
36 Months after the first retail owner first takes delivery of the travel trailer from an authorized dealership. Any action for breach of this warranty or any implied warranties must be commenced not more than 37 months after the breach. Some states do not allow the reduction of the time when a breach of a warranty claim must be commenced, so the reduction in time when a breach of a warranty claim must be commenced may not apply to you.
Limitation Of Implied Warranties
Implied warranties arising under applicable law, if any, including but not limited to implied warranties of merchantability or fitness for a particular purpose, are hereby limited in duration to the term of this limited warranty and are limited in the scope of coverage to those portions of the travel trailer covered by this limited warranty. There are no express warranties or any implied warranties of merchantability on those portions of the travel trailer excluded from coverage. There is no warranty of any nature made by Airstream beyond that contained in this limited warranty. No person has the authority to enlarge, amend or modify this limited war runty. The dealer is not airstream’s agent. Airstream is not responsible for any undertaking, representation or warranty made by any dealer or others beyond those expressly set forth within this limited warranty. Some states do not allow limitations on how long an implied warranty lasts, so the above limitations may not apply to you.
Disclaimer Of Incidental And Consequential Damages
Airstream disclaims any and all incidental and consequential damages, including but not limited to expenses such as transportation to and from dealerships and Airstream repair facilities, loss of time, loss of pay, loss of use, inconvenience, commercial loss (including but not limited to lost profits), towing charges, bus fares, vehicle rental, service call charges, gasoline expenses, incidental charges such as telephone calls and facsimile transmissions, and expenses for lodging and moisture damage such as mold and mildew as well as rust and corrosion. This disclaimer is independent of any failure of the essential purpose of any warranties provided with the travel trailer and shall survive any determination that a warranty failed of its essential purpose. Some states do not allow the exclusion or limitation of incidental or consequential damages, so the above limitation or exclusion may not apply to you.
Repair Remedy
Airstream’s sole and exclusive obligation is to repair any covered defects discovered within the warranty coverage period if: (1) within 10 days of your discovery of a defect you notify Airstream OR an authorized dealership of the defect; AND (2) you deliver your travel trailer to Airstream OR an authorized dealership at your cost and expense.
Back-Up Remedy
If the primary repair remedy fails to successfully cure any defect after a reasonable number of repair attempts, your sole and exclusive remedy shall be to have Airstream pay an independent service shop of your choice to perform repairs to the defect OR if the defect is incurable, have Airstream pay diminution in value damages. The repair remedy and the backup remedy must both be exhausted and these remedies must fail to fulfill their essential purpose before you can seek other legal or equitable remedies for breach of this express warranty or for breach of any implied warranty. This limited warranty is not a warranty that promises or extends to future performance because the warranty does not make a representation of how your travel trailer will perform in the future but instead represents only what the remedy will be if a defect exists. Unless prohibited by state law, repairs will not extend the time when you must commence a breach of warranty claim and shall not extend the warranty coverage period. Any performance of repairs after the warranty coverage ends OR any performance of repairs to those portions of your travel trailer excluded from coverage shall be considered “goodwill” repairs. Warranty repairs should be expected.
Airstream
may use new and/or remanufactured parts and/or components of substantially equal quality to complete a repair. Damage to the interior or exterior surfaces, trim, upholstery, and other appearance items may occur at the factory during assembly, during delivery of the travel trailer to your selling dealer, or on the selling dealer’s lot. Normally, any damage is detected and corrected at the factory or by the selling dealer during the inspection process. If you discover any damage when you take delivery of your travel trailer, you MUST notify your dealer OR Airstream within 10 days of the date of purchase to have the damage repaired at no cost to you. Minor adjustments, such as adjustments to the interior or exterior doors, drawers, and latches will be performed at no cost to you by your selling dealer during the first 90 days of warranty coverage; thereafter, such adjustments are your exclusive responsibility as normal maintenance.
What Is Not Covered
- Tires, batteries, stereo, television, range/stove, furnace, refrigerator, air conditioner, toilet, water heater, microwave, generator, glass breakage, axle alignment, and other materials, parts, and components warranted by persons or entities other than Airstream. Please refer to the warranties of component manufacturers for terms and conditions of coverage;
- Accessories and equipment that are working as designed, but which you are unhappy with because of the design
- Any part or component of the travel trailer that was
not manufactured or installed by Airstream;
- Normal deterioration due to wear or exposure, including but not limited to upholstery, flooring rust, corrosion, oxidation, and cosmetic blemishes;
- Normal maintenance and service items, including but not limited to light bulbs, fuses, lubricants, sealants and seals, door adjustments, and awning tension;
- After-market equipment or accessories installed on the travel trailer after completion of manufacture by Airstream, or any defects or damage caused by such items;
- Travel trailers not purchased through an authorized dealer of Airstream and travel trailers purchased directly or indirectly through auction, salvage, repossession, or other non-customary sale means;
- Any travel trailer used other than for temporary recreation purposes, including, but not limited to, use of the travel trailer for residential, rental, business, and commercial purposes or any travel trailer purchased by, registered by, or titled in the name of a business association (such as an LLC, corporation, or partnership). If the travel trailer owner or user files a tax form claiming a business or commercial tax benefit or income related to the travel trailer, it shall be irrefutable that the travel trailer has been used for rental, commercial, or business purposes.
Read all Instructions for Limited Warranty User Manual
Airstream Travel Trailer Bambi 2023 Obtaining Warranty User Manual
Obtaining Warranty Service
In order to obtain warranty service under this Limited Warranty, the owner must do all of the following:
- Owner and dealer representative must complete and return the Customer Performance Checkout within 10 days from delivery of the trailer,
- Notify Airstream or one of its authorized, independent dealers of any claimed defect within the warranty period or 10 days thereafter,
- Provide notification of a defect within 10 days of discovery of that defect, and
- Promptly return the travel trailer to an authorized Airstream dealer or Airstream for repairs.
- If you believe a defect covered by this Limited Warranty still exists after an attempted repair by an authorized Airstream dealer, you must contact Airstream in one of the following manners, and specify:
- The complete serial number of the travel trailer,
- The date of original purchase and the date of
original delivery,
- The name of the selling dealer, and
- The nature of the problem and the steps or service which have been performed.
Email: support.airstream.com
Phone: (937) 596-6111
Mail: AIRSTREAM, INC., 428 West Pike Street, P.O. Box 629, Jackson Center, Ohio 45334-0629, Attention:
Owner Relations Department
Airstream may direct you to an authorized Airstream dealer or may request that you bring your travel trailer to the Airstream factory in Jackson Center, Ohio for repairs. Airstream does not control the scheduling of repairs at its authorized Airstream dealers, and repairs at the Airstream factory may not be immediately available. Therefore, you may encounter delays in scheduling repairs and/or completion of repairs. All costs associated with transporting the travel trailer for any warranty service shall be the sole responsibility of the owner. Events That Discharge Airstream’s Obligations Under This Limited Warranty Misuse or neglect, accidents, unauthorized alteration, failure to provide reasonable and necessary maintenance (see Owner’s Manual), damage caused by off-road use, collision, fire, theft, vandalism, explosions, overloading in excess of rated capacities, and use of the travel trailer for commercial, business, or rental purposes shall discharge Airstream from any express or implied warranty obligation to repair any resulting defect.
Legal remedies:
exclusive jurisdiction for deciding legal disputes relating to an alleged breach of warranty or representations of any nature rests in the courts within the state of manufacture, which is Ohio. Also, this limited warranty shall be interpreted and construed in accordance with the laws of the state of Ohio. Any and all claims, controversies, and causes of action arising out of or relating to this limited warranty, whether sounding contract, tort or statute, shall be governed by the laws of the State of Ohio, including its statute of limitations, without giving effect to any conflict of law rule that would result in the application of the laws of a different jurisdiction.
Airstream Limited Warranty Excludes
Normal Wear
Items such as curtains, upholstery, floor coverings, window, door, and vent seals will show wear or may even wear out within the 3-year warranty period, depending upon the amount of usage, weather, and atmospheric conditions.
Accident
We strongly urge our dealers and customers to inspect the trailer upon receipt of delivery for any damage caused by accident while being delivered to the dealer, or while it is on the dealer’s lot. Damage of this nature becomes the dealer or customer’s responsibility upon acceptance of delivery, unless Airstream is notified and the person making the delivery verifies the damage. Glass breakage, whether obviously struck or mysterious, is always accidental and covered by most insurance policies.
Abuse
Lack of customer care and/or improper maintenance will result in early failure for which Airstream cannot be held responsible.
Chemical Gassing
Chemical gassing is not a “Defect” in your recreational vehicle and is not covered by the Limited Warranty. Please follow the recommendations in this manual to address this concern.
Exposure
Not unlike a car, the steel parts of a trailer can and will rust if subjected to prolonged exposure to moisture, salt air, or corrosive air-borne pollutants without repainting. Aluminum oxidizes when unprotected under similar conditions, and refinery chemicals of a sulfurous nature are harmful to finishes if not washed off periodically. Extremely hot or direct sunlight will deteriorate rubber and fade curtains and upholstery. Conditions of this nature, although they may be normal for the area, are beyond Airstream’s control and become the responsibility of the owner. It is the responsibility of the owner to take such preventative measures as are necessary to maintain the exterior caulking and sealer of your unit. It is the responsibility of the owner to use reasonable, prudent care to prevent foreseeable secondary damage from rain, plumbing leaks, and the natural accumulation of moisture in your unit, such as a delaminated floor; stained upholstery, carpeting, or drapes, mold formation and growth, furniture damage, etc. Mold is a natural growth, given certain environmental conditions, and is not covered by the terms of the Limited Warranty.
Overload
Damage due to loading, either beyond capacity or to cause improper towing because of improper balance, is beyond Airstream’s responsibility. The Airstream trailer is engineered to properly handle the gross vehicle load rating on the certification label. Load distribution has a definite effect upon the towing characteristics and attitudes of the trailer. Level hitch installations are a necessity, and very important on a tandem axle trailer. There are limits to the amount of load that can be safely transported, depending upon speed and road conditions, and reasonable cause to believe these factors have been exceeded could void the Airstream warranty. For additional information on the loading of your trailer, consult this Owner’s Manual or gross vehicle weight rating plate. The axle is manufactured to a tolerance of 1-degree camber and 1/8 in. toe-in. These tolerances will only change if the trailer is subjected to abuse, such as dropping off a sharp berm, striking a curb, or hitting
a deep hole in the road. Such damage could be considered as resulting from an accident, of which risks are not covered under the warranty. Abnormal tire wear and/or wheel alignment resulting from such damage is not covered under the terms of the warranty.
Read all Instructions for Obtaining Warranty User Manual
Airstream Travel Trailer Bambi 2023 Camping User Manual
Camping
Suggested Pre-Travel Check List
Interior
- Turn off the water pump switch.
- Check battery water level.
- Close windows and vents.
- Lock all interior cabinet doors.
- Latch refrigerator door. (Seal containers first)
- Hold down or stack securely all loose, hard, and sharp objects.
- Fasten sliding and folder doors.
- Drain the toilet bowl.
- Turn off the interior lights.
- Lower wall-mounted tables to be even with dinette seats. Place Pedestal tables in an upright position. .
- Pull up or retract the step.
- Lower blinds.
- Secure and lock the main door.
Exterior
- Disconnect and stow the electrical hookup cord, and the sewer (flush out) and water hookup hoses.
- Turn off the gas at LP tanks.
- Retract stabilizing jacks.
- Check the hitch for proper attachment.
- Check safety chains and a breakaway switch cable. 6. Fully retract the hitch jack. Remove and stow the jack stand or wood block.
- Check clearance and stoplights.
- Check lug nuts.
- Check tires for correct pressure.
- Adjust tow vehicle mirrors.
- Pull forward about 50 ft, test brakes, and check the site for forgotten objects and cleanliness
Trailer Equipment and Accessories
- Water hose, 5/8 in. high pressure, tasteless, odorless, non-toxic, (2 25-ft. sections)
- Y connection – water hose
- Sewer hose with clamp
- Drain cap with hose drain
- Holding tank cleaner and deodorizer
- Power cord adapter, 30-amp capacity
- 30-ft. electric cord, 30-amp capacity
- Woodblocks for leveling
- Wheel chocks
- Hydraulic jacks
- A cross-type lug wrench and a torque wrench
- Quality tire gauge
- Emergency road warning triangle
Motoring Essentials
- Display the tow vehicle and trailer registration properly.
- Carry a driver’s license.
- In Canada, bring along a non-residence liability insurance card and your birth certificate.
- In Mexico, you must have special auto insurance.
- Carry an extra set of the ignition and truck keys in a separate pocket, or in your wallet.
- Keep an operating flashlight with fresh batteries in the glove compartment.
- Pack the trunk so that you can reach the tools and spare tire without completely unpacking.
- Keep sharp or hard articles securely packed, wherever they may be.
- Carry a first-aid kit.
- Carry your pet’s dish, food, leash, and health and registration papers.
Overnight Stop
Airstream owners have parked virtually in every place imaginable, from filling stations to farmlands. In time, you’ll develop a knack for spying on wonderful little roadside locations by turning off the main highway and exploring. There are many modern parks, including State, County, and Federal parks with good facilities where you might obtain hookups of electrical, water, and sewer connections. Directories are published that describe in detail these parks and tell what is available in the way of services and hookups. On overnight or weekend trips, chances are you will not use up the capacity of the sewage holding tank, deplete the water supply, or run down the batteries that supply the 12-volt current.
On a longer trip, when you have stayed where sewer connections and utility hookups were not available, it will be necessary for you to stop from time to time to dispose of the waste in the holding tank and replenish the water supply. Many truck stops and gas stations, chain and individually owned, have installed sanitary dumping stations for just this purpose. Booklets are available that list these dumping stations. When stopping for the night, your Airstream is built to be safely parked in any spot that is relatively level and where the ground is firm. Your facilities are with you. You are self-contained. Unless the tow vehicle is needed for transportation, it is not necessary to unhitch.
WARNING
At each campsite, make sure you have not parked in such a manner as to block the operation of the escape window by being too close to trees, fences, or other impediments. Scenic views are one reason for traveling but don’t park so the beautiful lake or steep cliff is just outside your escape window.
Choose the most level parking spot possible. Stabilizing jacks or blocks may not be required for an overnight stay. However, if you put the jack pad on the hitch jack and run the hitch jack down to take the weight off the tow vehicle’s springs, it will provide some stability. If you must park on a slope, park facing downhill. It is easier to level the trailer this way. All you need to do to enjoy the self-contained luxury of your Airstream is to turn on the LPG and light any appliance pilot lights.
Before moving on, check your campsite, both for cleanliness and also, to be sure you haven’t left anything behind. Turn off the gas supply and make sure everything is properly stowed. Use your pre-travel checklist and you are ready for more travel adventures.
Read all Instructions for Camping User Manual
Airstream Travel Trailer Bambi 2023 Molds User Manual
Molds
Molds are microscopic organisms that naturally occur in virtually every environment, indoors and out. Outdoors, mold growth is important in the decomposition of plants. Indoors, mold growth is unfavorable. Left unchecked, molds break down natural materials, such as wood products and fabrics. Protect your investment by understanding the potential risks that mold imposes.
Contributing Factors To Mold Growth
For mold growth to occur, temperatures, indoors or outdoors, must be between 40° and 100°F, and must also have a source of moisture, such as humidity, standing water, damp materials, etc. Indoors, the most rapid growth occurs with warm and humid conditions.
Inhibiting Mold Growth
By controlling relative humidity, the growth of mold and mildew can be inhibited. In warm climates, use of the air conditioner will reduce the relative humidity. Vents are located in the bathing and cooking areas. Constant use of these vents is advised during food preparation and bathing, even during colder weather. Additionally, opening a window during these activities will assist in ventilation. In extremely humid conditions, the use of a dehumidifier can be helpful. Frequent use of your trailer, or cleaning regularly, are important preventive measures. Additionally, any spills should be wiped up quickly and dried as soon as possible. Avoid leaving damp items lying about. On safe surfaces, use a mold or mildew-killing cleaning products. Check sealants regularly, and reseal when necessary to avoid water leaks. Proper preventive maintenance of the trailer and its accessories, as described both in this manual and in the accompanying literature, will provide the best protection to the trailer. For more information concerning controlling moisture in the trailer, see Tips To Controlling Condensation on pages 3-9.
NOTE
If using a dehumidifier, please read and follow all manufacturer instructions and recommendations for the use and cleaning of the dehumidifier.
Waste Water System
The main parts of the wastewater system are the toilet, holding tanks, and tank dump valves; see Black and Gray Water Tank Draining on page 8-12. The system is designed to provide complete self-contained toilet facilities, while on the road or parked, without being connected to a sewage line. It may also be used in the stationary position while connected to a sewage hose.
Keep the dump valves closed with either method and empty the tanks when they are nearly full. The idea is to send a large volume of water through the tanks and hose at the same time to float solids away. After the sewage tank has been emptied, close the dump valves and put approximately five gallons of water in the sewage holding tank using the black tank flush inlet. This will spray the interior of the tank with water and help prevent solids from building up in the sewage holding tank. The addition of a deodorizing agent like Aqua Kim will help prevent odors. Should you ever have a buildup of solids, close the valves, fill the tanks about 3/4 full with fresh water, drive a distance to agitate the solids, and drain the tanks.
Things Not To Put Into Toilet Or Drains
- Facial tissues and feminine hygiene products (they do not dissolve like toilet paper).
- Automotive antifreeze, ammonia, alcohols, or acetone.
- Table scraps or other solids that may clog the drains.
16RB Model
Toilet Flange 2. Black/Grey Tank (Toilet) 3. Galley Drain 4. Shower Drain
19CB Model
Read all Instructions for Molds User Manual
Airstream Travel Trailer Bambi 2023 Floor Plans User Manual
Floor Plans
16RB Bambi
19CB Bambi
20FB Bambi
22FB Bambi
Specifications
Specification Chart
NOTE
All product information and specifications listed are as accurate as possible at the time of printing. Since we continually strive to improve our products, all specifications are subject to change without notice. All capacities are approximate and dimensions are nominal and are checked and updated throughout the model year.
Item |
Floor Plans |
16RB |
19CB |
20FB |
22FB |
Exterior length |
16′ 1″ |
19′ 1″ |
20′ 7″ |
21′ 11″ |
Exterior width |
8′ |
8′ |
8′ |
8′ |
Exterior height with A/C |
9′ 3″ |
9′ 3″ |
9′ 3″ |
9′ 3″ |
Interior width |
7′ 7″ |
7′ 7″ |
7′ 7″ |
7′ 7″ |
Interior height with A/C |
6′ 4″ |
6′ 4″ |
6′ 4″ |
6′ 4″ |
Hitch ball height |
19″ |
19″ |
19″ |
19″ |
Hitch ball size |
2 5/16” |
2 5/16” |
2 5/16” |
2 5/16” |
UBW (lbs. with LP & batteries) |
3000 |
3650 |
4000 |
3900 |
Hitch weight (lbs. with LP & batteries) |
430 |
525 |
540 |
500 |
GVWR (lbs.) |
3500 |
5000 |
5000 |
5000 |
NCC (lbs.) |
500 |
1350 |
1000 |
1100 |
Fresh water tank (gal.) |
23 |
23 |
23 |
23 |
Gray water tank (gal.) |
N/A |
29 |
30 |
30 |
Black water tank (gal.) |
N/A |
18 |
18 |
17 |
Combo gray/black tank (gal.) |
30 |
N/A |
N/A |
N/A |
Lug nut torque (Max), aluminum wheels (ft lbs.) |
110
|
110
|
110
|
110
|
Lug nut torque (Max), steel wheel (spare) (ft lbs.) |
100 |
|
Read all Instructions for Floor Plans User Manual
Airstream Travel Trailer Bambi 2023 Aluminum Skin User Manual
Interior Aluminum Skin
Interior aluminum skin can be cleaned by washing skin with any mild non-abrasive soap or detergent. Cleaning should be followed by a thorough clean water rinse. Drying the unit with a chamois or a soft cloth may prevent spots and streaks. Do not use abrasive cleaners or utensils on the aluminum skin as it is coated with a clear coat that could be damaged.
NOTE
When washing or polishing your trailer, always wipe with the grain of the metal.
Interior Woodwork
The finish on the interior woodwork is a high quality furniture finish and should be treated as any fine furniture finish. Use a high quality furniture cleaner which does NOT contain ammonia or bleach. One good choice is Murphy Oil Soap Clean and Shine.
Counter Area
The counter tops are made of a high-pressure laminate and can be cleaned with soap and water, or you can use a common solvent on tough spots. Do not use abrasive cleaners since they could scratch the surface. A protective pad should always be used under hot utensils or pans.
Sinks
Rinse and wipe sinks clean with a soft cloth after each use. Clean sinks thoroughly at least once a week with a mild soap. For the galley sink, use either mild soap or a non-abrasive stainless-friendly cleaner and a non-abrasive sponge or rag; rinse thoroughly to remove all cleaning residue. Always clean with the grain.
NOTE
The stainless-steel galley sink has a protective layer. To prevent damage, please refer to your Owner’s packet and read the manufacturer’s detailed cleaning instructions. Do not use bleach. Do not use abrasives like steel wool or scouring pads as they will damage your sink. Do not leave steel or cast-iron cookware in the sink.
Vinyl Flooring
Use a soft broom to sweep the floor. A vacuum cleaner may damage the flooring, especially the type that use beater bars. In most cases, a clean damp cloth or mop will suffice to clean dirty flooring. When necessary, a solution of mild detergent or domestic floor cleaning emulsion can be used to clean the flooring. Do not use a wire brush or nylon scouring pads, furniture polish, spirit-based polish, powder or liquid abrasive cleaners, bleach or other strong detergents. Scuffs, dirt, and spillages should be cleaned up as soon as possible. Rubber backing on doormats may result in yellow discoloration of the floor immediately beneath. Choose a natural fiber mat. Mats provided by Airstream are intended for use outside of your Airstream. Rubber feet on furniture may cause staining. Remove them altogether or place coasters or felt pads between them and the floor.
Polishing the Flooring
Vinyl floors do not require waxing or polishing. However, applying polish will provide additional protection for the floor. Always follow the manufacturer’s instructions when using a floor polish or cleaner and ensure it is suitable for use with cushioned vinyl flooring.
Shower Stall
To clean your fiberglass shower stall unit, use warm water and one of the stronger liquid detergents. Do not use abrasive cleaners as they may scratch and dull the surface of your unit. Stubborn stains can be removed with solvents such as turpentine, paint thinner, or acetone. Restore dulled areas by rubbing with an automotive-type liquid cleaner, then, put the soft glow back into your unit with a light application of liquid wax.
CAUTION
Applying wax to the base of the shower floor is not recommended, as this could create an unsafe surface.
Shower Head
The shower head is designed to give maximum flexibility in usage and provides for water-saving techniques when using your trailer on self-containment. It can be held in the hand and moved about the body. Normally, the best water conservation procedure is to wet the entire body and then turn the water off. Apply soap, lather thoroughly, and then rinse the soap off.
Retractable Clothesline
A retractable clothesline is installed for your convenience in the shower stall. To use, pull the line from the base and attach it to the holder on the opposite wall. Turning the nut on the base will tighten the line.
Dinette and Bed Conversion
To convert models with a wall-mounted dinette table, lift upward on the front of the table and find the black latch on the front of the table leg. Push the latch downward. The latch will release the table leg and allow you to fold it up and lock it into place on the underside of the tabletop. With the leg locked into place, lift the back of the table off the wall brackets. Once unhooked, the tabletop can swing on its hinge, allowing you to lower the tabletop onto the supports of the dinette seats. Place the backrest cushions over the tabletop to complete the conversion. We recommend that you travel with the table in the lowered position.
For models with a telescoping pedestal leg, release the black compression clamp levers on the pedestal leg and push the table down. Once lowered, clamp the levers back into place to lock the leg into the lowered position. Place the backrest cushions over the tabletop to complete the conversion.
Ceiling and Directional Lighting
All lighting in the Airstream trailer is LED and most will require a replacement fixture should it go out. The main ceiling lights can be turned on/off by the switch at the entry door. Some light fixtures may have a push button switch located on the fixture. The bed and lounge areas have individually switched directional lighting.
Storage Tips
Galley cabinets should have the heaviest items stored on the bottom and lighter items overhead. After loading, put skillets and canned goods on the floor or bottom shelf, and cereals and crackers in the overhead roof locker. Use unbreakable-type plates and saucers, and consider storing your dish towels around them.
Clothes hung in wardrobes should be kept on hangers that snap over the clothes rods to keep them from bouncing off on rough roads. Try to avoid large bulky coats. Layers of lighter clothing will usually keep you warmer, are more WARNING Keep flammable material away from the furnace. versatile, and are easier to store.
Read all Instructions for Aluminum Skin User Manual
Airstream Travel Trailer Bambi 2023 Water Pump User Manual
Water Pump
The water pump switch operates the pump (monitor panel mounted); see Monitor Panel on page 5-15. Once the switch is turned on, the pump will run until the water pressure reaches about 55 PSI. At this point, an internal pressure switch will shut it off. When a faucet is opened, the water pressure will drop and the pump will start to run again. As a general rule, the water pump should be turned off while using a city water hookup, however the water pressure at some campgrounds may be low. The water pump can be turned on to assist the city water hookup pressure. Be sure there is some water in the fresh water tank. The pump will only use the water that is needed out of the tank to bring the pressure up to the usual standard of 55 PSI.
Access to the water pump will be necessary for periodic cleaning of the strainer screen; see Water Pump Access Locations on page 8-10 and see Strainer Cleaning on page 8-10.
NOTE
Turn off the water pump while traveling to prevent water from being pumped in the event a faucet opens in transit.
Draining System
Fresh Water Lines and Tanks
The freshwater system’s water lines have low-point drain valves and can be drained. The freshwater tank has a petcock valve and can also be drained; see Fresh Water Tanks and Draining on page 8-11
Drain and Waste System
Your trailer has a drain and waste system that includes waste-holding tanks made from corrosion-free molded plastic, with trouble-free dump valves.
The main (Black Water) holding tank enables you to use the toilet for several days away from disposal facilities. The wastewater from the sink, shower, bath and lavatory drains into the auxiliary (Gray Water) holding tank. Each tank has its own dump valve with both tanks draining through a common outlet. Therefore, only one sewer hose connection is needed when hooking up to a dump station.
Almost all campgrounds will have dumping facilities. Park directories, such as Woodalls and Rand McNally, also list dumping stations; see Black and Gray Water Tank Draining on pages 8-12. Check your monitor panel frequently; see Monitor Panel on pages 5-15. When the Black Water holding tank is completely full, sewage cannot be emptied from the toilet bowl. If the Gray Water holding tank is overfilled, drain water may back up into the tub and cause an unpleasant cleaning job. Never drain the tanks at any place other than an approved dumping station.
NOTE
The 16 ft. model has a combination black/gray holding tank. The draining procedure is the same, however, only one dump valve handle is used to drain the tank.
NOTE
Never put wet-strength paper towels or tissues in your holding tank since they will not dissolve and can catch in the mechanism of the dump valve. Colored toilet tissue is slower to dissolve than white. Most RV-accessory stores offer tissue designed for RVs that will completely dissolve.
Toilet
The RV toilet in your trailer is a design that has been used for many years. There is only one pedal. This pedal opens and closes the slide mechanism, and opens the water valve. In normal use, depressing the pedal dumps the sewage and flushes water down the side of the bowl. Water will continue to run into the bowl for a short time after the pedal is released. When you wish to conserve water, hold the hand-spray head (if equipped) over the bowl and hold down the thumb-operated lever. When depressing the pedal, all the water is routed through the hand spray.
NOTE
When you dump the bowl of the toilet, make sure all paper and solids have cleared the slide mechanism before you allow it to close. Failure to do so can cause the groove for the slide to become jammed and the slide will no longer close completely. Please see the toilet owner’s/user manual for warranty and user tips, and maintenance information.
Deodorizers and Biological Chemicals
There are many deodorizers and processing chemicals on the market in tablet, liquid, and powder form. These not only combat odor, but also stimulate the bacteria that work to dissolve the solids and tissues in your waste tank. These chemicals should be introduced through the toilet prior to use per the manufacturer’s directions. It’s also important to always add a few gallons of water by filling the toilet bowl a few times and depressing the foot pedal.
Faucets
Galley Faucet
- Airstream Part
- 602243 Moen – Model 2967425
Lavatory Faucet

Airstream Part 602859
Pfister – Model LF-042-PRKK
Faucet Cleaning and Care
All that is needed to clean your faucet is a soft, damp cloth. Airstream does not recommend the use of scour pads, cleansers, or chemicals. The abrasive nature of these substances could damage the faucet’s finish. A non-abrasive car wax will help to protect the finish.
Electrical
Battery/12-Volt System Information
The major portion of electrical power in your Airstream is 12-volt. The 12-volt current powers all gas appliances for controls and/or ignition as well as lighting. An exception would be the range which has its own ignition source.
All 12-volt current comes through the battery system in the front of the trailer. The batteries are accessible in the battery box on the A-frame of your trailer. Power from the batteries goes to a set of Type 2 thermal breakers. The breakers are tied together by a brass bus bar. One breaker (30-amp) protects the 12-volt tow vehicle charge line coming from the 7-way cord. Another breaker (20-amp) feeds the trailer brakes breakaway switch located near the hitch coupler. A 50-amp breaker feeds the battery disconnect relay. The current leaves the relay and travels to the 12-volt distribution panel, located in the converter, and then to the rest of the trailer. Open the decorative door on the front of the converter to access the panel and its fuses. For more information, see Electrical Diagrams on page 8-17.
If you replace a blown fuse and it immediately blows again, do not replace the fuse again until a qualified service technician can correct the problem.
Read all Instructions for Water Pump User Manual
Airstream Travel Trailer Bambi 2023 Power Center User Manual
Power Center
The power center is installed under the bed or below the refrigerator, depending on the model. Open the decorative door for access to 12-volt fuses and 120- volt breakers. The power center’s converter transforms 120-volt AC into 12-volt DC. The converter/charging system is the interior low voltage electrical system that enables you to use the interior lights, fans, pumps, and 12-volt appliances, whether operating on self-contained battery power or 120-volt city power. The 12-volt light bulbs give off the same light as regular household bulbs so when operating on self-contained battery power, everything works normally except the 120-volt convenience outlets and 120-volt appliances. The converter system is designed to maintain constant output voltages regardless of the variances that occur in city power systems. The converter is energized only when the trailer is hooked up to external AC power.
To test the converter, observe the following:
- Confirm 120-volt power is going into the converter.
- Disconnect the 12+ wire from the master switch.
- Using a voltmeter, check voltage output between heavy gauge positive and negative wires coming out of the converter.
- The voltage should be between 13.6 and 14.0 volts. (The meter of the tester should be calibrated periodically.)
- If the converter is not within these voltages, have it serviced by a qualified technician or replace it.
One of these wires is not spliced onto a wire of the same color. It is the backup wire that is yellow in the cable and black in the harness.
A label on the inside of the converter door lists the circuits and what each fuse powers.
12-Volt Power Circuits
The current in the converter system is 12 volts direct current (12 VDC) negative grounded. Power sources that supply 12 VDC current to the system are as follows:
- Main charge line from the tow vehicle
- Trailer batteries
- Converter
The power sources listed above are all electrically connected to the 12-volt distribution fuse panel that distributes current to interior branch circuits. The circuits provide power to operate all 12-volt DC lights, pumps, motors, and appliances. A power converter is a solid-state electronic power supply and is maintenance-free. It is so self-sufficient and quiet that you will probably not know it is working except for the fact that your batteries are always charged, and your 12-volt lights and appliances always work.
If any 12-volt appliance fails to operate, first check your 12-volt distribution fuse block, located behind the decorative front door in the front right-hand corner of the converter, and inspect all fuses. If a fuse is opened or blown, replace it with the same size fuse (never install a larger fuse). If the fuse opens again, have an electrician or certified RV technician locate the circuit trouble. Replace blown fuses only with the same type and amperage size previously used.
If the power converter is not working, first confirm the RV supply or shoreline cord is plugged into a live circuit. Then check all the 120-volt breakers in your RV distribution panel to make sure they are on. If the breaker is tripped, follow the instructions to reset the breakers. If the breaker trips again, consult an electrician or certified RV technician.
Converter Operation
The electronic power converter is designed to supply the nominal 12-volt-filtered DC power for all 12-volt-operated devices encountered in RV service. Although the converter is an excellent battery charger, the converter does not require a battery to be connected to it for proper operation.
NOTE
When installing a battery (s), always observe polarity. Connecting a battery in reverse polarity will blow the power converter main fuses located on the 12-volt DC distribution fuse block.
120-Volt AC Panel Board
The AC panel board section contains the 120 VAC branch circuit breakers for your RV. One of the breakers controls the 120-volt power to the 12-volt converter section. This breaker may also control another branch circuit. Check the label next to each breaker for what each branch circuit breaker controls.
The 120-volt circuits may be turned on by setting their breaker to handle up, to the ON position, or off by setting the handle down, to the OFF position. To reset the tripped breaker, move the handle to OFF and then ON.
The system incorporates GFCI breakers that implement an auto self-test functionality. When turned off, these breakers require external AC power to be present, or the AC inverter enabled before they can be turned back on. If AC power is present from one of these two sources, and the breaker refuses to stay on consult an electrician or certified RV technician.
Fuses and Breakers
Breakers
The distribution panel was designed to use a 30 AMP 120Volt main breaker with branch circuits. Double breakers may be used for the branch circuits. Should a breaker become faulty replace it with the same type of breaker only. Use only approved circuit breakers and 12V fuses.
NOTE
When replacing circuit breakers replace them with the same type and rating as the original.
12 VDC Fuses
Each 12 VDC circuit in the distribution panel was designed for a maximum of a 20 amp automotive-style fuse. Should one need to be replaced, be sure to replace it with the same type and Amp rating as originally supplied by Airstream. Replacing it with either a higher or lower Amp fuse could result in the panel not functioning properly.
Read all Instructions for Power Center User Manual
Airstream Travel Trailer Bambi 2023 Electrical System User Manual
120-Volt Electrical System
City Power
When your trailer is hooked up to external AC power, the converter system automatically charges the trailer batteries with the battery disconnect switch in the USE (on) position and, if the 7-way cord is hooked up and depending on your vehicle, your tow vehicle battery as well. The speed and degree of charge depends on how much power is used for lights and appliances, as only the surplus goes to charging the battery. If you are making an extended stay, then you should keep your trailer hooked up to a 120-volt current if it is available. While you are connected to external AC power, the wiring is protected by circuit breakers in the breaker panel. The circuit breaker panel for the 120-volt system is located in the converter. In the event of a failure of a 120-volt circuit, first check your trailer circuit breakers and the breaker for the outlet into which your trailer shoreline cord is plugged. If a breaker continues to trip after you have reset it several times, your circuit may be overloaded with appliances or there may be a short in the circuit. Try lessening the load on the circuit. Perhaps an electric griddle, hair dryer, or electric heater can be turned off. If that does not solve the problem, consult an Airstream Service Center. The 120-volt electrical system provides power to operate the air conditioner, converter, and 120-volt receptacles for portable appliances. The power is carded through the 120-volt city power flexible cord to the 120-volt distribution panel, and then is distributed to each appliance or receptacle. Exterior outlets for 120 volts are located on the curbside exterior wall between the wheels and above the wheel well. All wire, components, and wiring methods conform to federal and state requirements.
Converter
The converter system is a transformer designed to maintain constant output voltages regardless of the variances that occur in city power systems. The design eliminates the need for complex electronic sensing systems to charge the batteries, minimizing the possibility of failures and greatly increasing its overall reliability. In some older parks and other locations where three-pronged outlets are not available, certain precautions to ensure proper grounding and polarity must be taken.
These precautions are listed below:
- Attach the three-pronged plug to a two-pronged adapter. The third conductor line of this adapter has a short wire lead, that must be grounded.
- For proper grounding, connect the short ground lead to a grounded outlet box or to a cold water pipe. When no water pipe is available, drive a metal rod two feet into the ground and attach the ground lug to it, thus, providing the unit with proper grounding.
NOTE
When the three-pronged plug can be used, there will be no problems with proper polarity or grounding with a properly wired shoreline outlet.
NOTE
When operating with city power, make very certain that the service is 120-volt and not 240-volt. To operate self-contained, simply disconnect the power supply cable.
Ground Fault Circuit Interrupter (GFCI)
Most states require trailers with exterior 120-volt receptacles and receptacles close to a water source, such as a faucet, to have a ground fault circuit interrupter. When properly installed, the GFCI circuit breaker provides reliable overload and short-circuit protection, plus protection from ground faults that might result from contact with a HOT load wire and ground.
WARNING
The GFCI circuit breaker will NOT reduce shock hazard if contact is made between a HOT load wire and a neutral wire or 2 HOT load wires. Each GFCI circuit breaker is calibrated to trip with a ground current of 5 milliamperes or more. Since most persons can feel as little as 2 milliamperes, a distinct shock may be felt if the need for protection exists. However, the shock should be of such a short duration that the effects would be reduced to less than the normally dangerous level. However, persons with acute heart problems or other conditions that can make a person particularly susceptible to electric shock may still be seriously injured.
While the GFCI circuit breaker affords a high degree of protection, there is no substitute for the knowledge that electricity can be dangerous when carelessly handled or used without reasonable caution.
WARNING
The GFCI circuit breaker provides protection only to the circuit to which it is connected. It does NOT provide protection to any other circuit.
GFCI Breaker Test
Perform this test on the GFI circuit breaker each month and record the date.
- With handle A in the “ON” position, press PUSH TO TEST button B.
- Handle A should move to the TRIP position, indicating that GFCI breaker has opened the circuit.
- To restore power move handle A to “OFF” and then to “ON“ If the device remains on when the Test button is pushed, the GFCI is not working properly or has been incorrectly installed (wired improperly). If your GFCI is not working properly, call a qualified, certified electrician who can assess the situation, rewire the GFCI if necessary, or replace the unit.
NOTE
All GFCI breakers implement an auto self-test function, however, Airstream recommends a manual test be conducted every month.
Entertainment Systems
TV and Sound Systems
Your Airstream is equipped with a TV/DVD combination unit and a radio with built-in Bluetooth. Please refer to the documentation included in your owner’s packet for instructions on their use.
TV Antenna
The installed omnidirectional antenna provides excellent reception of VHF/UHF TV channels. The TV antenna’s compact modern styling is unobtrusive and blends well with the designs of recreational vehicles. The amplified signal maximizes signal strength to provide the best TV reception available in your area. The antenna receives free VHF, UHF, and FM signals. Manufactured with durable automotive-grade plastic, the antenna is weatherproof, UV-protected, and resistant to rust.
Read all Instructions for Electrical System User Manual
Airstream Travel Trailer Bambi 2023 Appliances User Manual
Appliances
All appliances are delivered to Airstream Inc. with in-depth owner’s manuals. Those manuals are included in the delivery case supplied by your dealer. The manuals may contain warnings, cautions, and operating instruction that should be read and followed before operating the appliances.
The information contained in the appliances manuals supersedes any information contained in the Airstream Trailer Owner’s Manual on appliances. If you believe contradictory information on appliances is contained in this manual, or If any appliance manual(s) have not been provided with your trailer, contact your dealer, the respective appliance manufacturer, or Airstream Customer Service at 937-596-6111 or write:
Airstream Factory Service Center
428 W. Pike Street
P.O. Box 629
Jackson Center, OH 45334-0629
(937) 596-6111
Maintenance
Follow the instructions and warnings noted in the respective appliance and equipment owner’s manuals, as well as those mentioned below.
Annual maintenance should be conducted on propane gas appliances and equipment by an authorized dealer or repair facility.
Insects can build nests in the burners of various appliances and equipment. The burner and burner orifice of the propane gas appliances and equipment should be cleaned out by an authorized dealer or repair facility anytime circumstances or conditions warrant, but no less than on an annual basis.
WARNING
Most LPG appliances used in recreational vehicles are vented to the outside of the vehicle. When parked close to a gasoline pump, it is possible that gasoline fumes could enter this type of appliance and ignite from the burner flame, CAUSING A FIRE OR EXPLOSION.
WARNING
For additional Liquid Propane Gas (LPG) safety and warning information, refer to Section 2 – Safety and Section 6 – Exterior of this manual.
Air Conditioner
The roof air conditioner used on Airstream trailers is one of the most popular on the market today. In your owner’s packet is a set of literature covering all operating and maintenance instructions. If the literature is misplaced, contact the air conditioner manufacturer or your Airstream dealer for replacement.
Proper voltage to the air conditioner is critical. A voltmeter check may find the voltage much lower at a campground shoreline outlet than the needed 110 to 120 volts. Low voltage is usually associated with older or poorly maintained trailer parks. Parking your trailer so the power cord can be plugged into a receptacle close to the fuse or circuit breaker box can alleviate low-voltage problems. Avoid extension cords and adapters whenever possible. If an extension cord must be used, it should be as short and heavy as possible to provide the most current.
If high temperatures are expected, make an effort to park in a shaded area. Starting the air conditioner early in the morning also helps. It is more efficient to hold a comfortable temperature than it is to lower the temperature after the interior of the trailer is already hot.
Never run your air conditioner with the vents closed. Doing so could cause the air conditioner to freeze and may damage to the unit. The manufacturer recommends having at least 3 vents open when running to prevent any chance of freezing up
NOTE
Review the air conditioning literature supplied in your owner’s packet before proceeding.
Cooktop
There is little difference between the operation of home gas ranges and the trailer’s cooktop. If, however, you are used to an electric range, operating confidence can be quickly gained by reading the manufacturer’s directions provided in the owner’s packet. Manufacturer’s service and parts manuals are also available.
WARNING
An operation manual for the cooktop has been provided with your owner’s packet. If this has not been provided with your trailer, contact the listed manufacturer to obtain it. Their manual contains specialized warnings and cautions that should be reviewed prior to operating the appliance.
Ceiling Vent Fan
The high-volume roof vent system is designed to quickly exhaust stale, hot air and draw in the fresh air. It is great to use when the outside temperature does not call for air conditioning, but the heat has built up in your trailer.
The core of the system is a powerful rotary fan that works with a slightly open window to create a balanced airflow. It is designed for maximum air exchange, minimum sound levels, and power consumption. Fresh, clean, natural air is pulled in. Hot, stale, stuffy air is pushed out.
Read all Instructions for Appliances User Manual
Airstream Travel Trailer Bambi 2023 Monitor Panel User Manual
Monitor Panel
The display is the only system component that is accessed by the user. All user input to the display is done using the buttons along the bottom of the display.
NOTE
The 16’ Bambi combination Black/Grey tank requires only the “Black” button to be pressed to view the current tank level. Pressing “Grey” will result in “OPn” being displayed.
The display receives the information from the three sender pads via a single, two-conductor wire, and displays the level information in percent of full on a three-digit, LED display. When the front panel button for a particular tank is pressed, the display powers up and displays the level for that tank. If the button is pressed and released, the display will show the level for about 5 seconds and then shuts down automatically. If another button is pressed before the display shuts down, then the new level will immediately be shown. If the same button is pressed twice, the display will hold on that tank and continue to show updated levels for 5 minutes before shutting off. This allows the user to monitor the filling or draining of the tank. By pressing two buttons at once, the diagnostic functions can be accessed.
Sender pads are installed and stuck to the sides of the holding tank. The sender pad scans the water level through the tank wall using digital techniques programmed into the sender microprocessor.
To Read a Water or Sewer Tank Level
- Press the button corresponding to the tank to be checked and release it, the display will show the levels in percent on the LED display. If no other button is pressed, then the display shuts off after about 5 seconds.
- If another button (including BATT) is pressed before the 5-second time is up for the first button, the display will immediately switch to show the new level or voltage. The 5-second time-out is restarted every time a button is pressed.
- To continuously display a reading, press and release the desired button, and then press the same button a second time. When the button is released, the display will be on hold mode, which is indicated by the decimal point on the right-hand side turning on. While the display is in the hold mode it will recheck the level once per second so the user can watch the level change while the tank is being filled or drained. The display will automatically shut off after 5 minutes in hold mode. To end the hold mode before the 5 minutes is up, press any tank button, and the display will shut off.
To Read the Battery Voltage
- Press the BATT button and release it, the display will show the battery voltage on the LED display
- If no other button is pressed, then the display will shut down after about 5 seconds. If the BATT button is held down, the display will continuously recheck the voltage and show the updated value. The reading may flicker back and forth between two values.
- If another button is pressed before the 5-second time is up for the BATT button, the display will immediately switch to show the value for the new button. The 5-second time-out is restarted every time a button is pressed.
- There is no hold mode for the battery voltage
Refrigerator
Your Bambi is equipped with a 12V refrigerator. Review all refrigerator literature supplied in your owner’s packet or stored in the refrigerator prior to operating.
Operation
All units are supplied with a wide-range thermostat designed to sense the evaporator temperature. The coldest position on the thermostat is reached by turning the knob to the right (clockwise); conversely turning the thermostat knob to the left (counterclockwise) yields a warmer setting. To turn the refrigerator off, turn the knob counterclockwise to the STOP/OFF position (in some refrigerators this is reached by turning the knob counter clockwise past the click).
Startup
Turn the power on and set the thermostat between 3 and 4, or near the center. You can make further adjustments to suit your personal requirements after the box has cooled down. Allow the refrigerator to come down to temperature before loading with product. Adding pre-cooled product will help keep the temperature stable when loading. Setting the thermostat to a higher setting will not decrease the time required for the unit to cool down to its normal operating temperature.
Defrost and Cleaning
The frequency of defrost is dependent on the number of door openings, the ambient temperature and the humidity level. Typically, it is a good practice to defrost once there is 1/8 to 1/4 inch of frost buildup on the evaporator (cooling plate). When defrosting, the unit is shut off by turning the thermostat counterclockwise to the STOP/OFF position (in some refrigerators this is reached by turning the knob counterclockwise past the click). Prop the door open. We suggest placing a towel in the bottom of the refrigerator to catch excess moisture. Now that the unit has been defrosted, the interior can be cleaned with a non-abrasive cleaner. Do not use “Brillo” or “SOS” type abrasive pads, as they will score the surfaces. Baking soda is recommended.
CAUTION
Do not use mechanical means to remove frost, such as pointed or sharp objects to accelerate defrosting as this could result in puncturing the refrigerant circuit.
Solar System
If equipped, the rooftop solar panels installed on your Airstream help maintain battery health, reduce operating expenses, and extend the battery life of the batteries. The solar system’s solar charge controller gathers energy from the individual solar panels and stores it in your batteries. The system features a display (shown above) that allows you to view live status information like solar watts and battery voltage.
To optimize solar charging, ensure the panels are clean and not shaded by trees or structures that might block the sun. Please refer to your owner’s packet for reference material that discusses the solar system and its operation.
The charge controller is configured for a three-step charging process:
- Bulk – The controller delivers as much charge current as possible to quickly recharge the batteries.
- Absorption – The controller switches to a constant voltage mode.
- Float – Voltage is applied to the batteries to maintain them in a fully charged state.
Airstreams manufactured without the solar option have been pre-wired to support solar panels. These units will have a 3-port rooftop-mounted plug-in that allows installing rooftop solar panels without running wires. In addition, a quick plug-in port suitable for a portable solar charging kit has been pre-wired at the front of the unit, near the battery box; see Solar Panel Wiring on page 8-22.
Water Heater
Electronic Ignition
The Bambi is equipped with a continuous water heater featuring freeze protection, and direct spark ignition. The tankless water heater monitors inlet water temperature and flow, and output water temperature and flow. The water heater is controlled by the Control Center located on the wall above the bathroom sink. Turn on the power and press the temperature selection arrow to see the current setting. Select the desired temperature using the up and down arrow. Turn on the hot water faucet.
Read all Instructions for Monitor Panel User Manual
Airstream Travel Trailer Bambi 2023 Cleaning User Manual
Cleaning
Exterior Skin
We recommend the trailer be washed about every four weeks and waxed with Walbernize Super Seal, or high-quality clearcoat-safe wax, in the spring and fall. In coastal and industrial areas, cleaning and waxing should be done more frequently. When traveling through winter weather, all road treatment chemicals should be removed immediately.
NOTE
Abrasive polishes or cleaning solvents such as automatic dishwashers or acid etch cleaners are too strong and should never be used. Rinse all grit from the surface prior to washing. Use soft rags or wash mitts, always moving lengthwise with the grain of the trailer (washing or polishing). Never rub hard on the coating. Even the softest rag will damage the coating if excessive pressure is applied.
NOTE
Always clean your trailer in the shade or on a cloudy day when the aluminum skin is cool.
Oil, grease, dust, and dirt may be removed by washing with any mild non-abrasive soap or detergent. Cleaning should be followed by a thoroughly clean water rinse. Drying the unit with a chamois or a soft cloth may prevent spots and streaks.
After cleaning and drying, a good grade of non-abrasive automotive paste or liquid wax will increase the life of the finish, especially in coastal areas where the finish is exposed to salt air or in polluted industrial areas. It will also protect the shell from minor scratches and make subsequent cleaning easier.
It is important to remove substances such as sap, gum, resin, and asphalt as soon as possible by washing and waxing. Sunlight and time will bake-harden these materials, making them almost impossible to remove without heavy buffing. If asphalt remains on the trailer after washing, use a small amount of kerosene on a rag and wipe the spots individually, being careful not to scratch the finish. If a substance is found on the coating that cannot be removed by normal washing procedures, Airstream recommends using DX 330 Acryli-Clean, made by PPG Industries. Follow all directions and warnings on the product container.
Acryli-Clean should be used by trained personnel only, using the proper equipment under controlled conditions. Use the Acryli-Clean as sparingly as possible to remove glue, tar, and other similar substance. To keep your trailer looking new, paint the A-frame, LPG tanks, and rear frame periodically.
It is recommended that the caulking and sealant used in external seams and joints, such as end-shell segments and around window frames, light bezels, beltline and rub rail molding, etc., be checked once a year. If this material has dried out and become cracked or checked, or if a portion has fallen out, it should be replaced with fresh material to prevent possible rain leaks. Caulking and sealing products are available from your Airstream dealer.
Windows
Clean your trailer windows the same way you clean the windows in your home. Clean the seals with a damp cloth and mild detergent every three to six months. Do not use strong solvents, as they will damage the seals. A coat of natural silicone lubricant applied after the seal has dried, will keep it flexible. Spread the lubricant evenly with a brush or finger, working it into the surface. This is good practice for all rubber seals in your trailer.
WARNING
Failure to properly clean and lubricate the window seals could result in the window sticking to the jamb. Window seals that become stuck to the window jamb should be released by a qualified technician trained in the procedure. Do not force, pry, or apply great pressure to open the window. Failure to heed this warning may cause the window to shatter and/or cause personal injury. For replacement of a damaged window, contact an Airstream Service Center.
Aluminum Wheels
The aluminum wheels and axle end cover come treated with a clear coating. Keep them looking good by washing them with soap and water. Do not use abrasive cleaners or polishes on coated aluminum wheels.
General Information and Operation
Step
To operates the step, lift up on the front of the step and pull straight out until the step locks into place.
CAUTION
Once the steps are lowered, press down on them to make sure they are secure in their notches. Never travel with the step lowered or extended.
Main Door
The main door of the trailer is manufactured with a built-in, keyed deadbolt and door lock. The door lock is engaged from the inside by a lever and the deadbolt is engaged by turning the knob. A main door hold-back is mounted on the trailer’s exterior side skin. The hold-back secures the door to the side of the trailer. When opening the door, push it gently into the spring-operated slide. To release the door, slide the hold-back bolt back.
For lubrication and out-of-adjustment issues, see Main Door Care on pages 8-16.
CAUTION
When towing, the door lock and deadbolt must be secured. If it is not locked, the constant vibration of travel may cause the door to open resulting in possible damage.
Screen Door
The screen door is secured to the main door by a slide bolt-type latch. It can be operated independently by releasing the slide bolt and swinging the screen door away from the main door.
CAUTION
Always reattach the screen door to the main door prior to closing the main door; otherwise, damage may occur.
Emergency Escape Windows
The emergency escape window is released by two red release handles found at the bottom half of the window. Once the window is unlatched, push out for clearance and escape.
Read all Instructions for Cleaning User Manual
Airstream Travel Trailer Bambi 2023 Water Hookup User Manual
City Water Hookup
The city water hook-up is located on the side of the trailer. For consistent water flow and plumbing line safety, an in-line regulator limits pressure to 50 PSI.
Use a tasteless, odorless, and non-toxic high-pressure hose of at least 1/2 in. diameter designed for RV use. The city water inlet is a standard garden hose thread. We suggest you carry two lengths of hose in order to reach hookups farther away than normal, plus, to have a spare.
After hooking up the hose and turning on the city water valve provided in the park, slowly open a faucet. There will be a lot of spurts and sputtering until all the air is expelled from the trailer system. If the water heater is empty, it will take some time before all the air is expelled and a steady flow of water occurs at the faucet. Once a steady flow is achieved at one faucet the others should be opened long enough to expel the air in the lines going to them.
Your plumbing system has a built-in pressure regulator to protect your lines and faucets from extremely high pressures on some city water systems.
Exterior Shower
Bambi units are equipped with an exterior shower. This shower consists of a shower hose, shower head, and water valves inside of a lockable exterior door. Water is supplied by the pump or city water hookup.
Shoreline Power Supply
Your Aistream is equipped with a Smart Plug power inlet located on the road side exterior. Smart Plug inlets offer superior performance and ease of use. A few features of the Smart Plug include:
- Eliminates Overheating – Increased pin & clip surface area greatly improves electrical conductivity during high amperage demand.
- Ease of Use – No twist required, the unique plug body shape and push-in design means it only goes in the right way every time – even in the dark!
- Multi-Point Locking System – Side clips lock the plug securely into the inlet which eliminates any stress on the pins from movement of the power cord.
- Weatherproof Seals – Multi-fin silicone gaskets installed in the inlet cover and interior of the plug body eliminates moisture penetration.
The Smart Plug incorporates a reverse polarity feature which will include a series of light codes to let you know the condition of the power coming from the campsite power pedestal. Please refer to the provided Smart Plug owner’s manual for more information on reverse polarity and the light codes.
Many campgrounds provide less than 30-amp service and your hookup may blow their fuse or circuit breaker. If this happens, reduce the load and replace the fuse or reset the breaker.
120-Volt Outlet and TV/Satellite Inlets
An inlet for TV/Satellite and an outlet for a 120 volt receptacle is located on the curb side exterior and is labeled for your convenience. Your Airstream must be plugged into a shoreline power supply for the outlet to operate. Use the TV/satellite inlet to connect your Airstream to a campground TV cable source or portable TV satellite antenna source for viewing.
Axle and Running Gear Assembly
Each rubber torsion axle is aligned during manufacturing and double-checked on a random basis. Alignment after delivery is the customer’s responsibility.
Hitting chuck holes or rough railroad tracks while traveling straight will only cause misalignment after the tire has struck such objects many times. Of course, a deep enough hole can affect the alignment immediately.
The worse culprit is a curb because they are normally struck at an angle. Rear axles are occasionally damaged when people are attempting to park beside a curb while backing up their trailer. The trailer axle(s) is bent upward in the middle. This bend is normal and is how the camber is obtained. Also, toe-in is built into the axle by very slight bends in the axle tube on each end. Tire wear indicates misalignment. Check with your dealer for the nearest location to have the proper equipment to correct the trailer’s alignment. For Toe-In and Camber Specifications, see Rubber Torsion Axle Alignment Specifications on page 8-8.
Hitch/Coupler
The EZ-Latch coupler features a simple-to-use latching mechanism. Hooking up is as easy as dropping the coupler on to your hitch ball. Simply make sure that the coupler is properly lined up with the ball, then lower the coupler. The coupler will automatically open and latch into place when lowered onto the hitch ball. To disengage coupler, pull up on latch and raise the coupler off of hitch ball. Return the coupler latch to the latched position to ensure that coupler is ready to be latched again. The coupler features a strong composite handle, If the handle does get damaged or becomes missing, the coupler is still completely operational until the handle can be replaced. Replacement parts can be purchased through your Airstream Dealer. See additional information included in your owner’s packet.
Read all Instructions for Water Hookup User Manual
Airstream Travel Trailer Bambi 2023 Liquid Petroleum Gas User Manual
Liquid Petroleum Gas
Fill Valve
The LPG tanks are equipped with fill valve connections RV Type I Acme. The large, green, nylon swivel nut is a right-hand thread and is designed for hand operation only.
The valve features an internal spring-loaded module that will not allow gas to flow from the cylinder until a positive seal has been made at the connection. The valve outlet has 1-5/16 in. Acme threads on the outlet exterior, and female POL, left-handed threads on its interior. This feature allows for connection of the new wrenches, right-handed, Acme RV connection while still accommodating the standard left-handed POL fittings used for filling propane cylinders.
The mating, green swivel nut and brass nipple also incorporate new features: the green nylon nut swivels on a black bushing that is heat-sensitive. Between 240 and 300°F, the bushing will yield (melt) allowing the spring-loaded module in the valve to push the brass nipple back (approximately 1/4 in.), closing the module and stopping the flow of gas from the cylinder. Inside the brass nipple is a flow-limiting device designed to sense excessive gas flow. If an excessive flow is sensed, the flow-limiting device shuts the flow down to a maximum of 10 SCFH (Standard Cubic Feet per Hour) or less. This is also referred to as the bypass flow.
Bypass flow is extremely important in the proper operation of this connection. The flow-limiting device may activate if the cylinder valve is opened quickly. When all appliances are off, the bypass flow allows the pressure downstream from the flow-limiting device to equalize. When pressure is equalized, the flow-limiting device will supply normal flow to the system. Equalization occurs in approximately 5 seconds and, in most cases, goes completely unnoticed. If, however, an appliance is left on or there is a leak or open flow in the system, the bypass pressure will not be able to equalize and allow the flow-limiting device to reopen. Symptoms of this condition would be appliances that light but have lower than normal flame or starve out from lack of gas, a substantial reduction in the flame when another appliance is operating, or pilots that are difficult to light. If this should happen, the following steps should eliminate the condition:
- Close LPG cylinder valve.*
- Extinguish all flames and smoking materials.
- Be sure all gas appliances, including their pilot lights, are off.*
- Open LPG cylinder valve slowly. Do not snap open.
- Wait at least 15 seconds before lighting appliances.
- If operational difficulties continue, there may be a leak in the system. Immediately close the LPG cylinder valve and have the system inspected by a qualified RV service technician.
When reconnecting a full cylinder to an auto changeover regulator, it is not necessary to shut off the appliances or close the valve of the cylinder already in service.
WARNING
Leaking LPG may ignite, causing a fire or explosion, which could result in serious bodily injury, property damage, and/or death.
How long a full tank of gas will last is dependent on usage. In cold weather when you are using the furnace, large amounts of hot water, and are doing extensive cooking, you will naturally use more gas than you will in warm weather when you may do limited cooking. On the average, with normal cooking and other appliance use, you can probably count on two to three weeks of service from each tank.
Automatic Gas Regulator
All models are equipped with a two-stage automatic change-over gas regulator that offers the convenience of automatic changeover from empty to full gas cylinders. Both tanks are connected to this regulator. Make sure there is propane in both tanks before you start. Rotate the white knob on the top-front side of the regulator toward the cylinder you want to use first. This will be the service cylinder and the other will be the reserve cylinder. Slowly open both cylinders valves. Open both cylinder valves completely, then close about 1/4 turn. This will allow you to easily check to see if valves are open or closed. The indicator on top of the regulator will turn bright green. The indicator will stay bright green as long as there is fuel coming from the service cylinder. When the service cylinder empties, the regulator will draw fuel automatically from the reserve cylinder, providing an uninterrupted fuel flow to the system. When it switches over, the indicator will change from green to red. This red color indicates the service cylinder is empty and needs to be filled.
WARNING
LPG regulators must always be installed with the diaphragm vent facing downward. Regulators that are not located in compartments have been equipped with a protective cover. Make sure the regulator vent faces downward and the cover is kept in place to minimize vent blockage, which could result in excessive gas pressure, causing fire or explosion.
LPG Tanks
The following procedure outlines the proper method of removing and installing LPG bottles:
- Turn the knob on your automatic regulator until the arrow points to the tank opposite the one to be removed. Shut off the gas valve on the tank to be removed.
- Disconnect the rubber gas line at the tank to be removed. (The green plastic fitting is a right-hand thread and no tools should be used.)
- Turn the large clamping T-handle counterclockwise until the hold-down bracket is loosened enough to be able to remove the tank. If your trailer is equipped with a gas tank cover, you must remove the T-handle and then remove the cover before removing the bottle
WARNING
Do not remove the center hold-down rod. LPG Tank Installation:
- Place the tanks in position on the A-frame and tank cross-member so that it rests on the upper collar of both tanks with the collar rims engaged in the grooves on the underside of the bracket. If your trailer is equipped with a tank cover, it should be positioned over the tanks next. Make sure the hold-down rod projects up through the hole in the shroud center bracket.
- Replace the T-handle and tighten it down until the tanks are held firmly in place.
- Test fittings with liquid soap free of ammonia or chlorine, or products designed for testing, such as Snoop® liquid leak detector.
If you have allowed both tanks to run out, air may have gotten into the lines. In this event, the air must be forced out through the lines by gas pressure before you will be able to light the pilots. Hold a match to the pilot of the appliance closest to the tanks until it lights and stays lit. Then move to the next-closest appliance, etc.
Read all Instructions for Liquid Petroleum Gas User Manual
Airstream Travel Trailer Bambi 2023 Tow Vehicle User Manual
Tow Vehicle
When buying a new vehicle to tow your trailer, we suggest including towing options offered by most tow vehicle manufacturers. These include such things as a heavy-duty alternator and radiator, heavy-duty springs and shock absorbers, transmission cooler, heavy-duty fan and flasher unit, etc., for the make of the vehicle.
WARNING
Springs that are too stiff can hinder the action of the weight equalizing hitch and prevent the transfer of weight to the front of the vehicle.
NOTE
Only use springs heavy enough to support your loaded vehicle (not including trailer). Having a too harsh spring rate on your tow vehicle will only shorten the life of the tow vehicle and trailer, and will cause your trips to be less enjoyable.
Transmissions may be manual or automatic, but an automatic transmission may prolong your tow vehicle’s life and generally does a better job of controlling engine loads than does the average driver using a manual shift.
Having adequate power is very important when considering the purchase of a new vehicle or the trailer-towing capability of your present one. Auto dealers are provided with guidelines to use when helping a customer decide on a tow vehicle. Guidelines are not determined solely by the power output of the engine. The gear ratio of the differential is also a very important part of the guideline.
Inspect the tow vehicle’s hitch regularly for loose bolts or nuts, cracked welds, loose ball mounts, worn parts, etc.
New trailerists often carry more food and other supplies than really needed. Remember that every item you take along is one more thing to stow and adds weight to the total load you must pull. Consolidate items in shelves, lockers, and in the refrigerator. It is better
to have one full and one empty locker, than two half empty ones. Special care must be taken not to overload the front and rear ends of the trailer.
Brakes
All trailers are equipped with Dexter Nev-R-Adjust brakes. Please follow all maintenance procedures in the Dexter user’s manual provided in the owner’s packet.
Electronic Brake Controller
The trailer brakes are operated by 12-volt current from your tow vehicle and must be hooked up so you have an integral system with your tow vehicle brakes. To prevent problems and ensure satisfactory braking action, install an electronic controller in line with the brakes in your tow vehicle.
An electronic controller will synchronize the trailer brakes with your tow vehicle brakes. It is designed to apply the trailer brakes with your tow vehicle brakes. Your brake controller should be adjusted to provide for a slight lead of the trailer brakes over the tow vehicle brakes.
NOTE
Study all material provided with your particular brake control. If you do not understand the information, have the installer explain the information to you or call the manufacturer of the controller.
Proper Electric Brake Use
Proper synchronization of tow vehicle to trailer braking can only be accomplished by road testing. Brake lockup, grab, or harshness is quite often due to lack of synchronization between the tow vehicle and the trailer being towed, a too-high threshold voltage (over 2 volts), or under adjusted brakes.
WARNING
Never use your tow vehicle or trailer brakes alone to stop the combined load.
WARNING
The braking system should be checked and serviced by qualified, certified technicians only. Failure to do so could result in loss of control of your vehicle or the trailer, causing damage to property, injury, and/or death.
Breakaway Switch
In the event of an accidental separation of the tow vehicle and the trailer, the breakaway switch will set and lock the trailer brakes for a sufficient length of time to stop the trailer. The switch is activated when the wire attached to it and to the tow vehicle pulls out the small pin in the front of the unit.
When the trailer is connected to the tow vehicle, the breakaway switch loop should be attached to the permanent frame of your hitch. When disconnecting the trailer from the tow vehicle, remove wire loop from the frame. Do not remove the pin from the switch because this will apply the trailer brakes.
WARNING
Do not use the breakaway switch as a parking brake. If the battery should go dead, the trailer parking brake would no longer be applied. Failure to comply could cause damage to property, injury, and/or death.
Loading
When towing a trailer, you are subject to new and different challenges on the highway than you may have previously encountered. Towing a trailer is no small responsibility and should be undertaken with great care and safety first in mind. An accident with a tow vehicle and trailer can have much greater consequences than carelessness with a small car. Like an airline pilot who is responsible for expensive equipment and many lives, you should take your responsibilities as a tow vehicle driver very seriously and learn all you can about doing the job safely and well. Balancing the load and preparing the trailer and tow vehicle are critical to safe handling.
One of the most critical aspects of safely towing a trailer is knowing the weights involved and where they are placed. The first thing to determine is how much is being towed and confirming that it is within the capacities of the equipment being used. Determining where the load is placed is critical to the way your rig will handle on the road. Know what your trailer weighs loaded. Load your trailer including water, propane, etc, and take it to a public scale. Weigh each axle of your vehicle. Refer to your axle weight and tire limits to see if you are within a safe range; see Specification Tags on pages 4-4. Total all axle weights, ensuring you are below the Gross Vehicle Weight Rating (GVWR).
Make sure your load is balanced. Do not load too much on one side. A balanced load is much easier to tow or drive. Front-to-back balance is also important. Step back and look at your trailer, making sure that there is not too much weight on the hitch, or on the rear of the trailer. Secure all items, as loose items can cause damage and become a safety issue. The Cargo Carrying Capacity tag shown below is installed on every trailer and can be found on the inside of the screen door on your trailer.
Read all Instructions for Tow Vehicle User Manual
Airstream Travel Trailer Bambi 2023 Weighing Your Trailer User Manual
Weighing Your Trailer
The illustration below shows how to weigh the trailer on scales.

- Trailer’s total weight, cannot exceed GVWR.
- Trailer’s weight on axles cannot exceed GAWR.
- Weight on trailer tongue.
To determine that the GAWR is not exceeded, it is necessary to load all of your allowable personal cargo and variable weights. Then hitch the trailer to the tow vehicle with load equalizing hitch properly adjusted. Chock wheels and place the trailer on a scale with both axles only on the scale (see illustration). If the weight on the axles exceeds the axle system’s GAWR, then some of the personal cargo must be redistributed forward in order to place some of this weight on the tongue. The tongue weight should be 10 to 15% of the trailer’s total weight, and must not exceed the tow vehicle’s or the hitch’s maximum weight rating. To determine tongue load, unhitch tow vehicle and place the tongue hitch post on a scale. The trailer must be properly loaded as determined above, with your allowable personal cargo and variable weights.
Use a scale, such as a bathroom scale, that has a lower weight limit than your tongue load to check the tongue weight by using the following method (see illustration).
Place a piece of wood of approximately the same thickness as the bathroom scale on the ground in line with the trailer hitch jack as shown. It should be so spaced that a short piece of pipe or other round piece will lay exactly one foot from the centerline of the jack extension.
Place the scales so that another round piece can be exactly two feet from the centerline of the jack extension in the other direction. Place a 4×4 piece of wood on the two round pieces and screw the jack extension down on the top of the 4×4 until the tongue of the trailer is supported by it. Multiply the scale reading by three. This will be the tongue weight of your trailer. If you exceed the capacity of the bathroom scale, increase the two-foot dimension to three or four more feet, but always multiply the scale reading by the total number of feet between the wood and scales.

- Bathroom Scale
- Pipe
- Wood Support
NOTE
Be sure trailer is level when reading scale.
Hitching Up
The process of hitching up your trailer is something that will become almost second nature with practice. The following section includes proper hitch load distribution. Proper training on connecting your trailer to a tow vehicle is essential for safety. Please see your dealer or other qualified personnel for instruction on the proper hitching of your trailer. Safety chain use on the hitch is required in all states.
7-Way Plug
- Black, 12-Volt (+)
- Green, Clearance Lights/Taillights
- Red, Left Turn/Stop
- White, 12-Volt (-)
- Blue, Brake
- Brown, Right Turn/Stop
- Blank
NOTE
The 7-Way plug is spliced to the main harness in the area of the 12-volt distribution panel in front of the trailer.
Equalizing Hitch Load Distribution
When a trailer is properly hitched up to a tow vehicle with a load equalizing hitch, approximately 1/3 of the trailer’s tongue weight will be on the trailer’s axles and 2/3 will be transferred to the tow vehicle. One-third of this weight transfer will be carried by the front wheels and 1/3 by the rear wheels of the tow vehicle (See illustration). Thus, the tire load of each wheel on the tow vehicle will be increased by 1/6 of the trailer’s tongue weight. The tire air pressure of the tow vehicle should be increased to compensate for this additional weight. Refer to the vehicle’s owner’s manual for this information.
WARNING
The tongue weight should be approximately 10 to 15% of the trailer’s total weight. Under no condition should it exceed the tow vehicles hitch rating. Please refer to the tow vehicles documentation for your vehicle’s hitch rating information.
Wireless Observation System
Your travel trailer is equipped with a Wireless Observation system consisting of a camera mounted at the rear of the trailer and a wireless monitor for your tow vehicle. This system will allow you to see what is behind you while towing and provide visibility when backing up the trailer.
NOTE
Carefully read and understand all manufacturer’s instructions provided in your owner’s packet prior to operating.
Towing Tips and Information
We want every Airstream owner to be a safe and courteous driver. A few hours of towing practice in a large, empty parking lot will make pulling your trailer over the road much easier. Mark off two corners of the parking lot for left and right turns. These corners may also be used to practice backing and parking.
Tracking Observation
Observe that the tracks made by the trailer wheels are distinctly different from those made by the tow vehicle. Studying this will make it easier for you to correct mistakes.
Read all Instructions for Weighing Your Trailer User Manual
Airstream Travel Trailer Bambi 2023 Towing User Manual
Off-Road Towing
When driving in mud and sand, let the momentum carry the rig through. Apply power gently and use as little as possible. Stay in the tracks of the vehicle ahead and keep the tow vehicle in the highest possible gear. If you get stuck, it is best to tow the entire rig together without unhitching.
When Being Passed
Despite the best hitch, you will notice that whenever a large bus or truck overtakes your rig, the displaced air first pushes the trailer rear slightly to the right and then affects the front. It may be necessary to steer very slightly, momentarily, toward the bus or truck to help compensate for the sway induced by the passing vehicle. Do not apply the vehicle brakes, as this
can tend to exaggerate the situation. You may find, however, that briefly applying the trailer brakes with your manual control will help eliminate sway.
On a two-lane road, cars may line up behind you because you travel at a lower speed. It is both courteous and sensible, if you are able, to signal, pull onto the shoulder, and let them pass. Your trailer is designed to be towed easily at any legal speed, so if you are not careful, you may be inclined to forget it is there.
Passing
On freeways or expressways, pick the lane you want and try to stay in it. Always maintain plenty of space between you and the car ahead, at least the length of the tow vehicle plus trailer, for every 10 miles per hour. Remember that in order to pass another vehicle, you will need longer to accelerate. You must also allow for the length of the trailer when returning to the right hand lane.
Backing Up
When backing up, the important thing to remember is to do everything slowly and to immediately correct if you see the trailer turning the wrong way. Concentrate on the rear of the trailer. With your tow vehicle and trailer in a straight line, back up slowly and turn the bottom of the steering wheel in the direction you want the trailer to go. Watch out of the window or in the mirror until the rear of the trailer is pointing in the desired direction. Your tow vehicle will be following the trailer in an arc. Straighten the tow vehicle and trailer by turning the steering wheel more sharply, and then, when they are in line, straighten the steering wheel.
Always try to back to your left because the visibility is much better. When you don’t make it on the first try, it is usually much easier to pull forward to your original position and start over, or at least pull forward until the rig is straight, and then start backing.
If your spouse or traveling companion normally directs you when backing, they should position themselves forward of the tow vehicle so the driver can easily see them. Their directions should always indicate to the driver the direction the rear of the trailer should go. A little practice in a parking lot with the person giving directions can save a lot of frustration when backing into a campsite.
Stopped On a Hill
Refer to the following warning if stopped on a hill for a prolonged period of time.
WARNING
Chock the trailer wheels when stopping on a hill or slope. Leaving your tow vehicle in gear is not enough for standstill safety. Do not use trailer brakes as parking brakes.
Controlling Sway or Fishtailing
Sway or fishtailing is the sideways action of a trailer caused by external forces. It is common for travel trailers to sway in response to strong winds, crosswinds, when passed by or passing a semi-tractor and trailer, or driving downhill.
WARNING
Excessive sway or fishtailing of your travel trailer can lead to the rollover of the trailer and tow vehicle. Serious injury or death can occur. It is important that you read and understand the information in this section.
Sway or fishtailing of your recreation vehicle can be controlled and is primarily impacted by four factors:
- Equipment
- Tongue Weight
- Driving
- Corrective Measures
Equipment
When hitched together, the trailer and the tow vehicle must be level. The tires of both the trailer and tow vehicle should be in good condition and properly inflated to their recommended pressures.
Braking is a very important factor in vehicle control; see Brakes on pages 7-2 and see Electronic Brake Controller on pages 7-2.
We recommend a friction sway damper or hitch with built-in sway control be provided for your unit. Please consult your dealer regarding this equipment. For more information, see Sway Control Device on pages 7-8.
Tongue weight
For information about tongue weight, see Weighing Your Trailer on pages 7-4 and see Equalizing Hitch Load Distribution on pages 7-5.
Driving
This is the most important component. The tendency for the vehicle to sway increases with speed therefore, obey all speed limits and reduce speed during inclement weather or windy conditions.
Read all Instructions for Towing User Manual
Airstream Travel Trailer Bambi 2023 Maintenance User Manual
Maintenance Schedule
WARNING
Failure to maintain your trailer can cause premature and unexpected parts breakage and/or erratic operation that may be hazardous.
NOTE
See appliance manufacturers’ literature for further information.
Every 1,000 miles or 60 days |
Escape Window |
Check the operation of latches and upper hinge. |
Battery* |
Check water level, lead acid only. |
Smoke Alarm, CO Detector |
Test and replace battery as required. |
Tires |
Check tire pressure, see Specification Chart on page 4-3 |
Hitch |
Check for loose bolts or unusual wear. |
GFI Circuit Breaker |
Test and record. |
As a battery age and becomes less efficient, the water level should be checked more often and replenished only with distilled water. Checking the water level does not apply to Glass Mat Batteries.
Every 5,000 miles or 90 days |
Main Door Latch |
Lubricate with dry graphite |
Exterior Door Locks |
Lubricate with dry graphite. |
Exterior Hinges |
Lubricate with light household oil |
LPG Hold-Down |
Lubricate with light household oil |
LPG Regulator |
Check bottom vent for obstructions. |
Wheel Lug Nuts |
Torque Aluminum Wheels to 110 ft. lbs and Steel Wheels to 100 ft. lbs. |
Breakaway Switch |
Pull pin and lubricate with household oil, see Breakaway Switch on page 8-9 |
7-Way Plug |
Spray with contact cleaner. |
Every 5,000 miles or 90 days |
Hitch Ball |
Lubricate with hitch ball lube or wheel bearing grease. |
Exhaust Fans |
Clean fan blades and wash filter. |
Roof Vent Elevator Screws |
Lubricate with light household
oil
|
Main Door Step |
Lubricate and inspect moving parts. |
Every 10,000 miles or 6 months |
Brakes |
Inspect or replace as necessary. |
Wheel Bearings |
Clean and repack (Units less than 25 ft. only). |
Tires |
Inspect and rotate. |
Spare Tire Carrier |
Lubricate moving parts. |
Windows, and Door Seals |
Clean with mild detergent and apply 303 Aerospace Protectant |
Exterior |
Wax |
Escape Window |
Lubricate latches with WD-40 or light household oil. |
Every year |
Battery |
Clean, neutralize, and coat terminals with petroleum jelly. |
LPG Tanks |
Have purged by LPG supplier. |
Seams |
Check and reseal exterior seams, windows, lights, and vents as needed. |
Hitch Coupler and Ball |
Ensure all parts operate freely. Replace any component if worn or damaged. |
Interior Cabinetry |
Visual Inspection of latches Locks, Hinges, and Slides. Silicone Spray as needed. |
Suggested Maintenance and Replacement Parts
(Part numbers listed are Airstream part numbers and can be ordered by calling a certified Airstream dealer.)
WARNING
Exterior 12-Volt Lighting |
License Plate LED light |
PN – 514065-01 |
Amber LED Clearance Light |
PN – 512859 |
Red LED Clearance Light |
PN – 512860 |
Step Light LED |
PN – 513660 |
Convenience Light (Dump Valve) |
PN – 512533 |
NOTE: Most Exterior Lighting is LED and a replacement fixture will be required. |
Always replace the bulb or light fixture with the correct bulb for that light or matching fixture. Failure to heed this warning could cause fire, property damage, personal injury, or death.
Read all Instructions for Maintenance User Manual
Airstream Travel Trailer Bambi 2023 Inspection and Storage User Manual
Tire Inspection and Storage
Before taking your trailer on a trip or when removing it from an extended storage period, make it a practice to inspect the overall condition of your tires. Check for any type of condition or damage that might result in failure. A thorough check should include both inside and outside sidewalls, tread area and the condition of hardware such as valve stems, valve caps, and wheels. The tread should be checked for any unusual wear, cracking, penetrations and/or cuts. An uneven wear pattern can indicate misalignment or worn suspension parts.
Since many RVs are used seasonally and sometimes stored for extended times, it is possible that tires will take many years to wear out. Tires, as any rubber product, will age over time. If tires show cracking in the sidewall or tread surfaces that are more than 2/32 in. deep, they should be replaced before your next trip or vacation. Store your RV in a cool dry area away from major heat sources and extreme cold. An enclosed storage area is best with no exposure to electromagnetic sources such as generators or transformers. If you must keep your trailer outside, cover your tires from direct sunlight. Take your trailer to your tire dealer for service to check or correct any of these conditions.
Tire and Wheel Replacement
It is possible to replace your tires with a different size, in some instances, to increase your load capacity with a different inflation pressure. If there is a reason to replace your tires with a different size, make sure the following checks are made before the purchase:
- Does the replacement tire have the load capacity that is needed for my trailer and will it fit properly inside the wheel well?
- Will the overall diameter difference affect the braking system?
- Is the increase in air pressure compatible with the maximum rated pressure stamped on the rim?
Most trailers are towed at or near maximum loads during hot weather and then left idle for months. In normal use, oils in the tire come to the surface during flexing and protect the rubber from ultraviolet light. But when the trailer tires sit idle too long, natural aging may cause the rubber to crack prematurely, especially in the sidewall area. Trailer tires over five years old should be inspected by a tire expert for cracking and replaced even if it has no apparent tread wear.
Max Load Single vs. Max Load Dual
Max Load Single refers to the tire rating for applications with only one wheel on each end of a single axle. Max Load Dual refers to the tire rating for dually wheels, where there are two wheels on each end of an axle for a total of 4 wheels on a single axle. Don’t confuse the terms Single and Dual with Tandem. A tandem axle refers to trailers with two axles, one behind the other. For Airstream Travel Trailers, refer to the Max Load Single rating.
WARNING
Do not mismatch wheels and tires. Axle systems are installed with hubs and drums that are compatible with many wheels used in the recreational vehicle industry that have matching bolt patterns. If the original manufacturer-installed equipment is in need of replacement, the wheel manufacturer should be contacted for proof of compatibility prior to replacement and use. Customers replacing original equipment that has not been tested for compatibility must ensure the replacements are compatible to the hub and drum assembly installed.
Such elements of compatibility include, but are not limited to:
- Diameter of the hub-mounting surface.
- Stud length and diameter.
- Location and number of studs.
- Center hole diameter for the wheel.
- Wheel-mounting offset from the rim center.
- Rated capacity of the wheel.
- Wheel fastener torque.
- Wheel nut size and shape.
- Impact of any added wheel accessories (such as decorative center caps) that could affect proper seating of the wheel to the hub surface.
Refer to the following table for wheel specifications.
Read all Instructions for Inspection and Storage User Manual
Airstream Travel Trailer Bambi 2023 Batteries User Manual
Batteries
Depending on your chosen option, your Airstream may have lead acid, AGM, or lithium iron phosphate batteries. Each battery has its unique characteristics. Refer to the battery manufacturer’s manual for operation, servicing, and state of charge (SOC) information. Battery capacity is measured in AH (amp-hours), which refers to the amperage a battery can provide for one hour. For example, a 100AH battery can provide approximately 100 amps for 1 hour. Likewise, it can provide 1 amp for 100 hours. With the formula A (amps) x H (hours) = AH (amp-hours), you can roughly calculate how many amp-hours you are using if you know the total current draw of the device(s)/appliance(s) in use. For example, if an appliance draws 10A and is on for 2 hours, the discharge would be approximately 20AH. Many factors affect the state of charge, and because of this, the runtime can vary greatly. The faster a battery is drained, the less overall amperage is available. The AH rating drops the faster you use it. The industry standard rating is “C-20” or 20-hour rating, which is the energy a battery can deliver continuously for 20 hours at a given temperature. If a battery discharges over 20 hours (or longer), it should provide 100% of its rated capacity. Capacity diminishes when discharging at higher currents in less time.
Battery Maintenance and Storage
Lead Acid Batteries
Lead Acid Batteries require periodic cleaning and occasionally need refilling. Because of the corrosive nature of battery acid, you must take certain safety precautions when servicing them. Follow the battery manufacturer’s instructions for service and storage, and wear proper protective gear when handling batteries. Lead acid batteries are generally maintained and stored as follows: Maintain a clean battery top and check terminals and cables for tightness and cleanliness. A dirty lead acid battery will dissipate its charge through surface contamination. Ensure the caps are in place and tightly sealed before cleaning. If the baking soda/water solution used for cleaning gets into the battery, it will neutralize the battery acid. Clean the top of the battery using a ratio of two tablespoons of baking soda to a pint of water. Clean the battery terminal connectors with a wire or nylon brush to remove dirt and corrosion. Ensure the terminals are tight and free of corrosion. During winter, lead acid batteries should be removed from the trailer and stored in a cool, dry place where there is no danger of freezing. They should be clean and properly filled. Charge every 30-60 days. A battery that is allowed to lose its charge completely will never regain its original power or fully charge. When leaving the battery in the trailer, it is unnecessary to leave it on charge. Disconnect the negative battery cable to prevent the battery’s inadvertent discharging, which may lead to a complete discharge.
AGM Batteries
AGM batteries require very little maintenance other than keeping them clean and ensuring tight terminal connections. For information on how to properly maintain and store AGM batteries, consult the battery manufacturer’s instructions.
Lithium Iron Phosphate Batteries
Lithium batteries require little maintenance other than keeping them clean and ensuring tight and clean terminal connections. Lithium batteries must be stored with a full charge and disconnected from loads by removing the negative cable. For information on how to properly store lithium batteries, consult the battery manufacturer’s instructions.
WARNING
Before removing the batteries, verify that shoreline power is not connected. The risk of electrical shock may be present.
WARNING
Be sure to reconnect the battery cable terminals to the correct battery posts. Failure to do so could damage the battery and connected systems and potentially cause injury.
CAUTION
Avoid letting the battery get too low in charge, and never store a battery without fully charging it first. Keep your battery in a cool and dry place with plenty of ventilation, and remember to recharge as directed by the battery manufacturer.
NOTE
A battery will self-discharge 1-3% per month at 80 degrees. Depending on environmental conditions, this discharge rate may increase.
Lithium Battery Cold Weather Operation
Lithium batteries may not charge properly during cold weather usage if the temperature is below 35°F. Because of this, manufacturers may incorporate an internal heating system, allowing for use in colder climates and expanding the temperature restrictions for the battery’s internal Battery Management System (BMS). If equipped, the heating element may be enabled and disabled by an installed switch or automatically by an internal temperature gauge. Once on, the heating element will automatically engage and disengage as temperatures rise and fall.
Water Pump
Water Pump Access Locations
The 16RB model has a water pump and filter located under the roadside dinette seat. Access is gained by lifting the seat cushion to reveal the access panel.
The 19CB model has the water pump and filter located under the Stove. Access is gained removing the bottom drawer. The 20FB model has the water pump and filter located under the roadside dinette seat closest to the lavvy. Access is gained by lifting the seat cushion to reveal the access panel.
The 22FB model has the water pump and filter located under the roadside wardrobe. Access is gained by removing the felt covered lower wardrobe shelf. The winterization kit is located under the galley. Remove the bottom panel to access.
Strainer Cleaning
Locate the water pump and housing cap. Turn housing cap counterclockwise to remove cap and carefully pull out strainer. Clean strainer in small bucket of clean water or under running water. If necessary, clean strainer in a detergent solution. Install strainer and housing cap, being careful not to damage housing cap seal.

Fresh Water Tanks and Draining
Drain Valves
Drain valve locations are listed below by model; however, it may be helpful to know how to locate them should this information become outdated due to a change in mid-production.
To locate internal low-point drain valves:
- Look for a water line (usually white, red, or blue)protruding from the exterior underbelly. It will be a bare line with no valve. There may be two or more.
- Establish a reference point to something inside the trailer, such as a window or vent.
- Once inside, use your reference point to locate where the water line comes out of the floor. Trace the water line to the nearby low-point drain valve connection.
You can find where water lines come through the floor and locate valves by removing access panels inside or under furniture near your reference point; others are accessible by removing a drawer or opening a cabinet/compartment door. Sometimes access to internal valves is gained externally from inside a storage compartment. To locate external fresh water tank valve(s), look for a white PVC petcock valve or in-line brass valve(s) mounted to the galvanized steel underbelly. For more information on the plumbing layout, see Fresh Water Layouts on page 8-23
Read all Instructions for Batteries User Manual
Airstream Travel Trailer Bambi 2023 Water Tank Draining User Manual
Black and Gray Water Tank Draining
To empty one or both tanks, attach the sewer hose by pressing the bayonet fitting onto the dump valve outlet and rotate clockwise until it feels solid and secure. Attach the outlet end of the hose to the sewage outlet, making sure the hose is placed so it will drain completely. Pull the main dump valve handle as far as it will go and wait until the tank is drained. Close the dump valve and partially refill the tank with clean water and repeat the process until clean. The main holding tank must be flushed out until all paper and waste material is removed. Should solids accumulate, close the dump valve, fill the tank about half full with water, then tow the trailer for a few miles. The turbulence and surging of the water will usually dissolve the solids into suspension so the tank can be drained. Pull the auxiliary tank valve handle to drain the gray water tank. When dumping, the main holding tank should be dumped first, then the auxiliary holding tank. This will help to rinse out the sewer line with auxiliary holding tank water. Replace the bayonet ring cap prior to traveling.
16-ft. Model
- Combination Wastewater/Sewage (Gray/Black)
Tank Valve
- Light
- Light Switch
- Drain Cap (Drain Hose Hookup)
All Other Models
- Wastewater (Gray) Tank Valve
- Light
- Light Switch
- Sewage (Black) Tank Valve
- Drain Cap (Drain Hose Hookup)
Black Water Tank Dumping
When you are in a park and connected to a sewer outlet, keep the main holding tank dump valve closed, and empty the tank every few days, or whenever it becomes almost full. Only by sending a large volume of liquid, all at once, through the main holding tank will toilet paper and other solids completely wash away. This practice will avoid the accumulation of solids in the main holding tank, which could lead to an unpleasant cleaning job. Should solids accumulate, close the dump valve, fill the tank about half full with water, then tow the trailer for a few miles. The turbulence and surging of the water will usually dissolve the solids into suspension so the tank can be drained. Draining the tanks as described will protect them from freezing during storage. When traveling in sub-freezing temperatures, use a winterizing solution designed for RV use. Follow the directions on the container.
Black Water Tank Flush
The trailer has a water hose connector specifically
For flushing the Black Water Tank. To use, hook up a garden hose and turn it on. Within the tank, a head with multiple holes will spray the interior surface of the tank. Once the tank is about half full, turn the garden hose off and flush the water from the tank using the dump valve. The valve should be closed for the first couple of minutes, and then opened to let the water out in a rush. Repeat as needed. It is recommended the tank flush be used on a regular basis or the holes on the spray head may become clogged.
Drain Systems Cleaning
The only cleaning agents that can be used without causing harm to the system are household ammonia and tri-sodium phosphate in small quantities. Do not use any product that contains any portion of petroleum distillates. This type of product will attack the rubber seals of your toilet and dump valve. Also, do not use any dish detergent or abrasive cleaners. All products should be marked as approved for ABS drainage systems.
Winterizing and Storage
When storing your trailer for short or long periods, use the same precautions as you would in your own home in regard to perishables, ventilation, and rain protection. In addition, for prolonged storage periods, flush out all the drain lines and the holding tanks. Also drain the entire water system including the water heater and the water storage tank. Instructions for draining the water system are explained in the following paragraphs on winterizing.
The main consideration in winterizing your trailer is to guard against freeze damage to the freshwater system lines, tank, and pump, the waste drain system including the traps and tanks, the water heater, and the batteries.
To completely winterize your trailer follow this procedure:
- Level the trailer from side to side and front to rear. Open all faucets.
- Turn the water pump switch to the ON position to expel water from the storage tank
- Open all drain valves including exterior water service valve, if applicable.
- While the water is draining from the system, open and flush the toilet-flushing valve. Depress hand spray thumb button on the telephone shower head while holding down inside the tub and drain all water from the flexible hose.
- Unscrew the heads on both spray units and store.
- Turn the pump switch OFF after all water has been removed from the storage tank.
- Disconnect outlet hose from water pump. Turn the pump on until all the water is expelled. This water, about 1/2 cup, can be caught in a towel or rag. Reconnect hose.
Read all Instructions for Water Tank Draining User Manual
Airstream Travel Trailer Bambi 2023 Main Door Care User Manual
Main Door Care
Lubrication
Apply a little paraffin or grease to the striker pockets and a slight amount of household oil to the lock mechanisms to keep the locks operating smoothly. Also, lubricate the hinge pins periodically with household oil. Use the lubricant sparingly and remove any excess from exterior skin immediately.
Adjustment
Main door adjustment can be affected by:
- The trailer being improperly leveled (causing twisting of trailer body/shell).*
- Striker bolt alignment being out of adjustment, (striker bolt is adjustable).
- The screen door being out of adjustment, resulting in a situation of the door rubbing the frame, or not closing flush (which will create pressure on the door).
- Main door has come open at some point introducing a change to the contour of the door frame (check for sheared rivets on the interior skin of door).
When using the stabilizers (for eliminating movement-not leveling) on your Airstream be sure to check the fit of your main door before and after extending the stabilizers. The fit of the main door can be affected if trailer is not level side to side and front to back.
Tambour Track Maintenance
Applying a coat of silicon spray to the locker tracks will allow the tambour doors to travel smoothly.
Open
Closed
Windows
Sticking Windows
Forcing the window open may cause the window to shatter. Always follow the guidelines below for releasing a stuck window.
- Unlatch the window latches securing the windows on the interior.
- Apply some 303 Aerospace Protectant to a nylon wedge window tool.
- Starting in the corner, tuck the end of the nylon tool under the glass and gently slide to opposite end.
CAUTION
Prying up or applying pressure to the window may cause the window to shatter, resulting in personal injury or unit damage.
- Once the window is released, wash the gasket with a mild soap and water solution, and dry.
- Apply 303 Aerospace Protectant (Airstream part # 44845WR-01) to the window gasket. To apply, spray/pour 303 onto a soft rag or sponge and apply a generous coating directly to the gasket. Remove any residue that comes in contact with the exterior aluminum skin. This may be ordered through the Airstream Parts Department or at the Airstream online store at www.airstream.com.
Electrical Diagrams
The following electrical diagrams are representative of the National Electric Code (NEC) and the Canadian Standards Association (CSA). All circuits are NEC with the exception of CSA circuits as specified in each respective table.
12-Volt Main Schematic
120-Volt/30 Amp Diagram
FAQ
What is the Airstream Travel Trailer Bambi 2023?
The Airstream Travel Trailer Bambi is a compact and stylish travel trailer produced by Airstream.
What are the available floor plans for the 2023 Airstream Bambi?
Airstream typically offers different floor plans for their Bambi models. These layouts can vary in terms of sleeping arrangements, kitchen configurations, and living spaces.
What is the length and weight of the 2023 Airstream Bambi?
The length and weight of the Bambi can vary depending on the specific model and floor plan. It’s essential to check the specifications for the specific Bambi model you are interested in.
What are the key features of the 2023 Airstream Bambi?
Features can include a comfortable living area, a kitchenette, a bathroom, sleeping quarters, storage space, and various amenities depending on the model and trim level.
Is the 2023 Airstream Bambi suitable for off-grid camping?
Some Airstream Bambi models may be equipped for off-grid camping with features like solar panels and larger water tanks. It’s best to check the specifications for off-grid capabilities.
Does the 2023 Airstream Bambi come with a bathroom and shower?
Many Airstream Bambi models include a bathroom and shower, but the specifics can vary, so it’s important to confirm this feature for the particular model you’re interested in.
What is the sleeping capacity of the 2023 Airstream Bambi?
The sleeping capacity can differ by floor plan, with some accommodating two people and others more.
Is the 2023 Airstream Bambi equipped with modern technology and entertainment options?
Airstream often includes modern technology and entertainment systems in their trailers, such as audio systems, TV options, and connectivity features. Check the specific model for details.
What are the exterior materials and construction of the 2023 Airstream Bambi
Airstream travel trailers are known for their iconic aluminum construction, which provides durability and a distinctive look.
Does the 2023 Airstream Bambi come with a warranty?
Airstream typically offers a limited warranty for their travel trailers. Be sure to inquire about the warranty terms and coverage.
Is there a specific release date for the 2023 Airstream Bambi?
Release dates can vary, and it’s best to check with Airstream or their dealerships for information on the availability of the 2023 Bambi model.
What is the price range for the 2023 Airstream Bambi
Pricing for Airstream Bambi models can vary significantly depending on the model, features, and options. Contact Airstream or dealerships for pricing details.
Can the 2023 Airstream Bambi be towed by a specific type of vehicle?
The towing requirements can depend on the specific model’s weight and size. Consult the towing capacity of your vehicle and the trailer’s specifications.
Are there any new design or feature updates for the 2023 Airstream Bambi model?
Airstream may introduce design or feature updates for new model years, so check with Airstream for the latest information.