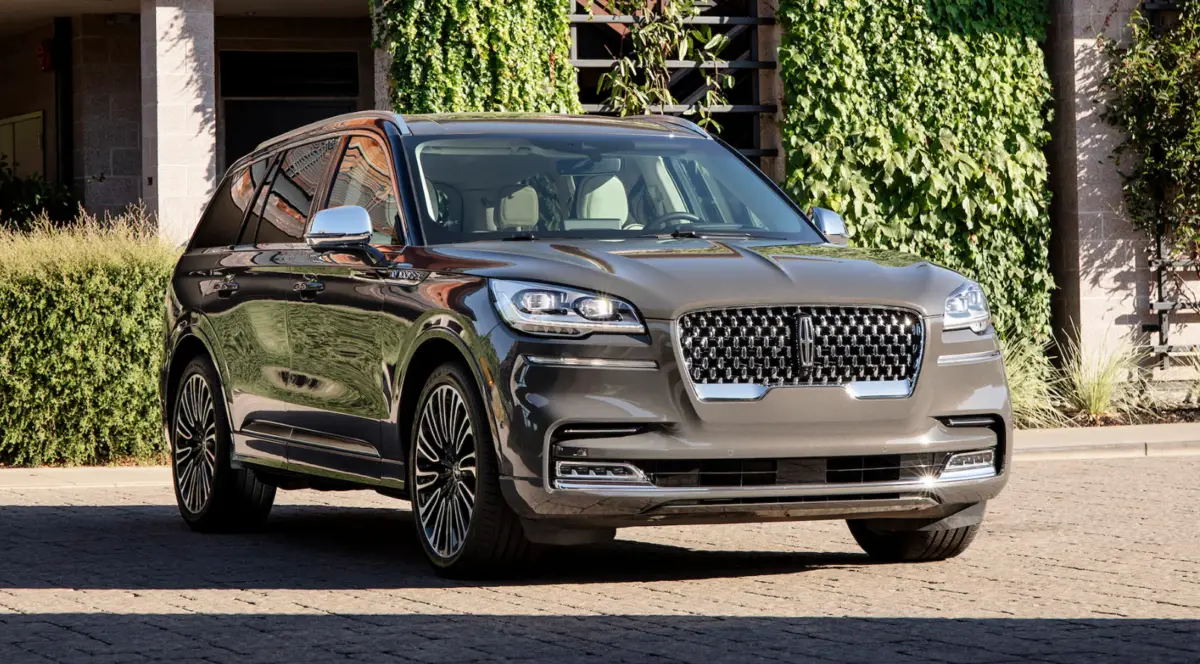
Categories
Renault

2022 Renault Master Owner’s Manual

Renault-logo

2022 Renault Master Owner’s Manual

By combining functionality, economy, and cutting-edge technology, the 2022 Renault Master maintained its leadership position in the commercial vehicle segment. Improvements in areas like driving comfort, safety features, and fuel efficiency are probably present in this model year, meeting the changing needs of both private users and companies. The Master was the preferred choice for a broad range of applications, including freight transport and bespoke adaptations, due to its adaptable design and availability in multiple configurations. The 2022 Master’s strong build quality, dependable performance, and Renault’s dedication to innovation made it a competitive and alluring option in the large van market.

GEAR LEVER

Gear lever Selecting reverse gear
With the vehicle stationary, move the gear lever into neutral then into reverse. Follow the grid drawn on gear knob 1, lift ring 2 against the gear knob to select reverse gear. The reversing lights will come on as soon as reverse gear is selected (with the ignition on).

Pull-up handbrake (depending on the vehicle)

  • To apply:
    Pull lever 4 upwards then release it. It returns to the horizontal position.
  • To release
    Press button 3 and pull lever 4 upwards then place it in a horizontal position.

REAR CAMERA
When the ignition is switched on, the 2 screen on the roof centre console dis- plays the view behind the vehicle that is transmitted by the camera 1.

Note: the 2 screen view may be may be displayed left to right.

Special features
The camera is equipped with an auto- matic de-icer which is activated when the temperature is below approximately 8°C. Make sure that the 1 camera is not ob- scured (by dirt, mud, snow, condensa- tion etc.). This function is an additional aid. It cannot, therefore, under any circumstances replace the vigilance or the responsibility of the driver.
The driver should always be ready for sudden incidents while driv- ing: always ensure that there are no small, narrow moving obstacles (such as a child, animal, pushchair, bicycle, stone, post, etc.) in the blind spot when manoeuvring.

Operation
The camera’s field of vision does not cover the entire area behind the vehi- cle, particularly the blind spot area A. On vehicles equipped with the Stop and Start function, the display remains active when the engine is in standby. Objects which appear on the edge of screen 2 may be  deformed.In very bright light (snow, vehicle in sunshine, etc.), the camera view may be partially obscured. In low brightness or poor weather, the image on the screen may be dis- torted.

Switching off the function
The display switches of:

  • up to approximately ten seconds after the reverse gear is engaged;
  • 30 seconds after the ignition is switched off.

Adjustment of the display
Accessing the brightness modes

Press button 6 repeatedly to select one of the four preset brightness modes:

  • “day” mode;
  • “intermediary” mode;
  • “night” mode;
  • “black screen” mode: allows suspen- sion of the display. Screen 2 displays a black image accompanied by the “OFF” message. To exit this mode, press button 6 again to access the first brightness mode (“day” mode).

Adjustment of brightness modes
Once the mode has been selected, press button 5 as many times as re- quired to access the type of setting you wish to change:

  • brightness;
  • contrast;
  • colour;
  • RESET: resets factory settings.

Press buttons 3 (+) or 4 (-) to adjust the setting.

Note: only the first three modes (“day”, “intermediary” and “night”) can be set.

Operating faults
When the system detects an operating fault, warning light B appears temporar- ily on screen 2. This may be caused a temporary fault affecting the camera or screen (clear- ness, fixed image, delayed communi- cation, etc.). If the warning light remains on, consult an approved dealer.

Anti-lock braking system (ABS)
Under heavy braking, the ABS prevents the wheels from locking, allowing the stopping distance to be managed and keeping control of the vehicle. Under these circumstances, the vehi-cle can be steered to avoid an obstacle whilst braking. In addition, this system can increase stopping distances, par-ticularly on roads with low surface grip (wet ground etc.). You will feel a pulsation through the brake pedal each time the system is activated. The ABS does not in any way improve the vehicle’s physical per-formance relating to the road surface and road-holding. It is still essential to follow the rules of good driving practice (such as driving at a safe distance from the vehicle in front etc.). In an emergency, apply firm and continuous pressure to the brake pedal. There is no need to pump it repeatedly. The ABS will modu-late the force applied in the braking system.

DRIVING CORRECTION DEVICES AND AIDS

Electronic stability program (ESC) with understeer control and traction control

Electronic stability control ESC
This system helps you to keep control of the vehicle in critical driving condi-tions (avoiding an obstacle, loss of grip on a bend, etc.).

Operating principle
A sensor in the steering wheel detects the direction selected by the driver. Other sensors throughout the vehicle measure the actual direction. The system compares driver input to the actual trajectory of the vehicle and corrects the trajectory if necessary by controlling the braking of certain wheels and/or engine power. In the event that the system is engaged, indicator light flashes on the instrument panel.

Understeer control
This system optimises the action of the ESC in the case of pronounced under-steer (loss of front axle road holding).

Assistance with side winds
This system optimises the action of the ESC and also helps to control the vehi- cle in case of variation of side winds. It helps maintain the vehicle trajectory through the use of the brakes. If the system is triggered, the warning light appears on the instrument panel. These functions are an ad-ditional aid in the event of critical driving conditions, enabling the vehicle behaviour to be adapted to suit the driving conditions. The functions do not take the place of the driver. They do not increase the vehicle’s limits and should not encourage you to drive more quickly. Therefore, they can under no circumstances replace the vigi- lance or responsibility of the driver when manoeuvring the vehicle (the driver must always be ready for sudden incidents which may occur when driving).

Traction control
This system helps to limit wheelspin of the drive wheels and to control the ve-hicle when pulling away accelerating or decelerating.

Operating principle
Using the wheel sensors, the system measures and compares the speed of the drive wheels at all times and slows down their over-rotation. If a wheel is starting to slip, the system brakes au- tomatically until the drive supplied be- comes compatible with the level of grip under the wheel again. The system also adjusts the engine speed to the grip available under the wheels, independently of the pressure exerted on the accelerator pedal.

Driver assistance with a trailer
This system helps to maintain control over the vehicle while using a trailer. It detects shaking caused by towing a trailer under certain driving conditions.

Operating conditions

  • The towbar must be approved by an authorised dealer;
  • the harness must be approved by an authorised dealer;
  • the towbar must be connected to the vehicle.

Operating principle
The function stabilises the vehicle by:

  • asymmetric braking of the front wheels to reduce shaking caused by the trailer;
  • braking of all four wheels and limita- tion on engine torque to reduce the vehicle speed until the shaking has stopped.

Emergency brake assist
This system supplements the ABS and helps reduce vehicle stopping dis-tances.

Operating principle
The system is for detecting an emer- gency braking situation. In this case, the braking assistance immediately de- velops maximum power and may trig- ger ABS regulation. ABS braking is maintained as long as the brake pedal is applied. Hazard warning lights switching on Depending on the vehicle, these may light up in the event of sudden decel- eration.

Operating faults
When the system detects an operating fault the message “WARNING: Check ABS” appears on the instrument panel along with the © warning light. Consult an approved dealer.

Grip control
If fitted on the vehicle, grip control makes it easier to control the vehicle on low grip surfaces (soft ground, etc.). These functions are an ad-ditional aid in the event of critical driving conditions, enabling the vehicle behaviour to be adapted to suit the driving conditions. The functions do not take the place of the driver. They do not increase the vehicle’s limits and should not encourage you to drive more quickly. Therefore, they can under no circumstances replace the vigi- lance or responsibility of the driver when manoeuvring the vehicle (the driver must always be ready for sudden incidents which may occur when driving). Press the 4 switch: the message “Grip Extend Loose Surface ON” is displayed on the instrument panel. This position enables optimal usage on soft ground (mud, sand, dead leaves, etc.). In this position, engine speed is left under the driver’s control. The system automatically switches to “Road” mode at speeds above about 31 mph (50 km/h). The message “Standard road mode on” is displayed on the instrument panel to warn you.

SCREEN WASHER, WIPER

Vehicle fitted with intermittent windscreen wipers

  • park
  • intermittent wiping
    The wipers will pause for several seconds between sweeps. It is pos-sible to change the time between sweeps by turning ring 2.
  • normal wiping speed
  • fast wiping speed

Special note
When driving the vehicle, the wiping speed slows down whenever the ve-hicle stops. For example, fast wiping speed will slow to normal wiping speed. As soon as the vehicle moves off, wiping will return to the speed originally selected. If stalk 1 is operated, it overrides and cancels the automatic function.

Note: in the event of mechanical sei- zure, the system automatically cuts the power supply to the wipers.

  • the rain sensor is only intended as a driving aid. In the event of reduced visibility, the driver should manually activate the wipers. In foggy weather or during snowfalls, wiping is not automatically triggered and remains under the driver’s control;
  • in the event of temperatures below zero, automatic wiping is not acti- vated when the vehicle is started. It is automatically activated as soon as the vehicle exceeds a certain speed (approximately 5 mph (8 km/h));
    do not activate automatic wiping in dry weather;
  • fully de-ice the windscreen before activating automatic wiping.

Windscreen washer
With the ignition on, pull stalk 1 then release. A brief pull will trigger a single sweep of the wipers, in addition to the wind-screen washer. A longer pull will trigger three sweeps of the wipers followed, a few seconds later, by a fourth, in addition to the wind-screen washer.

Efficiency of a wiper blade
Check the condition of the wiper blades. How long they last depends on you:

  • it must remain clean: clean the blade and the screen regularly with soapy water;
  • do not use it when the screen is dry;
  • free it from the screen when it has not been used for a long time.

In all cases, replace it as soon as it begins to lose efficiency: approxi- mately once a year.

Precautions for using the wipers

  • In freezing or snowy weather, clear the screen before starting the wipers (risk of motor over- heating);
  • ensure that no objects are ob- structing the travel of the blade.

When working in the engine compartment, ensure that the windscreen wiper stalk is in position A (park).

Daytime running lights function
The daytime running lights come on automatically with no action on stalk 1 when the engine is started, and they go off once the engine is switched off.

“See-me-home lighting” function
This function allows you to briefly switch on the dipped beam headlights (to pro-vide light when opening a gate, etc.). With the engine and lights switched off, and the ring 3 in position AUTO, pull the stalk 1 towards you: the dipped beam headlights come on for approximately one minute. To increase this du- ration, you may pull the stalk up to four times (total time restricted to approximately four minutes). To switch off the lights before they go out automatically, turn ring 3 to any position, then return it to position AUTO. If the vehicle is parked on the hard shoulder with the tailgate open, the rear lights may be obscured. You should make other road users aware of your vehicle by using a warning triangle or other equipment specified by the road traffic regulations of the country you are driving in.

Main beam headlights
With the dipped beam headlights lit, pull the stalk 1. This indicator light on the instrument panel comes on. To return to the dipped headlight posi-tion, pull stalk 1 towards you again.

Automatic main beam headlights
Depending on the vehicle, this system switches the main beam headlights on and off automatically. The function uses a camera located behind the interior rear-view mirror to detect vehicles that are following and coming in the opposite direction.

The main beam headlights come on automatically if:

  • exterior light is weak;
  • no other vehicles or lighting are detected;
  • the vehicle speed is above approximately 30 mph (45 km/h).

If any of the above conditions are not fulfilled, the system switches to dipped beam headlights.

Note: make sure the windscreen is not obscured (dirt, mud, snow, condensation etc.).

The system may encounter difficulties under certain conditions, including:

  • extreme weather conditions (rain, snow, fog, etc.);
  • obstruction in front of the windscreen or camera;
  • when a following or oncoming vehicle has weak or hidden lighting;
  • incorrect settings for the front headlights;
  • reflective systems;

The “automatic main beam headlights” system should under no circumstances be used to replace driver attention and responsibility with regard to vehicle lighting and adapting to light, visibility and traffic conditions..

Front fog lights
Turn the centre ring 4 of the stalk 1 until the symbol is opposite the 5 mark. The front fog lights only work if the ex-terior lights have been activated. An in-dicator light on the instrument panel will come on.

Rear fog lights
Turn the centre ring 4 of the stalk 1 until the symbol is opposite the 5 mark. The rear fog lights only work if the ex-terior lights have been activated. An in-dicator light on the instrument panel will come on.
Do not forget to switch off the fog lights when they are no longer needed, to avoid inconveniencing other road users. When the exterior vehicle lights are switched off, the rear fog lights switch off or the equipment returns to the front fog lights position (if they are fitted).

Switching off the lights
The lights will go out automatically when the engine is switched off, the driver’s door is opened or the vehicle is locked. In this case, the next time the engine is started the lights will be switched back on according to the position of the ring 3.

Lights-on warning buzzer
If the lights are on after the engine is switched off, a warning beep sounds when the driver’s door is opened to warn you that the lights are still on (to avoid battery discharge).

HEADLIGHT BEAM ADJUSTMENT
On vehicles fitted with this function, control A allows you to adjust the height of the beams according to the load. Turn control A downwards to lower the headlights and upwards to raise them.

HEADLIGHT BEAM ADJUSTMENT
When driving on the left in a left-hand drive vehicle (or vice versa), you must adjust your lights temporarily for the duration of your trip.

FAQ

What is the 2022 Renault Master?

The 2022 Renault Master is a large commercial van designed for a range of business applications, known for its versatility and reliability.

What engine options are available in the 2022 model?

The 2022 Master likely offers a selection of diesel engines, possibly including more efficient or environmentally friendly options.

Has the fuel efficiency improved in the 2022 model?

Yes, the 2022 model likely features improved fuel efficiency, thanks to advancements in engine technology and vehicle design.

Does the 2022 Master offer electric or hybrid versions?

Renault had been expanding its electric vehicle range, so there might be electric or hybrid versions available depending on the market.

What are the key features of the 2022 Renault Master?

Key features typically include a spacious cargo area, advanced driver-assistance systems, improved infotainment systems, and ergonomic interior design.

How has the interior been upgraded in the 2022 model?

The interior likely saw enhancements in comfort, with better seating, a user-friendly dashboard, and updated technology for convenience and connectivity.

What safety features are included in the 2022 model?

The 2022 Master probably includes features like enhanced braking systems, stability control, lane-keeping assistance, and possibly more advanced driver assist technologies.

What are the cargo space dimensions of the 2022 Renault Master?

The cargo dimensions vary based on the configuration, but the Master is known for its generous and versatile cargo space.

Is there a passenger version available?

Yes, the Renault Master is typically available in both cargo and passenger configurations.

What is the towing capacity of the 2022 Renault Master?

The towing capacity depends on the specific model and engine, but it is designed to meet robust commercial towing needs.

Has the exterior design changed from the previous model?

The 2022 model may feature minor design updates for a more modern appearance, while maintaining its recognizable and functional design.

Are there new color options for the 2022 model?

New model years often introduce additional color options, though this can vary by market.

What warranty does Renault offer with the 2022 Master?

Warranty terms for the Renault Master vary by region, but typically include comprehensive coverage to ensure buyer confidence.

How does the 2022 Master compare to its competitors?

The 2022 Master is designed to be competitive in terms of space, efficiency, and technology, offering a strong balance in the commercial van segment.

What is the price range for the 2022 Renault Master?

The price varies based on configuration, features, and market, but it is generally positioned competitively within the commercial vehicle market.

Useful Link

2023 Renault Master Owner’s Manual

2021 Renault Koleos Owner’s Manual

Categories
Renault

2023 Renault Master Owner’s Manual

Renault-logo

2023 Renault Master Owner’s Manual

An important improvement to Renault’s well-liked commercial vehicle portfolio is the 2023 Renault Master. It has upgraded features designed to increase effectiveness, comfort, and usefulness for many professional applications. Advanced driver-assistance technologies, a more contemporary and ergonomic interior, and perhaps upgraded powertrain options to meet the needs of both long-distance and urban driving are among the major improvements. These enhancements highlight Renault’s dedication to commercial vehicle innovation and customer satisfaction.

HEADLIGHT BEAM ADJUSTMENT

On vehicles fitted with this function, control A allows you to adjust the height of the beams according to the load. Turn control A downwards to lower the headlights and upwards to raise them. The table below gives some examples. In all cases, adjust control A according to the vehicle load so that the road can be seen and other drivers are not dazzled. When driving on the left in a left-hand drive vehicle (or vice versa), you must adjust your lights temporarily for the duration of your trip.

Temporary adjustment
Open the bonnet and identify the mark- ing B next to one of the front headlight projectors. For each headlight, using a screw- driver, turn the screw 1 by a quarter turn towards the – symbol to lower the beams.
Return to the starting point once your trip is over: turn the screw 1 by a quar- ter turn towards the + symbol to raise the beams.

Direction indicators
Move the stalk 1 in the same direc- tion as you want to move the steering wheel.

One-touch mode
Briefly shift the stalk 1 upwards or downwards, not exceeding the point of resistance, then release it: the stalk will return to its original position and the direction indicator light concerned will flash three times.

Horn
Press on the sides 2 of the steering wheel boss.

Headlight flasher
Pull stalk 1 towards you then release it to flash the headlights.

Hazard warning lights
Press the switch 3. This switch activates all four direction indicators and the side indicator lights simultaneously. It must only be used in an emergency to warn drivers of other vehicles that you have had to stop in an area where stopping is prohibited or unexpected, or that you are obliged to drive under special conditions. In the event of emergency braking or sudden deceleration, the flashing lights are activated at a faster frequency. They are switched off automatically once the emergency braking or deceleration is complete.

FUEL TANK

Useable capacity of the tank: approximately 23.1 gal or 17.6 gal (105 litres or 80 litres) (depending on the vehicle).

Filling the tank
Please observe the following instructions:

  • with the ignition off, wait at least 20 seconds before starting to fill with fuel;
  • open the driver’s door to open the flap 1;
  • depending on the vehicle, unlock the cap 2 using the key, then remove it and attach it to the flap 1;
  • when filling the tank partially, add at least 2.2 gallons (10 litres) of fuel.

If these instructions are not observed, the tank filling level will not be taken into account on the instrument panel. After filling, check that the cap and cover are closed.

Filling with fuel
When the pump cuts out automatically at the end of the filling procedure, a maximum of two further filling attempts may be made to maintain an expansion volume. Fuel types that conform to European standards which the engines of ve- hicles sold in Europe are compatible with.

Fuel grade
It is essential to use diesel. Make sure that no water enters the fuel tank ac- cidentally during filling. The sealing system and its surrounding area must be dust-free. Use a high-grade fuel that complies with the specific or equivalent legisla- tion in force in the country where the vehicle is marketed. It must comply with the indications on the label located on the cover  Do not mix even small amounts of petrol (un-leaded or E85) with diesel. Do not use ethanol-based fuel if your vehicle is not compatible with this fuel. Do not add reagent to the fuel – otherwise you risk damaging the engine If you wish to add an additive to the fuel, use a product approved by our Technical Department. Consult an approved dealer.

Fuel filler cap: this is a specific type.
If you have to replace it, make sure it is identical to the original cap. Contact an ap-proved Dealer. Never place the cap near a source of heat or flame. Do not wash the filler area with a high-pressure washer. No modifications what- soever are permitted on any part of the fuel supply system (computers, wiring, fuel circuit, injector, protection covers, etc.) as this may be danger- ous (such work must be undertaken by qualified Network personnel).

Persistent smell of fuel
If you notice a persistent fuel odour you should:

  • stop the vehicle when traffic con- ditions allow it and switch off the ignition;
  • switch on the hazard warning lights and ask your passengers to leave the vehicle and stay clear of the traffic;
  • contact an authorised dealer.

Please note when work- ing close to the engine that it may be hot. In addition, the engine cooling fan may start at any moment. The warning light in the engine compart- ment reminds you of this.

Repriming the fuel circuit
After a breakdown caused by com- pletely running out of fuel, the system must be reprimed before the engine is restarted:

  • set the ignition key to the “On” posi- tion M ➥ 2.2 and wait a few minutes before starting to enable the fuel cir- cuit to be primed;
  • turn the key to position D. If the engine does not start, repeat the procedure;
  • if the engine does not start after several attempts, please contact an authorised dealer.

REAGENT TANK 
Please ensure that you comply with the legislation of your country.
It is important to remember that failure to respect regulations in force could lead to legal action being taken against the vehicle owner.

Operating principle
The reagent is intended for Diesel en- gines fitted with the SCR (selective cat- alytic reduction) system. Using the reagent reduces the quantity of nitrogen oxides in exhaust gases. Reagent consumption in real time de- pends on vehicle usage conditions, the equipment fitted, and driving style.

Reagent quality
Use only reagents which conform to standard ISO 22241 and in accord- ance with the mark on the tank filler cap.

Topping up
Useful capacity of fuel tank: approx- imately 21 litres or 28 litres (depend- ing on the vehicle). Ignition off, open the front passenger door to open the cover 2. Unscrew the cap 1.

Note: ammonium hydroxide vapour may escape from the cap opening when the tank temperature is high.

To fill up with reagent, the engine must be stopped (not just on standby in the case of vehicles with the Stop and Start function). You must switch off the ignition

REAGENT TANK 
Precautions for use The tank can be filled at the pump. In other cases, it is essential to read the information shown on the reagent con- tainer (e.g. the can or bottle). When filling, handle the reagent care- fully. They can damage clothes, shoes, bodywork components etc. If the reagent overflows, or contami- nates any paintwork, clean the affected area quickly with plenty of cold water and a soft cloth.

Note: if the reagent crystallises, use a soft sponge.

In extreme cold weather conditions
In frosty conditions, fill the reagent tank as soon as the warning light and the “TOP UP AdBlue before 1500 km” message, or, depending on the vehicle, the “TOP UP AdBlue before 1200 km” message is displayed on the instrument panel.

Special cases
The reagent fluid freezes below about -10°C. In these conditions, do not attempt fill- ing when the fluid is frozen. In the event of needing to top up or fill the tank with reagent (on), park the ve- hicle in a hotter location if possible so that the reagent becomes liquid again. Otherwise, have a qualified profes- sional top up or fill up with reagent fluid. After filling the reagent tank, check that the cap and cover are closed, start the engine and WAIT 10 sec- onds with the vehicle stationary, engine running, before setting off again. If this operation is not carried out, the filling of the tank will not be taken into account automatically until after several dozens of minutes of driving. The message “— TOP UP AdBlue” and/or the warning lights will continue to appear until the filling has been registered by the system. No work whatsoever is permitted on any part of the system. To prevent damage, only qualified personnel from our network may work on the system.

Alert with message on the
the instrument panel on display 3 Front-wheel drive and van versions
Warning lights and the messages on the instrument panel 3 are displayed ac- according to the estimated range of the remaining reagent.

RUNNING IN, IGNITION SWITCH
Up to 930 miles (1,500 km), do not exceed 2,500 rpm or approximately 56 mph (90 km/h) in the highest gear. After completing this mileage you may drive faster, however, it is only after ap- proximately 3720 miles (6,000 km) that you may reasonably expect full perfor- mance.
During the running in period, do not ac- celerate hard while the engine is still cold and do not let the engine over-rev. Service intervals: refer to the Maintenance Service Booklet for the vehicle.

Note: for a new vehicle in the running-in phase: the coolant level may be higher than the “MAXI” mark on the tank, then drop to between the “MINI” and “MAXI” marks. This does not present a risk.

Ignition switch
“Stop and steering lock” position St To lock: remove the key and turn the steering wheel until the steering column locks. To unlock: turn the key and the steering wheel slightly.

“Accessories” position A
When the ignition is switched off, any accessories (radio, etc.) will continue to function.

“Ignition on” position M
With the ignition on, the engine will be preheating.

“Start” position D
If the engine fails to start at the first at-tempt, turn the key back before activating the starter again. Release the key as soon as the engine starts.

Note: several seconds may pass tween turning the key and the engine starting to allow for engine preheating. Special note on vehicles with a sequential gearbox Depress the brake pedal with the lever in the N position.

Note: if a gear other than neutral is displayed, it flashes; starting is not possible unless you depress the brake pedal while holding the key in the starting position.

In the “Accessories” or “On” position, a system may automatically switch off your vehicle’s accessories depending on the battery charge, to prevent it from discharging completely.

DRIVING ADVICE, ECO-DRIVING 
Fuel consumption is accredited in ac- cordance with a standard regulatory method. Identical for all manufactu- rers, this enables vehicles to be compared with one another. Consumption in real-time depends on vehicle usage conditions, the equipment fitted and the user’s driving style. To optimise fuel consumption, please refer to the following advice.

Depending on the vehicle, you will have various functions which enable you to lower your fuel consumption:

  • the rev counter;
  • gear change indicator;
  • the journey record and eco-driving advice via the multimedia display;
  • ECO mode activated by the ECO button;

If fitted on the vehicle, the navigation system provides additional information.

Journey record
Once the engine is switched off, you will see “Journey record” displayed on the screen 2, enabling you to view in- formation relating to your last journey.

This indicates:

  • average fuel consumption;
  • number of miles/kilometres travelled;
  • number of miles/kilometres saved.

An overall rating from 0 to 100 is dis- played to let you assess your eco-driving performance. The higher the rating, the lower the fuel consumption. Eco advice is given to help improve your performance. With your favourite journeys saved, you can evaluate your performance. For more information, please see the multimedia system instructions.

ECO mode
ECO mode is a function which opti- mises fuel consumption. It acts on cer- tain power consuming systems in the vehicle (heating, air conditioning, pow- er-assisted steering, etc.) and on cer- tain driving actions (acceleration, gear changing, cruise control, deceleration, etc.).
Limiting acceleration enables low fuel consumption in urban and surrounding areas. When ECO mode is in use, it is normal for changes in the heating level to occur.

Activating the function
Press switch 4. The 3 warning light comes on on the instrument panel A or B to confirm activation. While driving, it is possible to leave the ECO mode temporarily in order to improve engine performance. To do this, press the accelerator pedal firmly and fully. ECO mode is reactivated when you take pressure off the accelerator pedal.

Disabling the function
Press switch 4. Warning light 3 goes out on the instrument panel to confirm deactivation.

DRIVING ADVICE, ECO-DRIVING

Driving advice, Eco-driving Behaviour

  • Drive carefully for the first few miles until the engine reaches its normal operating temperature, rather than let it warm up while the vehicle is sta- tionary.
  • Dynamic driving with a lot of frequent acceleration and braking is expen- sive on fuel in comparison to the time saved.
  • High speeds significantly affect the vehicle’s fuel consumption. Examples (at a steady speed):
  • reducing the speed from 80 mph (130 km/h) to 68 mph (110 km/h) ap- proximately saves up to 20% of fuel approximately;
  • reducing the speed from 56 mph (90 km/h) to 50 mph (80 km/h) ap- proximately saves up to 10% of fuel approximately.
  • Do not overrev the engine in the in- termediate gears.
    You should always use the highest gear possible.
  • Avoid sudden acceleration.
  • Brake as little as possible. If you an- ticipate an obstacle or bend in ad- vance, you may then simply release the accelerator pedal.
  • Do not try to maintain the same speed up a hill, accelerate no more than you would on the level. Keep your foot in the same position on the accelerator pedal.
  • Double declutching and accelerating before switching off are unnecessary in modern vehicles.

FAQ

What is the 2023 Renault Master?

The 2023 Renault Master is a latest-model large van produced by Renault, designed for commercial use.

What engine options are available in the 2023 Renault Master?

The 2023 model typically offers a range of diesel engines, potentially including newer, more efficient options. Specific engine details vary by market.

Has the fuel efficiency improved in the 2023 model?

Yes, the 2023 Renault Master likely features improved fuel efficiency due to advancements in engine technology and aerodynamics.

Are there any electric or hybrid versions available?

As of my last update, Renault had plans to introduce electric versions, but availability would depend on the market.

What are the key features of the 2023 Renault Master?

Key features include advanced driver-assistance systems, a modernized interior, improved cargo space, and enhanced connectivity options.

How has the interior been upgraded?

The interior has been upgraded with a focus on ergonomics, featuring comfortable seating, a redesigned dashboard, and improved infotainment systems.

What safety features are included in the 2023 model?

It likely includes features such as lane-keeping assistance, blind-spot monitoring, and improved braking systems.

What are the cargo space dimensions?

Cargo dimensions vary by model, but the 2023 Master is known for its spacious and versatile cargo area.

Is there a passenger version available?

Yes, the Renault Master is typically available in both cargo and passenger configurations.

What is the towing capacity of the 2023 Renault Master?

Towing capacity depends on the specific model and engine, but it’s designed to be robust for commercial towing needs.

Has the exterior design changed from the previous model?

The 2023 model may feature subtle exterior design tweaks for a more modern and aerodynamic look.

Are there new color options for the 2023 model?

New models often introduce fresh color options, but specifics depend on the market.

What warranty does Renault offer with the 2023 Master?

Warranty terms vary by region, but Renault typically offers a competitive warranty for its commercial vehicles.

How does the 2023 Master compare to its competitors?

The 2023 Master is designed to be competitive in its class, offering a balance of efficiency, space, and technology.

What is the price range for the 2023 Renault Master?

Pricing varies based on configuration and market, but it’s positioned to offer value in the commercial van segment.

Useful Link

2021 Renault Koleos Owner’s Manual

2019 Renault Kangoo Z.E User Manual

Categories
Blogs

2024 Chevrolet Colorado Review, Specs, Price and Mileage (Brochure)

2024 Chevrolet Colorado Review, Specs, Price and Mileage (Brochure)

Few things are more American than a pickup truck, and the mid-size Chevrolet Colorado is one of the sweetest. Constructed to operate with unwavering dependability, the Colorado’s chassis and array of features enable even the most audacious off-road stunts. The only powertrain available for all Colorados is a 2.7-liter turbocharged inline-four with an eight-speed automatic transmission. Other trims, such as the off-road-focused ZR2, receive 310 horsepower from the same motor, while the base WT and LT models get 237 horsepower. Depending on the trim level, all Colorados have a five-foot bed and a four-door cab. Rear- or four-wheel drive are available as options. The Colorado has a maximum towing capability of 7700 pounds, which makes it easy to tow boats, snowmobiles, and campers. For a year, the Colorado was the newest truck on the block, but now that the Ford Ranger and Toyota Tacoma have entered the market, the Colorado confronts serious competition.

2024-Chevrolet-Colorado-Review-Specs-Price-and-Mileage-(Brochure)-Img

Pricing

Trims Price
WT $32,195
LT $34,595
Trail Boss $39,995
Z71 $41,955
ZR2 $49,995
ZR2 Bisson $61,450

Colours

2024-Chevrolet-Colorado-Review-Specs-Price-and-Mileage-(Brochure)-Colors

Specifications

Engine

Chevy’s turbocharged 2.7-liter inline-four engine, whose output varies depending on the trim level, powers every Colorado. All Colorados have an eight-speed automatic transmission. The WT and LT variants have 237 horsepower as standard. That is significantly more power than the standard Toyota Tacoma’s 159-hp four-cylinder. The Z71, Trail Boss, and ZR2 versions, which come loaded with more power and torque than the V-6 powertrains featured in the Jeep Gladiator, Ridgeline, and Tacoma, are powered by the same turbo 2.7-liter engine that produces 310 horsepower. Additionally, it can be added as an optional feature to WT and LT trims. The reason those figures seem familiar is that the engine is the same as the one found in Chevy’s full-size Silverado 1500. The previous Colorado was only available with the V-6 and Duramax Diesel engines. The new Colorado still has a solid back axle with leaf spring suspension and an independent front suspension. The rear DSSVs are now placed to the outside of the frame on the ZR2, while the large Mutlimatic DSSV dampers are installed up front. The Z71 and WT trucks have a limited-slip rear differential, while the LT and WT trucks have an open differential. The off-road ZR2 is the sole truck having power-locking front and rear diffs. The ZR2 Bison, equipped with the widest 35-inch tires in the mid-size pickup class, is the most rugged off-road Colorado. With a ground clearance of 12.2 inches, the Bison boasts superior breakover and departure angles to help it navigate difficult terrain. Its hydraulic front and rear bump stops also provide a softer landing after jumps. Yes, we did say “jumps.”

Type: 2.7L I-4 Turbo High-Output DOHC VVT DI with Active Fuel Management and Stop/Start
Bore & Stroke (in. / mm): 3.63 x 4.01 / 92.25 x 10²
Block Material: Cast aluminium
Cylinder Head Material: Cast aluminum
Valvetrain: Dual-overhead camshafts, four valves per cylinder, Tripower valvetrain with continuously variable valve timing, variable valve lift and Active Fuel Management
Fuel Delivery: Direct high-pressure fuel injection with Active Fuel Management
Horsepower (hp / kW @ rpm): 310 / 231 @ 5600
Torque (lb.-ft. / Nm @ rpm): 430 / 569 @ 3000 (GM est.)

Fuel Efficiency and Actual MPG

For models with rear-wheel drive, the Colorado achieves its greatest EPA fuel economy rating of 20 mpg in the city and 25 mpg on the highway. Four-wheel drive Colorados scored an estimated 19 city and 23 highway mpg according to the EPA. These ratings decrease to 17 mpg and 19 mpg, respectively, for ZR2 off-road vehicles. We can assess its actual mpg when we get a chance to test one on our 75 mph highway fuel-economy route, which is a part of our rigorous testing program.

Transmission & Axle

Type: Hydra-Matic 8L90 eight-speed automatic
Gear Ratios (:1)  
     First: 4.56
     Second: 2.97
     Third: 2.08
     Fourth: 1.69
     Fifth: 1.27
     Sixth: 1.00
     Seventh: 0.85
     Eighth: 0.65
     Reverse: 4.56
Final Drive Ratio: 3.42

Chassis and Suspension

Front Suspension: Independent coil-over-shock with Multimatic DSSV dampers; Multimatic Jounce Control Dampers on Bison
Rear Suspension: Solid axle with semi-elliptic two-stage multi-leaf springs and Multimatic DSSV dampers; Multimatic Jounce Control Dampers on Bison
Rear axle: Power-locking front and rear differentials
Steering Type: Electric power-assisted rack-and-pinion
Brake Type: Power-assisted four-wheel discs with Duralife™ long-life brake rotors; standard ABS; hill descent control
Wheel Size: 17 x 8-in. aluminum (ZR2)

17 x 8.5-in. aluminum (ZR2 Bison)

Tire Size: LT285/70R17 MT – 33-in. OD (ZR2)

LT315/70R17 MT – 35-in. OD (ZR2 Bison)

Exterior Dimensions

Wheelbase (in. / mm): 131 / 3338
Overall Length (in. / mm): 212.7 / 5402 – ZR2

214.1 / 5437 – ZR2 Bison

Overall Width (in. / mm): 84.4 / 2144 (with mirrors)

80.2 / 1938 (without mirrors)

Overall Height (in. / mm): 81.8 / 2078
Track (in. / mm): 66.3 / 1684 (front)

66.3 / 1684 (rear)

Ground Clearance (in. / mm): 10.7 / 272 – ZR2

12.2 / 311 – ZR2 Bison

Approach Angle (deg.): 38.6 – ZR2

38.2 – ZR2 Bison

Departure Angle (deg.): 25.2 – ZR2

26.0 – ZR2 Bison

Breakover Angle (deg.): 24.8 – ZR2

26.9 – ZR2 Bison

Interior Dimensions

Cargo, Comfort, and Interior

2024-Chevrolet-Colorado-Review-Specs-Price-and-Mileage-(Brochure)-Interior

The interior design of the Colorado of the latest generation is very impressive. Every Colorado has a crew cab with four doors. The cupholders are now right in front of the center console rather than nestled opposite the gear selector, and there’s a new center console inside. The shifter is also moved closer to the passenger side of the cab. The redesigned look is finished with a new infotainment screen, steering wheel, and instrument cluster. In comparison to the previous Colorado, headroom has generally decreased by an inch, although shoulder and legroom have remained mostly unchanged. ZR2 versions adopt a feature from the Honda Ridgeline handbook, adding a shallow 45-inch-wide lockable storage compartment to the tailgate as standard.

2024-Chevrolet-Colorado-Review-Specs-Price-and-Mileage-(Brochure)-Seatings

Headroom (in. / mm): 40.3 / 1024 (front)

38.3 / 973 (rear)

Legroom (in. / mm): 45.2 / 1148 (front)

34.7 / 881 (rear)

Shoulder Room (in. / mm): 57.4 / 1458 (front)

56.3 / 1430 (rear)

Hip Room (in. / mm): 54.7 / 1389 (front)

53.1 / 1349 (rear)

Connectivity and Entertainment

A sizable 11.3-inch infotainment touchscreen comes installed as standard on every Colorado. Additionally, the Colorado has wireless phone charging capabilities, but it also has USB connections in case your gadgets need them. The Colorado may be outfitted with Google Built-In, a subscription service that allows you to customize music, navigation, and other car features using your Google account. Apple CarPlay and wifi Android Auto are included in every Colorado.

Curb Weight

Curb Weight (lb. / kg): 4940 / 2241 – ZR2

5265 / 2388 – ZR2 Bison

GVWR (lb. / kg)1: 6250 / 2835 – ZR2

6350 / 2880 – ZR2 Bison

Max Payload (lb. / kg)2: 1280 / 581 – ZR2

1050 / 476– ZR2 Bison

Max Trailering (lb. / kg)3: 6000 / 2722 – ZR2

5500 / 2495 – ZR2 Bison

Frequently Asked Questions

What is the price of a 2024 Chevrolet Colorado?

The Price of Chevrolet Colorado is $32,195.

What is the Horsepower of the 2024 Chevrolet Colorado

The Horsepower of the 2024 Chevrolet Colorado is 310hp.

What is the Torque of the 2024 Chevrolet Colorado

The Torque of the 2024 Chevrolet Colorado is 430lb-ft.

What is the Wheelsize of the 2024 Chevrolet Colorado?

The Wheel Size of the 2024 Chevrolet Colorado is 17 inches.

What is the Engine Capacity of the 2024 Chevrolet Colorado?

The Engine Capacity of the 2024 Chevrolet Colorado is 2.7L.

What is the Wheelbase of the 2024 Chevrolet Colorado?

The Wheelbase of the 2024 Chevrolet Colorado is 131 inches.

What is the Length of the 2024 Chevrolet Colorado?

The Length of the 2024 Chevrolet Colorado is 212.7 inches.

What is the Width of the 2024 Chevrolet Colorado?

The Width of the 2024 Chevrolet Colorado is 84.4 inches.

What is the Curb Weight of 2024 Chevrolet Colorado?

The Curb Weight of 2024 Chevrolet Colorado is 4940lb.

What is the Transmission of 2024 Chevrolet Colorado?

The Transmission of the 2024 Chevrolet Colorado is 9-Speed Automatic.

Conclusion

In Conclusion, the 2024 Chevrolet Colorado is a flexible midsize pickup truck that comes in a variety of trim levels and engine options to meet a wide range of needs. Its practical interior, combined with its off-road and towing capabilities, make it a good option in the class. In order to make sure they locate the truck that best meets their unique needs, prospective buyers should, therefore, also look into alternative options in this fiercely competitive industry.

2023 Chevrolet Equinox Specs, Price, Features, Mileage (Brochure)

2023 Chevrolet Tahoe Specs, Price, Features, Mileage (Brochure)

2023 CHEVROLET SUBURBAN Specs, Price, Features, Mileage (Brochure)

2023 CHEVROLET BOLT EUV Specs, Price, Features, Mileage (Brochure)

Categories
Renault

2021 Renault Koleos Owner’s Manual

Renault-logo

2021 Renault Koleos Owner’s Manual

With its alluring blend of comfort, style, and utility, the 2021 Renault Koleos establishes its dominance in the mid-size SUV market. This newest model exemplifies Renault’s dedication to combine elegant styling with reliable performance. Its roomy and luxuriously furnished inside meets the needs of families and individuals looking for a car that is both luxurious and practical. The Koleos’s engine options are strong but efficient, making for a responsive and comfortable ride under the hood. The car also has an entertainment system that is easy to use and cutting-edge safety measures that improve both driving enjoyment and safety. In the competitive SUV market, the 2021 Renault Koleos stands out for its exquisite appearance, ample space, and cutting-edge technology.

SEAT BELTS

Always wear your seat belt when travelling in your vehicle. You must also comply with the legislation of the particular country you are in. Incorrectly adjusted or twisted seat belts may cause injuries in the event of an accident. Use one seat belt per person, whether child or adult.
Even pregnant women should wear a seat belt. In this case, ensure that the lap belt is not exerting too much pressure on the abdomen, but do not allow any slack. Before starting, first adjust your driv-ing position, then ask all occupants to adjust their seat belts to ensure optimum protection.

Adjusting your driving position

  • Sit well back in your seat (having first removed your coat or jacket). This is essential to ensure your back is positioned correctly;
  • adjust the distance between the seat and the pedals. Your seat should be as far back as possible while still allowing you to depress the clutch pedal fully. The seatback should be adjusted so that your arms are slightly bent when you hold the steering wheel;
  • adjust the position of your headrest. For the maximum safety, your head must be as close as possible to the headrest;
  • adjust the height of the seat. This adjustment allows you to select the seat position which offers you the best possible view;
  • adjust the position of the steering wheel.

Adjusting the seat belts
Sit with your back firmly against the seatback. Shoulder strap 1 should be as close as possible to the base of the neck but not on it. Lap belt 2 should be worn flat over the thighs and against the pelvis. The belt should be worn so that it is as close as possible to your body, i.e.: avoid wearing heavy clothing or keeping bulky objects under the belts, etc.

Locking
Unwind the belt slowly and smoothly and ensure that buckle 3 locks into catch 5 (check that it is locked by pulling on buckle 3). If the belt jams, allow it to return slightly before attempting to unwind it again. If your seat belt is completely jammed, pull slowly, but firmly, so that just over 3 cm unwinds. Allow it to return slightly before attempting to unwind it again. If there is still a problem, contact an approved dealer.

Driver’s seat belt reminder and, depending on the vehicle-
cle, front passenger seat belt reminder
This lights up on the central display when starting the engine then, if the driver’s or front passenger’s seat belt (if this seat is occupied) is not fastened and the vehicle has reached approximately 12 mph (20 km/h), it flashes and a bleep sounds for around 120 sec-onds.

Note: an object placed on the passenger seat base may activate the warning light in some cases.

Rear seat belt reminder (depending on vehicle)
Warning light ß lights up on the central display, accompanied by graphic 6 on the instrument panel for approximately 60 seconds (30 seconds depending on the vehicle) each time the vehicle is started, a door is opened or a rear seat belt is fastened or unfas-tened. Check that the rear passengers are wearing seat belts and that the number of seat belts shown as fastened cor-responds to the number of rear seat places occupied.

On the graphic 6:

  • marker in green: seat belt fastened;
  • marker in red: seat belt unfastened.

Unfastening
Press button 4 and the seat belt will be rewound by the inertia reel. Guide the belt.

Adjusting the height of the front seat belts
Use button 7 to adjust the seat belt height so that the shoulder strap is worn as shown previously. Press the button 7 and raise or lower the seat belt. Make sure that the seat belt is locked in posi-tion correctly after you have adjusted it.

Rear seat belts 8
The belts are locked, unlocked and adjusted in the same way as the front belts.

SEAT BELTS 
The following information applies to the vehicle’s front and rear seat belts.

  • No modification may be made to the component parts of the originally fitted restraint system: seat belts, seats and their mountings. For special operations (e.g. fitting child seats), contact an authorised dealer.
  • Do not use devices which allow any slack in the belts (e.g. clothes pegs, clips, etc.): a seat belt which is worn too loosely may cause injury in the event of an accident.
  • Never wear the shoulder strap under your arm or behind your back.
  • Never use the same belt for more than one person and never hold a baby or child on your lap with your seat belt around them.
  • The belt should never be twisted.
  • Following an accident, have the seat belts checked and replaced if necessary. Always replace your seat belts as soon as they show any signs of wear.
  • Make sure that the buckle is inserted into the appropriate catch.
  • Ensure that no objects are placed in the area around the seat belt catch as they could prevent it from being properly secured.
  • Make sure the seat belt catch is properly positioned (it should not be hidden away, crushed or flattened by people or objects).
  • When the rear seats are being put back, make sure that the seat belts and buckles are correctly positioned so that they can be used properly.

METHODS OF RESTRAINT IN ADDITION TO THE FRONT SEAT BELTS 

Depending on the vehicle, they are composed of:

  • seat belt inertia reel pretensioners;
  • driver and passenger’s lap belt pretensioners;
  • chest-level load limiter;
  • air bags for the driver and front passenger.

These systems are designed to act independently or together when the vehi-cle is subjected to a frontal impact.

Depending on the severity of the impact, the system can trigger:

  • seat belt locking;
  • the seat belt inertia reel pre tensioner (which engages to correct seat belt slack);
  • the lap belt pretensioners to hold the occupant in his seat;
  • the front airbag.

Pretensioners
The pretensioners hold the seat belt against the body, holding the occupant more securely against the seat, thus in-creasing the seat belt’s efficiency. In the event of a severe frontal impact and if the ignition is switched on, the system may engage the following de-pending on the force of the impact:

  • seat belt inertia reel pretensioner 1 which instantly retracts the seat belt;
  • the lap belt pretensioner 2 for the driver and passenger.
  • Have the entire restraint system checked following an accident.
  • No operation whatsoever is permitted on any part of the system (pretensioners, air bags, computers, wiring) and the system components must not be reused on any other vehicle, even if identical.
  • To avoid incorrect triggering of the system which may cause injury, only qualified personnel from an approved dealer may work on the pretensioner and air bag system.
  • The electric trigger system may only be tested by a specially trained technician using special equipment.
  • When the vehicle is scrapped, contact an approved dealer for disposal of the pretensioner and air bag gas generators.

Load limiter
Above a certain severity of impact, this mechanism is used to limit the force of the belt against the body so that it is at an acceptable level.

Front airbags for driver and passenger
Fitted to the driver and passenger side. The presence of this equipment is indicated by the word “Air bag” on the steering wheel and dashboard (air bag zone A) and, depending on the vehicle, a symbol on the lower section of the windscreen.

Each airbag system consists of:

  • an air bag and gas generator fitted on the steering wheel for the driver and in the dashboard for the front passenger;
  • an electronic unit for system monitoring which controls the gas generator electrical trigger system;
  • a single å warning light on the instrument panel.

The air bag system uses pyrotechnic principles. This explains why, when the air bag inflates, it will generate heat, produce smoke (this does not mean that a fire is about to start) and make a noise upon detonation. In a situation where an air bag is re-quired, it will inflate immediately and this may cause some minor, superficial grazing to the skin or other problems.

Operation
This system is only operational when the ignition is switched on.
In a severe frontal impact, the air bags inflate rapidly, cushioning the impact of the driver’s head and chest against the steering wheel and of the front passen-ger against the dashboard. The air bags then deflate immediately so that the passengers are not in any way hin-dered from leaving the vehicle. This warning light å will light up on the instrument panel when the ignition is switched on and then go out after a few seconds. If it does not light up when the ignition is switched on, or comes on when the engine is running, there is a fault in the system. Contact your approved Dealer as soon as possible. Your protection will be re-duced until this fault is rectified.

Warnings concerning the driver’s air bag

  • Do not modify the steering wheel or the steering wheel boss.
  • Do not cover the steering wheel boss under any circumstances.
  • Do not attach any objects (badge, logo, clock, telephone holder, etc.) to the steering wheel boss.
  • The steering wheel must not be removed (except by qualified personnel from our Network).
  • When driving, do not sit too close to the steering wheel. Sit with your arms slightly bent (see the information on “Adjusting your driving position” in Section 1). This will allow sufficient space for the air bag to deploy correctly and be fully effective.

Warnings concerning the passenger air bag

  • Do not attach or glue any objects (badge, logo, clock, telephone holder, etc.) to the dashboard on or near the air bag.
  • Do not place anything between the dashboard and the passenger (pet, umbrella, walking stick, parcels, etc.).
  • The passenger must not put his or her feet on the dashboard or seat as there is a risk that serious injuries may occur. In general, parts of the body should be kept away from the dashboard (knees, hands, head, etc.).
  • The devices in addition to the front passenger seat belt should be reactivated as soon as a child seat is removed, to ensure the protection of the passenger in the event of an impact.

A REAR-FACING CHILD SEAT MUST NOT BE FITTED TO THE FRONT PASSENGER SEAT UNLESS THE ADDITIONAL RESTRAINT SYSTEMS, I.E. THE PASSENGER AIR BAG, ARE DEACTIVATED. (refer to the information on “Child safety: deactivating/activating the front passenger air bag” in Section 1)

Force limiter
Above a certain severity of impact, this mechanism is used to limit the force of the belt against the body so that it is at an acceptable level.

  • Have the entire restraint system checked following an accident.
  • No operation whatsoever is permitted on any part of the system (air bags, electronic con-trol units, wiring) and the system components must not be reused on any other vehicle, even if iden-tical.
  • Only qualified personnel from our Network may work on the air bags; otherwise the system may trigger accidentally and cause injury.

SIDE PROTECTION DEVICES

Side Airbags
An airbag can be fitted to each front seat, which are deployed on the side of the seat (door side) to protect the oc-cupants in the case of a severe side impact.

Curtain Airbags
These are airbag fitted along the sides of the vehicle in the ceiling which trigger along the front and rear door side win- dows to protect the passengers in case of a severe side impact. Depending on the vehicle, a mark-ing on the windscreen informs you of the presence of additional means of restraint (air bags, pretensioners, etc.) in the passenger compartment.

Warning relating to the side airbag

  • Fitting seat covers: seats equipped with an airbag require covers specifically designed for your vehicle. Contact an approved Dealer to find out if these covers are available. The use of any covers other than those designed for your vehicle (and including those designed for another vehicle) may affect the operation of the airbags and reduce your protection.
  • Do not place any accessories, objects or even pets between the seatback, the door and the internal fittings. Do not cover the seatback with any items such as clothes or accessories. This may prevent the air bag from operating correctly or cause injury when the airbag is deployed.
  • No work or modification whatsoever may be carried out on the seat or internal fittings, except by qualified personnel from an approved Dealer.

ADDITIONAL METHODS OF RESTRAINT
All of the warnings below are given so that the airbag is not obstructed in any way when it is inflated and also to prevent the risk of serious injuries caused by items which may be dislodged when it inflates. The airbag is designed to complement the action of the seat belt. Both the air bags and seat belts are integral parts of the same protection system. It is therefore essential to wear seat belts at all times. If seat belts are not worn, the occupants are exposed to the risk of serious injury in the event of an accident. It may also increase the risk of minor superficial injuries occurring when the airbag is deployed, although such minor injuries are always possible with air bags. If the vehicle should overturn or in the event of a rear impact, however severe, the pretensioners and airbags are not always triggered. Impacts to the underside of the vehicle, e.g. from pavements, potholes or stones, can all trigger these systems.

  • No work or modification whatsoever may be carried out on any part of the airbag system (airbags, pretensioners, computer, wiring harness, etc.), except by qualified Network personnel.
  • To ensure that the system is in good working order and to avoid accidental triggering of the system which may cause injury, only qualified Network personnel may work on the airbag system.
  • As a safety precaution, have the airbag system checked if your vehicle has been involved in an accident, or is stolen or broken into.
  • When selling or lending the vehicle, inform the user of these points and hand over this handbook with the vehicle.
  • When scrapping your vehicle, contact your approved Dealer for disposal of the gas generator(s).

Operating faults
This warning light comes on when the engine is started and then goes out after approximately three se-conds. If it does not come on when the ignition is switched on or if it stays on, there is a fault in the system. Contact your approved Dealer as soon as possible. Your protection will be reduced until this fault is rectified.

FAQ

What type of vehicle is the 2021 Renault Koleos?

The 2021 Renault Koleos is a mid-size SUV.

What engine options are available for the 2021 Koleos?

It typically offers a range of petrol and diesel engines.

Does the Koleos have an all-wheel-drive option?

Yes, the Koleos is available in both front-wheel drive and all-wheel-drive configurations.

What is the fuel efficiency of the Renault Koleos?

Fuel efficiency varies by engine type but is generally competitive within the mid-size SUV segment.

How many passengers can the 2021 Koleos accommodate?

The Koleos can comfortably seat up to five passengers.

Does the 2021 Koleos come with a manual or automatic transmission?

It is available with both manual and automatic transmission options.

What are the key safety features in the 2021 Koleos?

Safety features may include advanced driver assistance systems, multiple airbags, ABS, and stability control.

What is the cargo capacity of the Renault Koleos?

The Koleos offers a spacious boot, which is expandable with foldable rear seats.

Is the 2021 Koleos equipped with modern technology and connectivity?

Yes, it typically includes a modern infotainment system with touchscreen capabilities, navigation, and smartphone integration.

Does the Koleos have a sunroof option?

A sunroof might be available either as standard or as an optional feature in higher trims.

What are the interior features of the Koleos?

The interior features high-quality materials, comfortable seating, climate control, and potentially a digital dashboard in higher trims.

What exterior color options are available for the Koleos?

The Koleos comes in a variety of color options, which vary depending on the market.

Are there any special editions of the 2021 Renault Koleos?

Special editions may be available, offering unique styling and additional features.

What is the warranty period for the Koleos?

The warranty period varies by region but typically includes comprehensive coverage for several years.

How does the Koleos perform in terms of ride and handling?

The Koleos is known for its comfortable ride and stable handling, suitable for both city driving and longer journeys.

Useful Link

2019 Renault Kangoo Z.E User Manual

2022 Renault Kangoo ZE Owner’s Manual

Categories
Renault

2019 Renault Kangoo Z.E User Manual

Renault-logo

2019 Renault Kangoo Z.E User Manual

A major player in the electric utility vehicle industry, the 2019 Renault Kangoo Z.E. provides a greener option for people and companies in need of a van that is both small and functional. With a dependable electric drivetrain that provides a useful range for daily operations, especially in urban settings, this electric version of the well-known Kangoo model highlights Renault’s dedication to sustainable transportation solutions. The Kangoo Z.E. offers the advantages of low operating costs and zero tailpipe emissions, while retaining the roomy and adaptable cargo space of its conventional equivalents. The 2019 Renault Kangoo Z.E. stands out as the perfect option for individuals looking for a green and economical light commercial vehicle thanks to its quiet operation, simple handling, and cutting-edge technology features for improved driving pleasure and efficiency.

CHILD SAFETY: fitting a child seat: general information

Some seats are not suitable for fitting child seats. The diagrams on the following pages show you how to attach a child seat. The types of child seats indicated may not be available. Before using a differ-ent child seat, check with the manufacturer that it can be fitted. Fit the child seat in a rear seat wherever possible. Check that when installing the child seat in the vehicle it is not at risk of coming loose from its base. If you have to remove the headrest, check that it is correctly stored so that it does not come loose under harsh braking or impact. Always attach the child seat to the vehicle even if it is not in use so that it does not come loose under harsh braking or impact.

In the front seat
The laws concerning children travel- ling in the front passenger seat differ in every country. Consult the legislation in force and follow the indications on the diagrams on the following pages.

Before fitting a child seat in this seat (if authorised):

  • lower the seat belt as far as possible;
  • move the seat as far back as possible;
  • gently tilt the seatback away from vertical (approximately 25°);
  • on equipped vehicles, raise the seat base as far as possible.

In all cases, for vehicles fitted with adjustable headrests, lift the headrest on the seat as high as possible so that it does not interfere with the child seat (refer to the information on “Front head- rest” in section 1).

After installing the child seat, when this is possible, you can move the vehicle seat forward if necessary (so as to leave enough space in the rear seats for passengers or other child seats). For a rear-facing child seat, do not let it touch the dashboard or move it to the furthest forward position. Do not change these settings after the child seat is installed.

RISK OF DEATH OR SERIOUS INJURY: before installing a child seat on this seat, check that the airbag has been deactivated (refer to “Child safety: front passenger airbag deactivation/activation” in Section 1).

In the rear seat
A carrycot can be installed across the vehicle and will take up at least two seats. Position the child with his or her feet nearest the door.
Move the front seat as far forward as possible to install a rear-facing child seat, then move back the seat in front as far as it will go, although without allowing it to come into contact with the child seat. For the safety of the child in the forward-facing seat, do not move the seat in front back past the middle of the runner, do not tilt the seatback too far (maximum of 25° ) and raise the seat as much as possible. Check that the forward-facing child seat is resting against the back of the vehicle seat and that the headrest of the vehicle is not obstructing its use.

Front passengerairbag activation
You should reactivate the airbag as soon as you remove the child seat from the front passenger seat to ensure the protection of the front passenger in the event of an impact. To reactivate the airbag: with the vehicle stationary and the ignition off, push and turn the lock 1 to the ON position. With the ignition on, you must check that the warning light 2 is off. The front passenger airbag has been activated.

Operating faults
In the event that the front passenger airbag activation/deactivation system is faulty, child seats must not be fitted to the front seat. Allowing any other passenger to sit in that seat is not recommended.
Contact your approved Dealer as soon as possible.

Steering wheel height adjustment
Pull lever 1 and move the steering wheel to the required position; push lever to lock the steering wheel. Make sure that the steering wheel is correctly locked.

Power-assisted steering
The variable power-assisted steering system is equipped with an electronic control system which alters the level of assistance to suit the vehicle speed. Steering is made easier during parking manoeuvres (for added comfort) while the force needed to steer increases progressively as the speed rises (for enhanced safety at high speeds). For safety reasons, only adjust the steering wheel when the vehicle is station-ary. Never switch off the igni-tion when travelling down-hill, and avoid doing so in normal driving (assistance is not provided). Never leave the steering wheel on full lock when the vehicle is station-ary. With the engine switched off, or if there is a system fault, it is still pos-sible to turn the steering wheel. The force required will be greater.
A noise may be heard when the steering wheel is moved quickly. This is normal.

Trip mileage resetting
With “trip mileage recorder” selected on the display, press button 1 or 2 until the mileage recorder resets to zero.

Resetting the journey parameters (reset button)
With one of the journey parameters se-lected on the display, press button 1 or 2 until the display resets.

Automatic resetting of the journey parameters
Resetting occurs automatically when the maximum value of any of the pa-rameters is exceeded.

Resetting the estimated range
Press and hold one of the buttons 1 or 2. Estimated range is calculated in proportion to the traction battery charge level.

Reading energy consumption values
Some vehicle equipment items con-sume energy: the energy consumed by the vehicle may therefore differ from the energy consumed on the electric counter.

Interpreting some of the values displayed after resetting
Average energy consumption and speed are all the more stable and reli- able as the distance travelled from the last reset is great. The estimated range displayed after reset may not be indicative of your true range (which depends on your driv- ing style): this is because the on-board computer is programmed with a prede- fined consumption over an average of around 18 miles (30 km). This is gradu- ally replaced by your true consumption as the travel distance increases: the display will be all the more stable and reliable as the distance travelled since the last reset is great.

Setting the time

Resetting the clock A
(depending on vehicle) Display the “Clock” page on the instru-ment panel by pressing one of the buttons on stalk 1. After two seconds, the hours and min-utes start flashing. Press and hold the bottom button to enter the hour setting mode. When only the hours flash, press the top button to scroll through them. Press and hold the bottom button to enter the minute setting mode. When only the minutes flash, press the top button to scroll through them. Confirm by pressing and holding the bottom button on stalk 1. Vehicles equipped with a navigation system, radio, etc. Refer to the equipment instructions for the special features.

Exterior temperature
On equipped vehicles, the exterior tem-perature is displayed at A. If it is be-tween -3°C and +3°C, the °C charac-ters flash (signalling a risk of ice). For safety reasons, carry out any adjustments when the vehicle is not being driven. For safety reasons, carry out any adjustments when the vehicle is not being driven.

Exterior temperature indicator
As ice formation is related to climatic exposure, local air humidity and temperature, the external temperature alone is not sufficient to detect ice.

Interior rear view mirror
The interior rear view mirror is adjusta-ble. When driving at night, tilt lever 1 to avoid being dazzled by the headlights of the vehicle behind.

Heated door mirrors
When the engine is started, mirror de-icing is activated with the rear screen de-icing/demisting.

Folding door mirrors
Move button 2 to position D to fold the door mirrors in. To reset them for driv-ing, return to position B. If you fold the door mirrors in manually before resetting them to driving posi-tion B, you must first turn button 2 to position D.

Horn
Press one of points 2.

Direction indicators
Move stalk 1 parallel to the steering wheel and in the direction you are going to turn. When driving on the motorway, the steering wheel is not often turned enough to return the stalk automatically to 0. There is an intermediate position in which the switch may be held when changing lanes. You can also briefly place stalk 1 in the intermediate position, causing the indi-cator light to flash three times. When the stalk is released, it automati-cally returns to 0.

Headlight flasher
Pull stalk 1 towards you to flash the headlights.

Hazard warning lights
Pressing switch 3 illuminates all four direction indicators and the side-mounted indicator lights simul-taneously. It must only be used in an emergency to warn other drivers that you have had to stop in an area where stopping is prohibited or unexpected, or that you are obliged to drive under spe-cial conditions. Depending on the vehicle, the hazard warning lights may come on automati-cally under heavy deceleration. You can switch them off by pressing switch 3.

Manual operation
Turn the end of stalk 1 until the symbol is opposite mark 2. This indicator light on the instrument panel comes on.

Automatic operation
(depending on vehicle) When the engine is started, the dipped beam headlights switch on or off auto-matically depending on the brightness of the light outside, without any action on stalk 1. This function can be deactivated or re-activated.

  • To switch it on: with the ignition on and the vehicle stationary, press and hold button 3 for at least four sec-onds. Depending on the vehicle, the message “lights ON” appears on the instrument panel.
  • To deactivate: with the ignition on and the vehicle stationary, press and hold button 3 for at least four sec-onds. Depending on the vehicle, the message “lights OFF” appears on the instrument panel.

Main beam headlights
With stalk 1 in dipped beam headlights position, move the stalk towards you. The indicator light on the instrument panel then lights up.
To return to the dipped beam head-light position, pull the stalk towards you again.

Before driving at night: check the electrical equip-ment is operating correctly and adjust your headlights (if your vehicle is not carrying its normal load). As a general precau-tion, check that the lights are not obscured (by dirt, mud, snow or ob-jects being transported).

EXTERNAL LIGHTING AND SIGNALS

“See-me-home lighting” function
(depending on vehicle) This function (useful, for example, when opening a gate, garage, etc.) en-ables you to switch the dipped head-lights on momentarily. With the ignition off and the headlights off, pull stalk 1 towards you: the dipped beam headlights come on for approxi-mately sixty seconds. This action may be carried out no more than four times for a maximum lighting period of four minutes. To switch off the lights before they switch off automatically, turn the end of stalk 1 then bring it back to position 0, or switch on the ignition.

Switching off the lights
There are two possibilities:

  • manually, move stalk 1 to its original position;
  • automatically, the lights are switched off when the engine is stopped, the driver’s door is opened or, depending on the vehicle, when the vehicle is locked. In this case, the next time the engine is started the lights will be switched back on according to the position of the ring 2.

Lights-on reminder buzzer
A warning beep sounds when the driver’s door is opened to warn you that the lights are still on..

Front fog lights
(depending on vehicle) The side lights or dipped beam head-lights must be on. Turn ring 5 on stalk 1 until the symbol is opposite mark 4, then release it. This indicator light on the instrument panel comes on.

Rear fog light
The front fog lights and the side lights or dipped beam headlights must be on. Turn ring 5 on stalk 1 until the symbol is opposite mark 4, then release it. This indicator light on the instrument panel comes on. To avoid inconveniencing other road users, remember to switch off the rear fog light when it is no longer needed.

Turning off the fog lights
Turn ring 5 again to position mark 4 op-posite the symbol for the light you wish to switch off. Switching off the exterior lights or the ignition switches off the front and rear fog lights.

HEADLIGHT BEAM ADJUSTMENT
Control knob 1 is used to adjust the height of the headlight beams according to the load. Turn control knob 1 downwards to lower the headlights and upwards to raise them. Unladen, control knob 1 should be at 0. When the vehicle is partially or completely laden, the headlight beam should be set to light the road at be- tween 50 and 100 metres. Then use positions 1 to 4 on the control knob.

Temporary adjustment
Open the bonnet and identify the mark- ing B next to one of the front headlight projectors. For each headlight, using a screw- driver, turn the screw 1 by a quarter turn towards the – symbol to lower the beams. Return to the starting point once your trip is over: turn the screw 1 by a quar- ter turn towards the + symbol to raise the beams.

FAQ

What type of vehicle is the 2019 Renault Kangoo Z.E.?

The Kangoo Z.E. is an all-electric light commercial vehicle.

What is the electric range of the 2019 Kangoo Z.E.?

The range varies, but it’s designed to meet the needs of daily urban operations.

How long does it take to fully charge the Kangoo Z.E.?

Charging times vary based on the charging method, but it offers options for both standard and faster charging.

Does the Kangoo Z.E. have regenerative braking?

Yes, it includes regenerative braking to help extend battery life.

What is the cargo capacity of the Kangoo Z.E.?

It offers a spacious cargo area, similar to the conventional Kangoo.

Is there a passenger version of the Kangoo Z.E.?

Typically, the focus is on cargo transport but check with local dealers for passenger options.

What type of battery does the Kangoo Z.E. use?

It uses a lithium-ion battery pack.

How many seats are in the Kangoo Z.E.?

The standard version typically has two seats, focusing on cargo space.

Does the Kangoo Z.E. support fast charging?

Yes, it is equipped to handle fast charging.

What are the interior features of the Kangoo Z.E.?

The interior is practical and functional, with essential comfort features and a basic infotainment system.

What safety features are included in the Kangoo Z.E.?

Standard safety features likely include airbags, ABS, and electronic stability control.

Are there tax incentives for using the Kangoo Z.E.?

Many regions offer tax incentives for electric vehicles, which would likely apply to the Kangoo Z.E.

Can the cargo area be customized in the Kangoo Z.E.?

Yes, the cargo space is adaptable and can be fitted with different storage solutions.

What is the payload capacity of the Kangoo Z.E.?

It has a competitive payload capacity, though slightly less than petrol/diesel models due to the battery weight.

Is there a warranty specific to the electric battery in the Kangoo Z.E.?

Yes, electric vehicles typically come with a separate warranty for the battery.

Useful Link

2020 Renault Kangoo Z.E Owner’s Manual

2022 Renault Kangoo ZE Owner’s Manual

Categories
Renault

2020 Renault Kangoo Z.E Owner’s Manual

Renault-logo

2020 Renault Kangoo Z.E Owner’s Manual

For the urban business class, the 2020 Renault Kangoo Z.E. presents a compelling blend of efficiency and practicality, extending Renault’s entry into the electric vehicle market. This all-electric variant of the popular Kangoo van meets the increasing need for environmentally friendly modes of transportation, particularly from companies that are trying to lower their carbon impact. Deliveries and small-scale logistics are made easy with the Kangoo Z.E., which has an efficient electric motor and a lithium-ion battery that provide it enough driving range for daily urban operations. All of the Kangoo line’s vast and adaptable cargo capacity is retained, and driving pleasure is quiet and emission-free. For individuals looking for a practical, affordable, and environmentally friendly light commercial vehicle, the 2020 Renault Kangoo Z.E. is a wise option.

METHODS OF RESTRAINT IN ADDITION TO THE FRONT SEAT BELTS

Depending on the vehicle, they will consist of:

  • seat belt pretensioners;
  • front airbags 1 for the driver and front passenger.

These systems are designed to act independently or together when the vehi-cle is subjected to a frontal impact.

Depending on the severity of the impact, the system can trigger:

  • seat belt locking2;
  • the seat belt pre-tensioner (which enables to correct seat belt slack);
  • the front airbag.

Pretensioners
The pretensioners hold the seat belt against the body, holding the occupant more securely against the seat, thus increasing the seat belt’s efficiency. With the ignition on, following a significant frontal impact and depending on the severity of the impact, the system may trigger the seat belt pretensioner which instantly retracts the seat belt.

  • Have the entire restraint system checked following an accident.
  • No operation whatsoever is permitted on any part of the system (pretensioners, airbags, computers, wiring) and the system components must not be reused on any other vehicle, even if identical.
  • To avoid incorrect triggering of the system which may cause injury, only qualified personnel from an approved dealer may work on the pretensioner and airbag system.
  • The electric trigger system may only be tested by a specially trained technician using special equipment.
  • When the vehicle is scrapped, contact an approved dealer for disposal of the pretensioner and air bag gas generators.

Driver and passenger front airbags
They are fitted to the front seats on the driver’s side and, depending on the vehicle, on the passenger’s side as well. Depending on the vehicle, the presence of this equipment is indicated by the word “airbag” on the steering wheel and dashboard (airbag zone A) and a symbol on the lower section of the windscreen.

Each airbag system consists of:

  • an airbag and gas generator fitted on the steering wheel for the driver and in the dashboard for the front passenger;
  • an electronic unit for system monitoring which controls the gas generator’s electrical trigger system;
  • a single indicator light å on the instrument panel;
  • remote sensors.

Operation
This system is only operational when the ignition is switched on.
In a severe frontal impact, the airbags inflate rapidly, cushioning the impact of the driver’s head and chest against the steering wheel and of the front passenger against the dashboard. The airbags then deflate immediately so that the passengers are not in any way hindered from leaving the vehicle.

Load limiter
Above a certain severity of impact, this mechanism is used to limit the force of the belt against the body so that it is at an acceptable level. The airbag system uses pyrotechnic principles. This explains why, when the airbag inflates, it will generate heat, produce smoke (this does not mean that a fire is about to start) and make a noise upon detonation. In a situation where an airbag is required, it will inflate immediately and this may cause some minor, superficial grazing to the skin or other problems.

The following cases trigger the pretensioners or airbags.
In a frontal impact against a rigid (non-deformable) surface at an impact speed equal to or greater than 16 mph (25 km/h). In a frontal impact with another vehicle of an equivalent or higher category, with an impact area equal to or greater than 40%, where the speed of both vehicles is equal to or greater than 25 mph (40 km/h). In a side impact with another vehicle of an equivalent or higher category, at an impact speed equal to or greater than 31 mph (50 km/h).

Warnings concerning the driver’s airbag

  • Do not modify the steering wheel or the steering wheel boss.
  • Do not cover the steering wheel boss under any circumstances.
  • Do not attach any objects (badge, logo, clock, telephone support, etc.) to the steering wheel boss.
  • The steering wheel must not be removed (except by qualified personnel from our Network).
  • Do not sit too close to the steering wheel when driving: sit with your arms slightly bent (see Section 1 “Adjusting your driving position”). This will allow sufficient space for the airbag to deploy correctly and be fully effective.

Warnings concerning the passenger airbag

  • Do not attach or glue any objects (badge, logo, clock, telephone cradle, etc.) to the dashboard in the airbag zone.
  • Do not place anything between the dashboard and the passenger (animal, umbrella, walking stick, parcels, etc.).
  • The passenger must not put his or her feet on the dashboard or seat as there is a risk that serious injuries may be sustained. As a general rule, keep all body parts (knees, hands, head, etc.) away from the dashboard.
  • The devices in addition to the front passenger seat belt should be reactivated as soon as a child seat is removed, to ensure the protection of the passenger in the event of an impact.

A REAR-FACING CHILD SEAT MUST NOT BE FITTED TO THE FRONT PASSENGER SEAT UNLESS THE ADDITIONAL RESTRAINT SYSTEMS, I.E. THE PASSENGER AIR BAG, ARE DEACTIVATED. (Refer to the information on “Child safety: front passenger airbag deactivation/activation” Section 1).

SIDE PROTECTION DEVICES

Side airbags
(depending on the vehicle)
This airbag may be fitted to each of the front seats and is activated at the sides of the seats (door side) to protect the occupants in the event of a severe side impact.

Curtain airbags
(depending on the vehicle)
These airbags may be fitted along the top of each side of the vehicle and are triggered along the front and rear side door windows to protect the passengers in the event of a severe side impact. Depending on the vehicle, a marking on the windscreen informs you of the presence of additional means of restraint (airbags, pretensioners, etc.) in the passenger compartment.

Warnings concerning the side airbag

  • Fitting seat covers: seats equipped with an airbag require covers specifically designed for your vehicle. Contact an authorised dealer to find out if these covers are available. The use of any covers other than those designed for your vehicle (including those designed for another vehicle) may affect the operation of the airbags and reduce your protection.
  • Do not place any accessories, objects or even pets between the seatback, the door and the internal fittings. Do not cover the seatback with any items such as clothes or accessories. This may prevent the airbag from operating correctly or cause injury when the airbag is deployed.
  • No work or modification whatsoever may be carried out on the seat or internal fittings, except by qualified personnel from an approved Dealer.
  • These airbags operate through slits in the front seatbacks (door side): Never place any objects here.

ADDITIONAL METHODS OF RESTRAINT
All of the warnings below are given so that the airbag is not obstructed in any way when it is inflated and also to prevent the risk of serious injuries caused by items which may be dislodged when the air bag inflates. The airbag is designed to complement the action of the seat belt. Both the airbags and seat belts are integral parts of the same protection system. It is therefore essential to wear seat belts at all times. If seat belts are not worn, the occupants are exposed to the risk of serious injury in the event of an accident. It may also increase the risk of minor superficial injuries occurring when the airbag is deployed, although such minor injuries are always possible with airbags.
If the vehicle should overturn or suffer a rear impact, however severe, the pre-tensioners and airbags are not always triggered. Impacts on the underside of the vehicle, eg. from pavements, potholes or stones, can all trigger these systems.

  • No work or modification whatsoever may be carried out on any part of the airbag system (air bags, pretensioners, computer, wiring harness, etc.), except by qualified personnel from an approved Dealer.
  • To ensure that the system is in good working order and to avoid accidental triggering of the system which may cause injury, only qualified Network personnel may work on the airbag system.
  • As a safety precaution, have the airbag system checked if your vehicle has been involved in an accident, or is stolen or broken into.
  • When selling or lending the vehicle, inform the user of these points and hand over this handbook with the vehicle.
  • When scrapping your vehicle, contact your approved Dealer for disposal of the gas generator(s).

Operating faults
This warning light 1 will light up on the instrument panel when the ignition is switched on and then go out after a few seconds.
If it does not come on when the ignition is switched on, or if it comes on when the engine is running, there is a fault with the system (airbags, pretensioners, etc.) in the front and/or rear seats. Contact your approved dealer as soon as possible. Your protection will be reduced until this fault is rectified.

Carrying children
Please ensure that you comply with the legislation of your country. Children, and adults, must be correctly seated and strapped in for all journeys. The children being carried in your vehi-cle are your responsibility. A child is not a miniature adult. Children are at risk of specific injuries as their muscles and bones have not yet finished growing. The seat belt alone would not provide suitable protection. Use an approved child seat and ensure you use it correctly. To prevent the doors from being opened, use the “Child safety” device (refer to the information on “Opening and closing the doors” in Section 1). A collision at 30 mph (50 km/h) is the same as falling a distance of 10 metres. Transporting a child without restraint is the equivalent of allowing him or her to play on a fourth-floor balcony without railings. Never travel with a child held in your arms. In the event of an accident, you will not be able to keep hold of the child, even if you yourself are wearing a seat belt. If your vehicle has been involved in a road accident, replace the child seat and have the seat belts and ISOFIX anchorage points checked.

Driver’s responsibility when parking or stopping the vehicle
Never leave an animal, child or adult who is not self-sufficient alone on your vehicle, even for a short time. They may pose a risk to themselves or to others by starting the engine, activating equipment such as the electric windows or locking the doors. Also, in hot and/or sunny weather, please remember that the temperature inside the passenger compartment increases very quickly. RISK OF DEATH OR SERIOUS INJURY.

Using a child seat
The level of protection offered by the child seat depends on its ability to restrain your child and on its installation. Incorrect installation compromises the protection it offers the child in the event of harsh braking or an impact. Before purchasing a child seat, check that it complies with the regulations of the country you are in and that it can be fitted in your vehicle. Consult an approved dealer to find out which seats are recommended for your vehicle. Before fitting a child seat, read the manual and respect its instructions. If you experience any difficulties during installation, contact the manufacturer of the equipment. Keep the instructions with the seat.

Set a good example by always fastening your seat belt and teaching your child:

  • to strap themselves incorrectly.
  • to always get in and out of the car at the curb, away from busy traffic.

Do not use a second-hand child seat or one without an instruction manual. Check that there are no objects in the vicinity of the child seat which could impede its operation. Never leave a child unattended in the vehicle. Check that your child is always strapped in and that the belt or safety harness used is correctly set and adjusted. Avoid wearing bulky clothing which could cause the belts to slacken. Never let your child put their head or arms out of the window. Check that the child is in the correct position for the entire journey, especially if asleep.

Rear-facing child seats
A baby’s head is, proportionally, heavier than that of an adult and its neck is very fragile. Transport the child in this position for as long as possible (until the age of 2 at the very least). It supports both the head and the neck. Choose a bucket-type seat for best side protection and change it as soon as the child’s head is higher than the shell.

Forward-facing child seats
The child’s head and abdomen need to be protected as a priority. A forward-facing child seat which is firmly attached to the vehicle will reduce the risk of impact to the head. Ensure your child travels in a forward-facing seat with a harness for as long as their size permits.
Choose a bucket-type seat for optimum side protection..

Booster cushions
From 15 kg or 4 years, the child can travel using a booster seat, which will enable the seat belt to be adapted to suit his/her size and shape. The booster seat cushion must be fitted with guides to position the seat belt on the child’s thighs rather than the stomach. It is recommended that you use a seat-back fitted with a belt strap guide which can be adjusted in terms of height to position the seat belt in the centre of the shoulder. It must never rest on the neck or on the arm.
Choose a bucket-type seat for optimum side protection. The are two ways of attaching child seats: via the seat belt or using the  ISOFIX system. Attachment via the seat belt The seat belt must be adjusted to ensure that it is effective in the event of harsh braking or an impact. Ensure that the strap paths indicated by the child seat manufacturer are respected. Always check that the seat belt is correctly fastened by pulling it up, then pulling it out fully whilst pressing on the child seat. Check that the seat is correctly held by moving it from side to side and back to front: the seat should remain firmly fixed. Check that the child seat has not been installed at an angle and that it is not resting against a window.

FAQ

What type of vehicle is the 2020 Renault Kangoo Z.E.?

The Kangoo Z.E. is an all-electric light commercial vehicle.

What is the electric range of the 2020 Kangoo Z.E.?

The range varies but is designed to meet daily urban commercial and delivery needs.

How long does it take to charge the Kangoo Z.E.?

Charging times vary based on the charger, but it supports both standard and faster charging options.

Does the Kangoo Z.E. feature regenerative braking?

Yes, it includes regenerative braking to help extend the battery’s range.

What is the cargo capacity of the Kangoo Z.E.?

It offers a spacious cargo area, comparable to the standard Kangoo model.

Is there a passenger variant of the Kangoo Z.E.?

The main focus is on cargo transport, but some markets may offer a passenger variant.

What type of battery is used in the Kangoo Z.E.?

It uses a lithium-ion battery pack.

How many seats are in the Kangoo Z.E.?

The standard cargo version typically has two seats.

Does the Kangoo Z.E. support fast charging?

Yes, it is equipped with fast charging capabilities.

What are the interior features of the Kangoo Z.E.?

The interior is designed for functionality and practicality, with essential comfort features and a basic infotainment system.

What safety features are included in the Kangoo Z.E.?

Standard safety features likely include airbags, ABS, and electronic stability control.

Are there tax incentives for using the Kangoo Z.E.?

Many regions offer tax incentives for electric vehicles, which would likely apply to the Kangoo Z.E.

Can the cargo area be customized?

Yes, the cargo space is versatile and can be fitted with different storage solutions.

What is the payload capacity of the Kangoo Z.E.?

The payload is competitive within its class, though it may be slightly lower than petrol/diesel versions due to the battery weight.

Is there a warranty specific to the electric battery in the Kangoo Z.E.?

Yes, there is usually a separate warranty for the electric battery.

Useful Link

2022 Renault Kangoo ZE Owner’s Manual

2021 Renault Kangoo Z.E Owner’s Manual

Categories
Renault

2021 Renault Kangoo Z.E Owner’s Manual

Renault-logo

2021 Renault Kangoo Z.E Owner’s Manual

As a key product in the electric light commercial vehicle market, the 2021 Renault Kangoo Z.E. demonstrates Renault’s dedication to providing effective and sustainable urban mobility options. This all-electric version of the well-known Kangoo series is designed to satisfy the demands of companies and consumers looking for a greener solution for their transportation and logistics needs. It has a fair range that is ideal for regular urban deliveries and operations thanks to its strong electric motor and lithium-ion battery pack. The Kangoo Z.E. maintains the roomy and functional design of the original Kangoo, providing plenty of cargo space and guaranteeing a silent, emission-free, and smooth driving experience. For individuals who prioritize eco-friendly transportation options in their personal and business interests, the 2021 Renault Kangoo Z.E. is a compelling option because to its functionality, low operating costs, and environmental awareness.

OPENING AND CLOSING THE DOORS

Opening from the outside
Unlock the door and pull handle 1. For information on unlocking the doors, refer to the information on the “Key, radio frequency remote control: use” in Section 1.

Opening from the inside
Pull handle 2.

Closing from the inside
Pull handle 3.

Note: do not use the handle 2 to close the door.

Lights-on reminder buzzer
A warning beep sounds when the driver’s door is opened to warn you that the lights are still on (to prevent discharge of the 12-volt battery). This warning indicates that a door is open or not properly closed.

Child safety
(depending on the vehicle) At the rear, to prevent the side door from being opened from the inside, move lever 4 using the end of the vehicle key. From the inside, check that the door is correctly locked.

Sliding side door

Opening from the outside
Unlock the door and pull handle 5, then slide the door towards the rear of the vehicle until it locks in position. For information on unlocking the doors, refer to Section 1 “Key, radio frequency remote control: use”.

Opening from the inside
Pull handle 7 and use handle 6 to slide the door towards the rear of the vehicle until it locks in position.

Closing from the inside
Pull handle 5 towards the front of the vehicle until the door is completely closed.

As a safety measure, the sliding side door located on the fuel filler flap side locks when the flap is opened. For more information, refer to the information on the “Central door locking/unlocking” in Section 1.

Recommendations cocerning the sliding side door
The following precautions must be taken when opening and closing the doors or any other open-ing element:

  • Check that the door will not come into contact with any person, animal or object.
  • Only use the handles on the inside and outside of the door to operate it.
  • Take care when opening and closing the door.
  • Take particular care when the vehicle is parked on a slope: open the door with care until it is fully open and latches into its locking position.
  • Before moving off, always ensure that the sliding door is properly closed.
  • Do not use the lower support as a step.

Rear hinged doors

Opening from the outside
Unlock the door and pull handle 8. For information on unlocking the doors, refer to Section 1 “Key, radio frequency remote control: use”.

Do not leave the hinged rear doors open in case of strong winds. Risk of injury.

Opening the doors to the maximum position
For each door, pull handle 9 to release the door check strap. Open the door as far as possible.

Closing manually from the outside
First close the small door and then close the large door. Position each door so that it is almost closed and then slam shut. If the vehicle is parked on the hard shoulder with the tailgate open, the rear lights may be obscured.  You should make other road-users aware of your vehicle by using a warning triangle or other equipment specified by the road traffic regulations of the country concerned.

Rear hinged doors (continued)
Opening from the inside (depending on vehicle) Pull handle 11 and open the door. Pull lever 10 to open the small door.

Closing from the inside
First close the small door and then close the large door. Position each door so that it is almost closed and then slam shut.

Control for locking and unlocking from the inside
This enables all the doors to be locked simultaneously. Lock or unlock the doors by pressing switch 1. If a door or the tailgate is open or not closed properly, the doors and tailgate lock/unlock quickly. Never leave your vehicle with the key inside the vehicle.

Locking the opening elements without the remote control
With the engine and ignition off, the sliding side doors closed and a front door open, press switch 1 for more than five seconds.
Make sure you have your key with you before you leave your vehicle.
When the door is closed, all the doors and tailgate will be locked.
Unlocking from outside the vehicle will only be possible with the key for the driver’s door.

Doors and tailgate status indicator light
With the ignition on, the warning light integrated in switch 1 informs you of the locking status of the opening elements:

  • indicator light on, the doors and tail-gate are locked;
  • indicator light off, at least one door is unlocked.

When you lock the doors, the indicator light remains lit and then goes out. Unlocking the opening elements by pressing the switch 1 releases the vehicle charging cord. If you decide to keep the doors locked when you are driving, remember that it may be more difficult for those assisting you to gain access to the passenger compartment in the event of an emergency.

Manual control

Using the key
Lock or unlock the driver’s door by in-serting the key 3 fully into lock 2, and turning the key. For more information on the remote controls, refer to the information on the “Key, radio frequency remote control: use” in Section 1.

Locking the doors manually
Turn screw 4 with the door open (using the end of the key) and close the door. This means that the doors are then locked from the outside. The doors may then only be opened from inside the vehicle or with the key for the front doors.

Sliding side door (fuel filler cap side)
To prevent the door striking the fuel filler nozzle, a mechanical system locks it when the fuel filler flap is open. When the fuel tank has been filled, re-place the cap in its housing and close the flap. The door can now be used.

AUTOMATIC LOCKING WHEN DRIVING (RAID)
You must first decide if you want to activate this function.

To activate
With the engine running, press and hold button 1 for approximately 5 seconds, until you hear a beep. The indicator light built into the control comes on when the doors are locked.

To deactivate
With the engine running, press and hold button 1 for approximately 5 seconds, until you hear a beep.

Operating principle
When the engine is started, the system automatically locks the doors when the vehicle reaches a speed of approximately 4 mph (7 km/h).

Operating faults
If you notice an operating fault (automatic locking impossible), first check that all doors are correctly locked. If they are correctly locked and the fault is still present, contact an approved Dealer. Also make sure that locking has not been inadvertently deactivated. If necessary, refer to the activation procedure. If you decide to keep the doors locked when you are driving, remember that it may be more difficult for those assisting you to gain access to the passenger compartment in the event of an emergency.

FRONT HEADRESTS

To raise the headrest
Pull it upwards to the required height.

To lower the headrest
Pull the tab 2 forwards, gently lift the headrest to unlock it and guide it down to the required height.

To remove the headrest
Raise it to its highest position. Press button 1 and lift the headrest to release it.

To refit the headrest
First, check that the headrest rods are clean and correctly aligned.
Pull the tab 2 forwards. Insert the headrest rods in the holes, with the notches facing forwards (tilt the seat backwards if necessary). Guide the headrest down to the desired height. The headrest is an important safety component: ensure that it is in place and in the correct position.  The distance between your head and the headrest should be as small as possible. The top of your head should be in line with the top of the headrest.

To raise the headrest
Pull it upwards to the required height.

To lower the headrest
Press button 3 and guide the headrest down to the desired height.

To remove the headrest
Raise it to its highest position. Press button 4 and lift the headrest to release it.

Note: when the headrest is removed, take care not to change the positions of the rods.

To refit the headrest
If the setting of the rods has been altered, pull them fully upwards. Take care to ensure they are clean and correctly aligned and, if there are any problems, check that the notches are facing forwards. Insert the headrest rods into the holes (tilt the seatback backwards if necessary). Lower the headrest until it locks, press button 3 and lower the headrest as far as possible. The headrest is an important safety component: ensure that it is in place and in the correct position. The distance between your head and the headrest should be as small as possible. The top of your head should be in line with the top of the headrest.

To raise the headrest
Pull it upwards to the required height.

To lower the headrest
Press tab 5 and guide the headrest down to the desired height.

To remove the headrest
Raise it to its highest position. Press tabs 5 and 6 then lift the headrest to re-lease it.

Note: when the headrest is removed, take care not to change the positions of the rods.

To refit the headrest
Press tab 5. Insert the headrest rods in the holes with the notches facing forward, and guide the headrest down to the re-quired height.

The headrest is an impor-tant safety component: ensure that it is in place and in the correct position. The distance between your head and the headrest should be as small as possible. The top of your head should be in line with the top of the headrest.

To move forwards or backwards
Depending on the seat, lift bar 1 or handle 4 to release it. Release the handle at the desired position and make sure that it is locked.

Adjusting the height of the driver’s seat
Move lever 3 as many times as necessary:.

  • upwards to raise the seat,
  • downwards to lower the seat.

To tilt the seatback
Depending on the seat, lower or lift lever 2 and tilt the seatback until it reaches the required position.

Heated seats
Ignition switch to a position other than the “Stop and steering lock” position St, press switch 5, an indicator light will come on.

Operating faults
(depending on vehicle) If the sliding side door does not work, lower handle 6, hold it while the seat-back tilts and slide the seat forwards. To place the seat into the comfort posi-tion, slide it rearwards. Adjust the seat and make sure that it is correctly locked. For safety reasons, carry out any adjustments when the vehicle is not being driven. To avoid all risk of injury, ensure that nobody is in the proximity of the moving parts. When moving the seat, make sure that nothing inter-feres with the moving parts and their locking.

SWIVELLING PARTITION

To rotate the partition

  • Unlock the seat base by moving handle 1 downwards;
  • lift the front passenger seat base vertically (arrow);
  • lower headrest 2 to its lowest setting;
  • unlock the seatback by moving handle 1 downwards again and position the seatback horizontally. To make the manoeuvre easier, rotate the headrest 2 ;
  • unlock the swivelling section by lift-ing catch 3;
  • reposition the seat base, proceeding in reverse order.
  • Pivot the moving section 90 degrees, lock it at point 5 and lower catch 3.

Note: before refitting the swivelling section in its original position, check that locking point 4 is clean.

When moving the swivelling partition, ensure the seat belt is not dam-aged. Hold it aside when you rotate the partition. Maximum weight on the seat in table position is 80 kg. The weight must be evenly distributed. The swivelling section must always be locked when the vehicle is driven. Risk of injury.

SEAT BELTS 
Always wear your seat belt when travelling in your vehicle. You must also comply with the legislation of the particular country you are in. Make sure that the rear bench seat is securely locked in position so that the rear seat belts will operate efficiently. Refer to the information on the “Rear bench seat: functions” in Section 3. Seat belts which are incor-rectly adjusted or twisted may cause injuries in the event of an accident. Use one seat belt per person, whether child or adult.
Even pregnant women should wear a seat belt. In this case, ensure that the lap belt is not exerting too much pressure on the abdomen, but do not allow any slack. Before starting, first adjust your driv-ing position, then ask all occupants to adjust their seat belts to ensure optimum protection.

Adjusting your driving position

  • Sit well back in your seat (having first removed your coat or jacket). This is essential to ensure your back is positioned correctly;
  • Adjust the distance between the seat and the pedals. Your seat should be as far back as possible while still allowing you to fully de-press the pedals. The seatback should be adjusted so that your arms are slightly bent when you hold the steering wheel;
  • adjust the position of your head-rest. For maximum safety, your head must be as close as possible to the headrest;
  • adjust the height of the seat. This adjustment allows you to select the seat position which offers you the best possible view;
  • adjust the position of the steering wheel.

Adjusting the seat belts
Sit with your back firmly against the seatback. The shoulder strap 1 should be as close as possible to the base of the neck but not on it. The lap belt 2 should be worn flat over the thighs and against the pelvis. The seat belt must be worn as close to the body as possible. E.g.: avoid wear-ing heavy clothing or keeping bulky ob-jects under the belts, etc.

Locking
Unwind the belt slowly and smoothly and ensure that buckle 3 locks into catch 5 (check that it is locked by pull-ing on buckle 3). If the belt jams, allow it to return slightly before attempting to unwind it again. If your seat belt is completely jammed, pull slowly, but firmly so that just over 3 cm unwinds. Allow it to return slightly before attempting to unwind it again. If there is still a problem, contact an ap-proved dealer.

™ Front seat belt reminder warning light
It remains on when the engine is started if your seat belt is not fatened. When the vehicle reaches a speed of 12 mph (20 km/h), the warning light flashes and a buzzer sounds. Then, the beep sounds at a low volume for 30 seconds, then at a high volume for 90 seconds.

Unfastening
Press button 4 and the seat belt will be rewound by the inertia reel. Guide the belt.

NB: an object placed on the passenger seat base may activate the warning light in some cases.

FAQ

What type of vehicle is the 2021 Renault Kangoo Z.E.?

The Renault Kangoo Z.E. is an all-electric light commercial vehicle.

What is the electric range of the 2021 Kangoo Z.E.?

The range varies but is designed to be sufficient for typical daily urban commercial use.

How long does it take to fully charge the Kangoo Z.E.?

Charging time varies based on the type of charger, but it offers options for both standard and faster charging.

Does the Kangoo Z.E. feature regenerative braking?

Yes, like most electric vehicles, it includes regenerative braking to help extend battery life.

What is the cargo capacity of the Kangoo Z.E.?

The Kangoo Z.E. offers a spacious and adaptable cargo area, similar to the conventional Kangoo.

Is there a passenger variant of the Kangoo Z.E.?

The focus is mainly on cargo transport, but regional variations might offer a passenger variant.

What type of battery is used in the Kangoo Z.E.?

It uses a lithium-ion battery pack.

How many seats are in the Kangoo Z.E.?

It typically has two seats, as it’s primarily designed for cargo transport.

Does the Kangoo Z.E. support fast charging?

Yes, it is equipped to handle fast charging for quicker recharge times.

What are the interior features of the Kangoo Z.E.?

The interior is practical and functional, with basic comfort features and a modern infotainment system.

What safety features are included in the Kangoo Z.E.?

Standard safety features likely include airbags, ABS, and electronic stability control.

Are there tax incentives for using the Kangoo Z.E.?

Many regions offer tax incentives or benefits for electric vehicles, which would likely apply to the Kangoo Z.E.

Can the cargo area be customized?

Yes, the cargo space is versatile and can be fitted with different storage solutions for business needs.

What is the payload capacity of the Kangoo Z.E.?

It has a competitive payload capacity, though slightly less than petrol/diesel models due to the battery’s weight.

Is there a warranty specific to the electric battery in the Kangoo Z.E.?

Yes, electric vehicles typically come with a separate battery warranty.

Useful Link

2022 Renault Kangoo ZE Owner’s Manual

2021 Renault Kangoo User Manual

Categories
Blogs

2024 Chevrolet Blazer Review, Specs, Price and Mileage (Brochure)

2024 Chevrolet Blazer Review, Specs, Price and Mileage (Brochure)

The 2024 Chevrolet Blazer finds itself in an intriguing mid-size SUV sector that is in the centre of everything. In addition to having an aggressive and sporting appearance and responsive handling to match, it also boasts a roomy cabin with two rows of seats and a sizable cargo compartment. Although the Blazer’s highest trim levels can grow very expensive, the interior materials aren’t up to par, but there are plenty of extra features. The base engine is a four-cylinder turbocharged unit with front-wheel drive as standard and all-wheel drive as optional. The optional V-6 engine has a nice sound and is rather powerful. Nevertheless, the Blazer falls short of being the Camaro of SUVs, and its unique personality doesn’t fully compensate for its lack of sophistication when compared to competitors like the Jeep Grand Cherokee and Honda Passport.

2024-Chevrolet-Blazer-Review-Specs-Price-and-Mileage-(Brochure)-Img

Pricing

Trims Price
2LT $37,795
3LT $41,695
RS $45,195
Premier $45,900

Colours

2024-Chevrolet-Blazer-Review-Specs-Price-and-Mileage-(Brochure)-Colors

Specifications

Engine

A 228-hp turbocharged 2.0-liter four-cylinder engine is standard on the Blazer, but a 308-hp 3.6-liter V-6 engine is available as an option. Both come equipped with either front-wheel drive or all-wheel drive and a nine-speed automatic transmission. The turbo-four, front-drive model offers enough power for both city and highway driving. On the other hand, the V-6 accelerates quickly and gives you more assurance when passing on the freeway. When a driver needs to merge onto a crowded highway or pass slower-moving traffic, the latest Blazer RS we tested pleased with its short passing manoeuvre times. It reached 60 mph in 6.6 seconds. While the V-6 model can tow up to 4500 pounds, the four-cylinder model can only tow up to 1500 pounds. The Chevrolet bow tie-wearing crossover that drives the best is the Blazer, thanks to its precise steering and calm demeanor under pressure. With its unique suspension and steering setup, the RS variant in particular is exceptionally quick and confident on winding roads. Nevertheless, driving the Blazer isn’t as enjoyable as its looks would imply. Compared to the RS model, which rides on massive 21-inch wheels and thuds over uneven terrain, the normal 18-inch wheel and tire combination offers a quieter and more comfortable ride. Fortunately, both models stay silent at highway speeds and on level terrain. Our Blazer RS test car’s solid brake pedal responded to our inputs right away, and it took an amazing 165 feet for the brakes to stop it from 70 mph.

Specification 2LT 3LT RS Premier
2.0L Turbo 4-cylinder engine (Standard) Standard Standard Not Available Standard
3.6L V6 engine (Not Available) Not Available Available Standard Available
9-speed automatic transmission for 2.0L Turbo engine (Standard) Standard Standard Not Available Standard
9-speed automatic transmission for 3.6L engine (Not Available) Not Available Available Standard Available

Mechanical

Specification 2LT 3LT RS Premier
155-amp alternator (Not Available) Not Available Available Standard Available
170-amp alternator (Standard) Standard Standard Available Standard
2.0L Turbo 4-cylinder engine (Standard) Standard Standard Not Available Standard
3.47 axle ratio (Standard) Standard Standard Not Available Standard
3.49 axle ratio (Not Available) Not Available Available Standard Available
3.6L V6 engine (Not Available) Not Available Available Standard Available
4-wheel antilock disc brakes (Standard) Standard Standard Standard Standard
7 airbags (Standard) Standard Standard Standard Standard
9-speed automatic transmission for 2.0L Turbo engine (Standard) Standard Standard Not Available Standard
9-speed automatic transmission for 3.6L engine (Not Available) Not Available Available Standard Available
Advanced twin clutch all-wheel drive system (Not Available) Not Available Not Available Not Available Not Available
All-wheel drive (Not Available) Not Available Not Available Not Available Not Available
Automatic Stop/Start (Standard) Standard Standard Standard Standard
Automatic Stop/Start disable switch (Standard) Standard Standard Standard Standard
Capless fuel fill (Standard) Standard Standard Standard Standard
Driver Mode Selector (Standard) Standard Standard Standard Standard
Dual-outlet exhaust with circular bright tips (Standard) Standard Standard Not Available Not Available
Dual-outlet exhaust with rectangular bright tips (Not Available) Not Available Not Available Standard Not Available
Dual-outlet exhaust with rectangular bright tips integrated into fascia (Not Available) Not Available Not Available Not Available Standard
Electronic parking brake (Standard) Standard Standard Standard Standard
Engine air filtration monitor (Standard) Standard Standard Standard Standard
Engine block heater (Available) Available Available Available Available
Front Pedestrian Braking (Standard) Standard Standard Standard Standard
Front-wheel drive (Standard) Standard Standard Standard Standard
GVWR, 6001 lbs. (2722 kg) (Standard) Standard Standard Standard Standard
Heavy-duty cooling system (Not Available) Not Available Available Available Available
Hitch Guidance (Available) Available Available Available Available
Hitch View (Not Available) Not Available Available Available Available
Ride and Handling suspension (Standard) Standard Standard Standard Standard
Road emergency tool kit (Standard) Standard Standard Standard Standard
StabiliTrak, electronic stability control system with traction control (Standard) Standard Standard Standard Standard
Trailering equipment (Available) Available Available Available Available

Exterior

Specification 2LT 3LT RS Premier
‘Hit The Road’ Package (Available) Available Available Available Available
18″ 265/60R18 all-season blackwall tires (Standard) Standard Standard Not Available Not Available
18″ Grazen Metallic aluminum wheels (Standard) Standard Standard Not Available Not Available
18″ High Gloss Black painted aluminum wheels (Available) Available Available Not Available Not Available
18″ compact spare tire (Standard) Standard Standard Standard Standard
18″ spare steel wheel (Standard) Standard Standard Standard Standard
20″ Bright Silver aluminum wheels (Available) Available Available Not Available Not Available
20″ Chrome aluminum wheels (Available) Available Available Not Available Available
20″ Gloss Black aluminum wheels (Available) Available Available Not Available Available
20″ Gloss Black aluminum wheels (Available) Available Available Available Available
20″ Gloss Black painted aluminum wheels with Red accents (Available) Available Available Not Available Not Available
20″ Medium Android machined-face aluminum wheels (Not Available) Not Available Not Available Not Available Standard
20″ Technical Gray aluminum wheels (Not Available) Not Available Not Available Standard Not Available
20″ all-season blackwall tires (Available) Available Available Standard Standard
21″ High Gloss Black wheels with machined face (Not Available) Not Available Not Available Available Not Available
21″ Triple finish aluminum wheels (Not Available) Not Available Not Available Not Available Available
21″ all-season blackwall tires (Not Available) Not Available Not Available Available Available
Active Aero Grille Shutters (Standard) Standard Standard Standard Standard
Antenna, body-color (Standard) Standard Standard Standard Standard
Arctic Package 1 (Not Available) Not Available Available Not Available Not Available
Arctic Package 2 (Not Available) Not Available Available Not Available Not Available
Automatic on/off headlamps (Standard) Standard Standard Standard Standard
Black Blazer badges with Red outline (Available) Available Available Not Available Not Available
Black Grille Bar Package (Available) Available Available Not Available Available
Black Sport Package (Available) Available Available Not Available Available
Black assist steps (Available) Available Available Available Available
Black center caps (Available) Available Available Not Available Available
Black grille bar (Available) Available Available Not Available Available
Black lug nut and wheel lock kit (Available) Available Available Available Available
Black lug nuts (Available) Available Available Available Available
Black mesh grille with Black header bar (Available) Available Available Not Available Available
Black roof (for two-tone color combinations) (Available) Available Available Available Not Available
Black roof-mounted side rails (Available) Available Standard Standard Not Available
Blazer signature grille (Standard) Standard Standard Not Available Not Available
Body-color door handles (Standard) Standard Standard Standard Not Available
Body-color door handles with chrome accents (Not Available) Not Available Not Available Not Available Standard
Body-color grille bar (Available) Available Available Not Available Not Available
Body-color mirror caps (Standard) Standard Standard Standard Standard
Bowtie-design bodyside fender hash decal (Available) Available Available Not Available Available
Bowtie-design lower bodyside decal (Available) Available Available Available Available
Cargo Package (Available) Available Available Available Available
Checkered flag-design lower bodyside decals (Available) Available Available Available Available
Chevy Safety Assist (Standard) Standard Standard Standard Standard
Chrome center caps (Available) Available Available Not Available Available
Chrome lug nuts (Available) Available Available Not Available Available
Chrome wheel locks (Available) Available Available Available Available
Convenience Package (Available) Available Not Available Not Available Not Available
Deep-tinted glass (Standard) Standard Standard Standard Standard
Driver Confidence II Package (Not Available) Not Available Not Available Available Available
Driver Confidence Package (Available) Available Standard Not Available Not Available
Enhanced Convenience Package (Not Available) Not Available Not Available Available Available
Exterior Decal Package (Available) Available Available Available Available
Floor Liner Package (Available) Available Available Available Available
Front and rear Black bowtie emblems (Available) Available Available Standard Available
Front and rear splash guards (Available) Available Available Available Available
Front intermittent wipers (Standard) Standard Standard Standard Standard
Front license plate bracket (Available) Available Available Available Available
Gloss Black emblem kit (Available) Available Available Not Available Available
Hands-Free Gesture liftgate (Not Available) Not Available Not Available Standard Standard
Heated power auto-dimming outside mirrors with integrated turn signal indicators (Not Available) Not Available Standard Standard Standard
Heated power outside mirrors (Standard) Standard Not Available Not Available Not Available
Hood & liftgate decals (Available) Available Available Available Available
Illuminated Black bowtie emblem (Available) Available Available Available Available
IntelliBeam (Standard) Standard Standard Standard

Interior

Interior, Comfort, and Cargo

2024-Chevrolet-Blazer-Review-Specs-Price-and-Mileage-(Brochure)-Interior

2024-Chevrolet-Blazer-Review-Specs-Price-and-Mileage-(Brochure)-Seating

The Chevy Camaro served as a major design influence for the Blazer’s interior, which has an easy-to-use climate control system with circular air vents beneath the center stack. The temperature can be changed by twisting these vents. Two-tone color scheme and soft-touch plastics are among the visual accents. The more expensive models come with flashier materials and leather surfaces, while the mid-range trims are primarily grayscale in color and feature an excessive number of inferior trim pieces. Desirable features like heated and ventilated front seats, ambient interior lighting, and heated rear seats are available in the Blazer. Our test vehicle’s rear seat featured lots of room for stretching out, which should be comfortable for everyone on long rides, but the front seats had tiny cushions that provided little support. We were able to fit 11 and 26 carry-on suitcases, respectively, with the cargo capacity of 31 cubic feet behind the back seats and 64 with the seats folding. For tiny objects, there are many storage options available, such as smartphone-friendly ledges on the front door panels. In addition, the center console has a sizable cubby at its front, and a roomy bin that lacks organization. With modest door pockets and a container behind the center console, the back seat is less impressive.

Specification 2LT 3LT RS Premier
‘Hit The Road’ Package        
120-volt power outlet Available Available Available Available
2-way adjustable front head restraints Available Available Available Available
2-way adjustable rear head restraints Available Available Available Available
3 Years of OnStar® Remote Access Available Available Available Available
4-way manual front passenger seat Not Available Available Available Available
4.2″ diagonal color Driver Information Center Available Available Not Available Not Available
5-passenger seating Standard Standard Standard Standard
6-speaker audio system Standard Standard Not Available Not Available
6-way power front passenger seat Not Available Standard Standard Standard
8″ diagonal color Driver Information Center Not Available Not Available Standard Standard
8-way power driver seat Standard Standard Standard Standard
Active Noise Cancellation Standard Standard Standard Standard
Adaptive Cruise Control Available Available Available Available
Air filtration system Standard Standard Standard Standard
All-weather floor liners Available Available Available Available
Ambient interior lighting Not Available Not Available Standard Standard
Arctic Package 1 Not Available Available Not Available Not Available
Arctic Package 2 Not Available Available Not Available Not Available
Assist handles Standard Standard Standard Standard
Automatic Emergency Braking Standard Standard Standard Standard
Black Grille Bar Package Available Available Not Available Available
Black Sport Package Available Available Not Available Available
Bluetooth® Standard Standard Standard Standard
Bose® premium 8-speaker audio system Not Available Available Standard Standard
Bright front sill plates Not Available Not Available Not Available Standard
Buckle to Drive Standard Standard Standard Standard
Cargo Package Available Available Available Available
Charging-only USB ports Standard Standard Standard Standard
Chevrolet Connected Access capable Standard Standard Standard Standard
Chevrolet Infotainment 3 Plus system with 10.2″ diagonal HD color touch-screen Standard Standard Not Available Not Available
Chevrolet Infotainment 3 Premium system with connected Navigation and 10.2″ diagonal color touch-screen Not Available Available Standard Standard
Chevy Safety Assist Standard Standard Standard Standard
Collapsible cargo area organizer Available Available Available Available
Convenience Package Available Not Available Not Available Not Available
Cruise control Standard Standard Standard Standard
Cupholders Standard Standard Standard Standard
Digital compass Standard Standard Standard Standard
Driver Confidence II Package Not Available Not Available Available Available
Driver Confidence Package Available Standard Not Available Not Available
Driver and front passenger visors with illuminated mirrors Standard Standard Standard Standard
Dual-zone automatic climate control Standard Standard Standard Standard
Electronic locking glove box Standard Standard Standard Standard
Enhanced Automatic Emergency Braking Available Available Available Available
Enhanced Convenience Package Not Available Not Available Available Available
Exterior Decal Package Available Available Available Available
First Aid Kit Available Available Available Available
Floor Liner Package Available Available Available Available
Foldable cargo organizer Available Available Available Available
Following Distance Indicator Standard Standard Standard Standard
Forward Collision Alert Standard Standard Standard Standard
Front USB data ports and auxiliary input jack with SD Card Reader Not Available Available Standard Standard
Front and rear deluxe carpeted floor mats Standard Standard Standard Standard
Front bucket seats Standard Standard Standard Standard
Front console organizer Available Available Available Available
Front outboard Passenger Sensing System Standard Standard Standard Standard
HD Rear Vision Camera Standard Standard Standard Standard
HD Surround Vision Not Available Available Available Available
Heated driver and front passenger seats Standard Standard Standard Standard
Heated rear outboard seats Not Available Not Available Available Available
Heated steering wheel Not Available Not Available Standard Standard
Highway Safety Kit Available Available Available Available
Horn, dual-note Standard Standard Standard Standard
Inside rearview auto-dimming mirror Available Standard Standard Standard
Inside rearview manual day/night mirror Standard Not Available Not Available Not Available
Integrated cargo liner Available Available Available Available
Interior Protection Package Available Available Available Available
Interior lighting Standard Standard Standard Standard
Jet Black with Red Accents, Perforated Leather-Appointed seat trim Not Available Not Available Available Not Available
Jet Black, Perforated Leather-Appointed seat trim Not Available Available Not Available Not Available
Jet Black, Perforated Leather-Appointed seat trim Not Available Not Available Not Available Available
Jet Black/Maple Sugar, Perforated Leather-Appointed seat trim Not Available Not Available Not Available Available
Jet Black/Medium Gray, Premium Cloth seat trim Available Not Available Not Available Not Available
Jet Black/Nightshift Blue, Perforated Leather-Appointed seat trim Not Available Not Available Available Not Available
Keyless Open and Start Standard Standard Standard Standard
LATCH System Standard Standard Standard Standard
Lane Change Alert with Side Blind Zone Alert Available Standard Standard Standard
Lane Keep Assist with Lane Departure Warning Standard Standard Standard Standard
Manual tilt and telescoping steering column Standard Standard Standard Standard
Memory settings Not Available Not Available Available Available
Midnight/Sport Edition Available Available Not Available Not Available
Not Equipped with Rear Park Assist Available Available Not Available Not Available
OnStar® & Chevrolet Connected Services capable Standard Standard Standard Standard
Power door locks Standard Standard Standard Standard
Power driver seat lumbar control Standard Standard Standard Standard
Power tilt and telescoping steering column Not Available Not Available Available Available
Power windows Standard Standard Standard Standard
Premium all-weather cargo mat Available Available Available Available
Premium all-weather floor mats Available Available Available Available
Rear Camera Mirror Washer Not Available Available Available Available
Rear Camera Mirror with washer Not Available Available Available Available
Rear Cross Traffic Alert Available Standard Standard Standard
Rear Park Assist Available Available Standard Standard
Rear Seat Reminder Standard Standard Standard Standard
Rear air vents Standard Standard Standard Standard
Rear child security door locks Standard Standard Standard Standard
Rear window defogger Standard Standard Standard Standard
Redline Edition Available Available Not Available Not Available
Remote Start Standard Standard Standard Standard
Retractable cargo shade Available Available Available Available
Roadside Safety Package Available Available Available Available
Safety Alert Seat Not Available Not Available Available Available
Seat belts, all seating positions Standard Standard Standard Standard
Seat trim, Perforated Leather-Appointed Not Available Standard Standard Standard
Seat trim, Premium Cloth Standard Not Available Not Available Not Available
Sensor, cabin humidity Standard Standard Standard Standard
SiriusXM® with 360L 3-month Trial Subscription Standard Standard Standard Standard
Sound & Technology Package Not Available Available Not Available Not Available
Sport Package Available Available Available Available
Sport pedal kit Available Available Available Available
Steering wheel, urethane Standard Not Available Not Available Not Available
Storage Optimization Package Available Available Available Available
Teen Driver Standard Standard Standard Standard
Theft-deterrent unauthorized entry system Standard Standard Standard Standard
Tire Fill Alert Standard Standard Standard Standard
Tire Pressure Monitoring System Standard Standard Standard Standard
USB data ports Standard Standard Standard Standard
Umbrella holders Standard Standard Standard Standard
Universal Home Remote Available Standard Standard Standard
Vehicle health management Standard Standard Standard Standard
Ventilated driver and front passenger seats Not Available Not Available Available Available
Vertical cargo net Available Available Available Available
Wi-Fi® hotspot capable Standard Standard Standard Standard
Wireless Apple CarPlay/Wireless Android Auto capability for compatible phones Standard Standard Standard Standard
Wireless Charging Available Available Standard Standard
Wrapped steering wheel Not Available Standard Standard Standard

Connectivity and Entertainment

2024-Chevrolet-Blazer-Review-Specs-Price-and-Mileage-(Brochure)-Entertainment

Every Blazer has a 10.2-inch touchscreen that can be used for wireless charging of compatible phones as well as Apple CarPlay and Android Auto. Although the system’s UI is user-friendly and appealing, distractions might be minimized with the addition of a rotary controller. Standard features on the center console include two USB ports on the front and rear; certain models additionally come with a 120-volt outlet. In addition, the Blazer has an eight-speaker Bose audio system, integrated navigation, and a Wi-Fi hotspot.

Safety

Safety Features 2LT 3LT RS Premier
3 Years of OnStar® Remote Access Standard Standard Standard Standard
7 airbags Standard Standard Standard Standard
Automatic Emergency Braking Standard Standard Standard Standard
Buckle to Drive Standard Standard Standard Standard
Chevrolet Connected Access capable Standard Standard Standard Standard
Enhanced Automatic Emergency Braking Available Available Available Available
First Aid Kit Available Available Available Available
Following Distance Indicator Standard Standard Standard Standard
Forward Collision Alert Standard Standard Standard Standard
Front Pedestrian Braking Standard Standard Standard Standard
Front outboard Passenger Sensing System Standard Standard Standard Standard
HD Rear Vision Camera Standard Standard Standard Standard
HD Surround Vision Not Available Available Available Available
Highway Safety Kit Available Available Available Available
Horn, dual-note Standard Standard Standard Standard
LATCH System Standard Standard Standard Standard
LED Daytime Running Lamps Standard Standard Standard Standard
Lane Change Alert with Side Blind Zone Alert Available Standard Standard Standard
Lane Keep Assist with Lane Departure Warning Standard Standard Standard Standard
Not Equipped with Rear Park Assist Available Available Not Available Not Available
OnStar® & Chevrolet Connected Services capable Standard Standard Standard Standard
Rear Cross Traffic Alert Available Standard Standard Standard
Rear Park Assist Available Available Standard Standard
Rear child security door locks Standard Standard Standard Standard
Safety Alert Seat Not Available Not Available Available Available
Seat belts, all seating positions Standard Standard Standard Standard
StabiliTrak, electronic stability control system with traction control Standard Standard Standard Standard
Teen Driver Standard Standard Standard Standard
Tire Fill Alert Standard Standard Standard Standard
Tire Pressure Monitoring System Standard Standard Standard Standard

Fuel Efficiency

With the regular turbo four, the Blazer can get up to 22 mpg in the city and 29 mpg on the interstate. Up to 20 mpg in the city and 27 mpg on the highway are estimated for the slightly thirstier V-6 version. The all-wheel-drive, V-6 Blazer achieved 24 mpg in our real-world test, but we haven’t tested the four-cylinder version on our 75 mph highway fuel-economy route, which is part of our rigorous testing process. In the same test, the Hyundai Santa Fe and Honda Passport both received 27 mpg. Visit the EPA website to learn more about the Blazer’s fuel efficiency

Fuel Specifications 2LT 3LT RS Premier
Fuel Tank Capacity, Approx (gal) 19.4 19.4 19.4 19.4
EPA Fuel Economy Est – City (MPG) 22.0 22.0 19.0 22.0
EPA Fuel Economy Est – Hwy (MPG) 29.0 29.0 27.0 29.0
Fuel Economy Est-Combined (MPG) 25.0 25.0 22.0 25.0

Dimensions

Dimensions 2LT 3LT RS Premier
Front Head Room (in) 39.80 39.80 39.80 39.80
Front Leg Room (in) 41.00 41.00 41.00 41.00
Front Shoulder Room (in) 59.10 59.10 59.10 59.10
Front Hip Room (in) 55.60 55.60 55.60 55.60
Second Head Room (in) 38.60 38.60 38.60 38.60
Second Leg Room (in) 39.60 39.60 39.60 39.60
Second Shoulder Room (in) 58.60 58.60 58.60 58.60
Second Hip Room (in) 54.20 54.20 54.20 54.20
Wheelbase (in) 113.00 113.00 113.00 113.00
Length, Overall (in) 191.88 191.88 191.88 191.88
Width, Max w/o mirrors (in) 76.70 76.70 76.70 76.70
Height, Overall (in) 67.00 67.00 67.00 67.00
Track Width, Front (in) 66.40 66.40 66.40 66.40
Track Width, Rear (in) 66.20 66.20 66.20 66.20
Min Ground Clearance (in) 7.50 7.50 7.60 7.60
Cargo Area Length @ Floor to Seat 1 (TBD) -TBD- -TBD- -TBD- -TBD-
Cargo Area Length @ Floor to Seat 2 (TBD) -TBD- -TBD- -TBD- -TBD-
Cargo Area Length @ Floor to Seat 3 (TBD) -TBD- -TBD- -TBD- -TBD-
Cargo Area Width @ Beltline (TBD) -TBD- -TBD- -TBD- -TBD-
Cargo Box Width @ Wheelhousings (TBD) -TBD- -TBD- -TBD- -TBD-
Cargo Box (Area) Height (TBD) -TBD- -TBD- -TBD- -TBD-
Liftover Height (TBD) -TBD- -TBD- -TBD- -TBD-
Cargo Volume to Seat 1 (ft³) 64.20 64.20 64.20 64.20
Cargo Volume to Seat 2 (ft³) 30.50 30.50 30.50 30.50
Total Option Weight 0.00 0.00 0.00 0.00
Base Curb Weight (lbs) 3,918 lbs 3,918 lbs 4,079 lbs 3,992 lbs
Maximum Payload Capacity (lbs) 0.00 0.00 0.00 0.00
Passenger Capacity 5 5 5 5
Passenger Volume (ft³) 107.80 ft³ 107.80 ft³ 107.80 ft³ 107.80 ft³

Warranty

Warranty/Maintenance 2LT 3LT RS Premier
Scheduled Maintenance Visit† First Visit: 12 Months/12,000 Miles First Visit: 12 Months/12,000 Miles First Visit: 12 Months/12,000 Miles First Visit: 12 Months/12,000 Miles
Bumper-to-Bumper Limited Warranty† 3 Years/36,000 Miles 3 Years/36,000 Miles 3 Years/36,000 Miles 3 Years/36,000 Miles
Corrosion Limited Warranty† 3 Years/36,000 Miles Rust-Through 6 Years/100,000 Miles 3 Years/36,000 Miles Rust-Through 6 Years/100,000 Miles
Powertrain/Drivetrain Limited Warranty† 5 Years/60,000 Miles Certain commercial, government, and qualified fleet vehicles: 5 years/100,000 miles 5 Years/60,000 Miles Certain commercial, government, and qualified fleet vehicles: 5 years/100,000 miles
Roadside Assistance Program and Available Courtesy Transportation† 5 Years/60,000 Miles Certain commercial, government, and qualified fleet vehicles: 5 years/100,000 miles 5 Years/60,000 Miles Certain commercial, government, and qualified fleet vehicles: 5 years/100,000 miles

Safety and Driver Assistance

See the NHTSA’s overall safety rating and crash test results.

Every Blazer from Chevy comes with standard driver-assistance features like automated high beams, automated emergency braking, and forward-collision warning. The highest trims have the most standard equipment, and there are additional available driver assistance features. Visit the websites of the Insurance Institute for Highway Safety (IIHS) and the National Highway Traffic Safety Administration (NHTSA) for additional details regarding the Blazer’s crash test results. Important safety characteristics consist of:

  • Regular lane-keeping assistance and lane-departure warning
  • Blind-spot detection and rear cross-traffic alert are optional.
  • Adaptive cruise control is available.

Coverage for Maintenance and Warranty

The Blazer comes with the standard Chevrolet warranty, which includes one free maintenance visit in addition to competitive limited and powertrain coverage. It also comes with roadside support for five years or 60,000 miles.

A limited warranty is valid for 36 months or 36,000 miles.
A powertrain warranty is valid for 60,000 miles or five years.
For the first year, complimentary maintenance is provided.

Frequently Asked Questions

What is the price of a 2024 Chevrolet Blazer?

The Price of the 2024 Chevrolet Blazer is $37,795.

What is the Horsepower of the 2024 Chevrolet Blazer?

The Horsepower of the 2024 Chevrolet Blazer is 228hp.

What is the Torque of the 2024 Chevrolet Blazer?

The Torque of the 2024 Chevrolet Blazer is 258lb-ft.

What is the Engine Capacity of the 2024 Chevrolet Blazer?

The Engine Capacity of the 2024 Chevrolet Blazer is 2.0L.

What is the Fuel Consumption of the 2024 Chevrolet Blazer?

The Fuel Consumption of the 2024 Chevrolet Blazer is 25MPG.

What is the Drive type of the 2024 Chevrolet Blazer?

The Drive type of the 2024 Chevrolet Blazer is front-wheel-drive.

What is the Transmission of the 2024 Chevrolet Blazer?

The Transmission of the 2024 Chevrolet Blazer is a 9-speed shiftable automatic.

What is the Wheelsize of the 2024 Chevrolet Blazer?

The Wheel Size of the 2024 Chevrolet Blazer is 18 inches.

What is the Wheelbase of the 2024 Chevrolet Blazer?

The Wheelbase of the 2024 Chevrolet Blazer is 113.0 inches.

What is the Length of the 2024 Chevrolet Blazer?

The Length of the 2024 Chevrolet Blazer is the 191.9inches.

Conclusion

In a lively mid-size SUV sector, the 2024 Chevrolet Blazer is right in the thick of things. Along with a roomy cabin that accommodates two rows of seats and a sizable cargo area, the Blazer boasts a dramatic and sporty outward appearance that is complemented with snappy handling. Although the top-tier Blazer trims can be quite expensive, the interior materials might not be of the greatest caliber, but this is more than made up for with a slew of extra features.

Related Article

2023 Chevrolet Equinox Specs, Price, Features, Mileage (Brochure)

2023 Chevrolet Tahoe Specs, Price, Features, Mileage (Brochure)

2023 CHEVROLET SUBURBAN Specs, Price, Features, Mileage (Brochure)

2023 CHEVROLET BOLT EUV Specs, Price, Features, Mileage (Brochure)

Categories
Fiat

2022 Fiat Panda Lightnings Instructions

fiat-logo

2022 Fiat Panda Lightnings Instructions

The 2022 Fiat Panda Lightnings, which combines style and innovation in a small yet dynamic package, is an exciting new addition to the Fiat family. With its sophisticated appearance, cutting-edge features, and remarkable efficiency, this Panda series version is poised to completely transform urban transportation. The Panda Lightnings meet the needs of contemporary drivers who want their cars to be both efficient and stylish, offering a nimble and environmentally friendly driving experience whether cruising city streets or going on weekend excursions.

EXTERIOR LIGHTS     

The left stalk fig. 20 controls the operation of the headlights, side lights, dipped beam headlights, parking lights, main beam headlights, direction indicators, and “Follow me home” device.

2022 Fiat Panda Lightnings Instructions (4)

The exterior lights can only be switched on when the ignition key is at MAR. The instrument panel and the various dashboard controls will come on with the external lights.

SIDE LIGHTS / DAYTIME RUNNING LIGHTS (DRL)

“Daytime Running Lights”
(for versions/markets, where provided)

With the ignition key turned to MAR and ring nut (A) fig. 20 turned to position  the daytime running lights are automatically activated; the other lights and interior lighting remain off.

SIDE LIGHTS / DIPPED BEAM HEADLIGHTS

With the ignition key turned to MAR, turn the ring (A) fig. 20 to

2022 Fiat Panda Lightnings Instructions (6)

If dipped beam headlights are activated, the daytime running lights switch off and the side lights and dipped headlights switch on. The        warning light switches on in the instrument panel.

PARKING LIGHTS

The side lights, license plate lights and parking lights can only be switched on with ignition key at STOP or removed, by moving ring nut (A) fig. 20 first to position 2022 Fiat Panda Lightnings Instructions (79)and then to position

2022 Fiat Panda Lightnings Instructions (6)

.

The    2022 Fiat Panda Lightnings Instructions (7)warning light switches on in the instrument panel.

To switch off the parking lights, turn the ring (A) from the position  to the position 2022 Fiat Panda Lightnings Instructions (79). Warning light switches off in the instrument panel.

MAIN BEAM HEADLIGHTS

To activate the main beam headlights, with the ring (A) fig. 20 in position  and the ignition device in the MAR position

2022 Fiat Panda Lightnings Instructions (6)

pull the stalk towards the steering wheel beyond the end of travel click. The  warning light switches on in the instrument panel. When the stalk is pulled towards the steering wheel again, beyond the end of travel position, the main beam headlights deactivate, the dipped headlights reactivate and the  warning light switches off.

FLASHING THE HEADLIGHTS

To do this, pull the stalk towards the steering wheel (unstable position), regardless of the position of ring nut (A) fig. 20. The  warning light switches on in the instrument panel.

DIRECTION INDICATORS

Bring the stalk to the (stable) position:

Upwards: activates the right direction indicator;

Downwards: activates the left direction indicator. Warning light  or  will blink on the instrument panel. The direction indicators switch off automatically when the steering wheel is straightened.

“Lane Change” function
If you wish to signal a lane change, place the left stalk in the unstable position for less than half a second. The direction indicator on the side selected will be activated for 5 flashes and then go out automatically.

“FOLLOW ME HOME” DEVICE

This allows the space in front of the vehicle to be lit for a set time.
Activation: with the ignition key at STOP or removed, pull the stalk towards the steering wheel within 2 minutes from when the engine is turned off.
Each time the stalk is moved, the lights stay on for an extra 30 seconds up to a maximum of 210 seconds; then the lights are switched off automatically.

Each time the stalk is operated, the warning light on the instrument panel switches on and the display also shows a message and how long the function will remain active.

The     warning light comes on when the stalk is first moved and stays on until the function is automatically deactivated. Each time the stalk is activated it increases the time that the lights remain on.

Deactivation: keep the stalk pulled towards the steering wheel for more than two seconds.

REAR FOG LIGHTS

To switch on the rear fog lights, press the button  with the ignition device in the MAR position.

The rear fog lights can only be switched on when the dipped beam headlights are on.

With rear fog lights on, the  warning light on the instrument panel will come on at the same time. To switch off the rear fog lights, press the button , switch off the dipped beam headlights or turn the ignition device to the STOP position.

FOG LIGHTS / REAR FOG LIGHTS
(for versions/markets, where provided) The fog lights can be activated only when the dipped beam headlights are on.

To switch on the rear/front fog lights, press the button (A) fig. 21 with the ignition device in the MAR position as follows:

First pressing: front fog lights on;
second press: rear fog lights on;
third pressing: front/rear fog lights off.

With front fog lights on, the  warning light on the instrument panel will come on at the same time.

With rear fog lights on, the  warning light on the instrument panel will come on at the same time.

To switch off the front/rear fog lights, switch off the dipped beam headlights or turn the ignition device to the STOP position.

2022 Fiat Panda Lightnings Instructions (1)

WARNING

  • The daytime running lights are an alternative to the dipped beam headlights for driving during the daytime in countries where it is compulsory to have lights on during the day, and they are also permitted in those countries where this is not obligatory.
  • Daytime running lights cannot replace dipped beam headlights when driving at night or through tunnels. The use of daytime running lights is governed by the Highway Code of the country in which you are driving. Comply with legal requirements.

INTERIOR LIGHTS      

FRONT CEILING LIGHT
Singe-bulb roof light

The lens of ceiling light (A) fig. 22 can be set to three positions:

right side pressed: light always on; left side pressed: light always off; central position: the light switches on/off when the doors are opened/closed.

2022 Fiat Panda Lightnings Instructions (4)

Multi-bulb roof light
(for versions/markets, where provided) Switch (A) fig. 23 is used to switch on/off the ceiling light bulbs. Switch positions (A):
central position (position 1): lights (C) and (D) switch on/ off when the doors are opened/closed;

pressed to the left (position 0): lights (C) and (D) are always switched off;

  • Pressed to the left (position 2): lights (C) and (D) are always switched on.
    The lights switch on/off gradually. Switch positions (B) fig. 23:
  • Central position (position 1): lights (C) and (D) are always switched off;
  • Pressed to the left (position 0): light (C) switches on;
    pressed to the right (position 2): light (D) switches on.

2022 Fiat Panda Lightnings Instructions (5)

WARNING
Before getting out of the car, make sure that both switches are in the central position: when the doors are closed the lights will switch off to avoid draining the conventional battery.
In any case, if the switch is left in the on position, the roof light switches off automatically about 15 minutes after the engine has been switched off.

ROOF LIGHT TIMING

On certain versions, to facilitate getting in/out of the vehicle at night or in poorly-lit areas, two timed modes have been provided.
when getting into the car; when getting out of the vehicle.

REAR CEILING LIGHT WITH REMOVABLE TORCH

(for versions/markets, where provided)
The removable ceiling light: it can only be switched on/off manually by pressing switch (A) fig. 24, with the ignition key in the MAR position.

2022 Fiat Panda Lightnings Instructions (6)

  • Switch (A) can assume three different positions:
  • With the switch in the middle, the light is always off.
  • Switch pushed up (position (1)), light is always on;
  • Switch pushed down (position (2) –

AUTO OFF), light is always off.

TORCH FUNCTION
(for versions/markets, where provided)

FAQs

What type of engine powers the 2022 Fiat Panda Lightnings?

With its electric motor, the Panda Lightnings provide effective and environmentally responsible performance.

What is the estimated driving range on a single charge?

With a roughly 200 mile range on a full charge, it’s ideal for short trips and urban commuting.

How long does it take to charge the Fiat Panda Lightnings?

 The Fiat Panda Lightnings require varying amounts of time to charge; however, with a fast charger, an 80% charge can be achieved in about half an hour.

What are the key features that set the Panda Lightnings apart from its predecessors?

It brings more sophisticated safety features, cutting edge connectivity capabilities, and an attractive exterior design.

Is the interior spacious enough for passengers and cargo?

The Panda Lightnings maximizes interior space despite its small size, offering plenty of room for passengers and a useful cargo area.

Does it come with advanced safety features?

Yes, it has a number of safety features like adaptive cruise control, lane-keeping assistance, and automated emergency braking.

What is the performance like compared to traditional combustion-engine cars?

Because of the electric motor’s instantaneous torque and quick, responsive acceleration, it can maneuver easily in urban driving situations.

Can the Fiat Panda Lightnings be charged at home?

Indeed, you can charge it at home with a regular household outlet, though using a special charging station will speed up the process.

Are there different driving modes available?

Yes, it usually has several driving modes, such as Eco mode for optimal efficiency, to change performance based on various circumstances.

Does it support smartphone integration?

Yes, it typically has seamless connectivity features like Android Auto and Apple CarPlay installed.

What type of warranty is offered with the Panda Lightnings?

It frequently has a manufacturer warranty that lasts for a predetermined amount of time and covers the car and all of its parts, usually including the battery.

Is the Fiat Panda Lightnings eligible for government incentives or rebates?

Depending on the area, it may be eligible for a number of incentives like tax credits or rebates that are meant to encourage the adoption of electric vehicles.

How does the maintenance of an electric car differ from a conventional one?

The battery and routine vehicle inspections are the main areas of maintenance for electric cars, which typically have fewer moving parts and require less care.

Is the Panda Lightnings equipped with regenerative braking?

Yes, the car can recover energy when braking or decelerating thanks to integrated regenerative braking.

Is the Fiat Panda Lightnings available in different color options?

Yes, it typically provides a variety of color options to accommodate different tastes and styling preferences.

Useful Link

View Full PDF : 2022 Fiat Panda Owner’s Manual| Auto User Guide
2022 Fiat Panda Seats Instructions

Categories
Fiat

2022 Fiat Panda Seats Instructions

fiat-logo

2022 Fiat Panda Seats Instructions

The seating configuration of the 2022 Fiat Panda is ergonomic and adaptable, enhancing comfort and functionality for the driver and passengers alike. This model’s cleverly designed seats combine comfort, support, and style to make for a comfortable and enjoyable driving experience for all passengers. The Fiat Panda’s seats are designed to offer the best possible comfort and convenience, whether you’re traveling long distances or through cities, making every ride an enjoyable experience.

FRONT SEATS

Longitudinal adjustment
Lift lever (A) fig. 7 and push the seat forwards or backwards: in the driving position, you should be able to rest your arms on the rim of the steering wheel.

Height adjustment
(for versions/markets, where provided) Pull lever B (B) fig. 7 upward or push downward to reach the desired height.

WARNING
Carry out the adjustment whilst seated in the driver’s seat.

2022 Fiat Panda Seats (8

Backrest angle adjustment
Operate lever (C) fig. 8 until the desired position is reached, then release the lever.

2022 Fiat Panda Seats (9)Lumbar adjustment
(for versions/markets, where provided)
The position of the back against the seat backrest is adjusted by turning knob (D) fig. 9.

2022 Fiat Panda Seats (1)

FRONT SEAT ELECTRIC HEATING

(for versions/markets, where provided) With the ignition key turned to MAR, press button (A) or (B) fig. 10 respectively to turn the function on.
To deactivate the function press the button again

2022 Fiat Panda Seats (2)

MOVING THE FOLDDOWN PASSENGER SEAT
TO TABLE POSITION

(for versions/markets, where provided) Position the seat all back using lever (A) fig. 7 (see “Longitudinal adjustment”), lower the headrest (see the “Head restraints” paragraph), operate lever (C) fig. 8, fold the backrest over the cushion and then release lever (C).

BACKREST POCKET

(for versions/markets, where provided)

  • On some versions the multifunction pocket can be removed from the seat backrest, using the two pullers of the zips in the pocket bottom fig. 11.
  • The removed pocket can be folded and closed with the buttons at its ends.

2022 Fiat Panda Seats (3)

REAR SEATS

Extending the boot

Proceed as follows:
remove the rear shelf; move the seat belts to the side, making sure that they are correctly extended and not twisted; if there is a third rear seat (for versions/markets, where provided), release the central belt, winding the buckle into its housing on the roof panel;
operate the levers at the sides of the rear seats fig. 12 pushing them towards the inside of the vehicle, fold the backrest and then bring the backrest onto the cushion.

Proceed as follows: remove the rear shelf; move the seat belts to the side, making sure that they are correctly extended and not twisted; if there is a third rear seat (for versions/markets, where provided), release the central belt, winding the buckle into its housing on the roof
panel; operate the levers at the sides of the rear seats fig. 12 pushing them towards the inside of the vehicle, fold the backrest and then bring the backrest onto the cushion.

2022 Fiat Panda Seats (4)

Repositioning seat backrests
Move the seat belts to the side, making sure that they are correctly extended and not twisted. Lift up the backrest folded previously until a click is heard for the engagement mechanism.

PRECAUTIONS FOR SITTING CORRECTLY
(for the 1.0 FireFly Hybrid version)

2022 Fiat Panda Seats (6)

The auxiliary lithium battery (A) fig. 13 for the hybrid System is installed under the left front seat.

WARNING

  • All adjustments must be made with the car stationary.
  • If a side bag is fitted, it is dangerous to use seat covers not available from Lineaccessori MOPAR®.
  • After releasing the adjustment lever, always check that the seat is locked on the guides by trying to move it back and forth.
    If the seat is not locked into place, it may unexpectedly slide and cause the driver to lose control of the car.
  • If passengers are seating in the rear seats, remove all potentially dangerous objects which may cause injuries in the event of an accident.
  • When adjusting the left front seat, the auxiliary battery may become available.
    Take care not rest your feet on the auxiliary battery cover to avoid damaging it and to avoid trapping your feet between the seat and the battery.

IMPORTANT

  • The fabric upholstery of the seats has been designed to withstand long-term wear deriving from normal use of the car. Some precautions are however required.
    Avoid prolonged and/or excessive rubbing against clothing accessories such as metal buckles and Velcro strips which, by applying a high pressure on the fabric in a small area, could cause it to break, thereby damaging the upholstery.
  • Before tilting the backrest, remove any objects on the seat cushion.
  • Do not rest your feet on the protective cover of the auxiliary lithium battery under the front left seat to avoid damaging the cover or battery.

FAQs

How many people can the Fiat Panda seat?

Up to five people can fit in the Fiat Panda with ease.

Are the seats adjustable in the Fiat Panda?

 To accommodate varying tastes and guarantee a comfortable driving experience, the front seats are indeed adjustable.

What material are the seats upholstered with in the Fiat Panda?

High-quality fabric is usually used to upholstered the seats, offering comfort and longevity.

Are the rear seats foldable?

The Fiat Panda’s rear seats can be folded down to provide more cargo space when needed.

Does the Fiat Panda offer heated seats?

Heated seats may come standard or as an option on some models. For precise trim information, speak with your dealer.

Are the seats in the Fiat Panda suitable for long drives?

The seats are appropriate for long trips because they were made with comfort in mind.

Are there any lumbar support adjustments available in the Fiat Panda seats?

Although there may not be lumbar support adjustments, the seats are made to offer ergonomic support.

Can child seats be easily installed in the Fiat Panda?

 The Fiat Panda has standard attachment points for child safety seats. Yes.

Are the seats in the Fiat Panda spacious for taller individuals?

 The Panda’s seats are roomy, but taller people might want to try sitting in order to gauge how comfortable they are.

Are leather seats an option in the Fiat Panda?

Select trim levels may offer leather seats as standard equipment or as an optional upgrade. Consult your dealer about the packages that are offered.

Do the rear seats have ISOFIX anchorage points for child seats?

To secure child seats, the rear seats do indeed have ISOFIX anchorage points.

Can the headrests be adjusted in the Fiat Panda seats?

Absolutely, headrests can typically be adjusted to accommodate personal preferences.

Are the seats in the Fiat Panda easy to clean?*

The fabric used for the seats is typically simple to maintain and clean, making maintenance easier.

Do the front seats have armrests in the Fiat Panda?

As an added feature, armrests may be available in some models or trim levels.

Are the seats in the Fiat Panda designed to reduce fatigue on longer journeys?

 The seats are designed to minimize fatigue during long drives by providing comfort and support.

Useful Link

View Full PDF : 2022 Fiat Panda Owner’s Manual| Auto User Guide
2022 Fiat Panda Keys and Smart Key Setup Guide

Categories
Renault

2022 Renault Kangoo ZE Owner’s Manual

Renault-logo

2022 Renault Kangoo ZE Owner’s Manual

The 2022 Renault Kangoo Z.E. (Zero Emission), which offers an all-electric option in the light commercial vehicle market, is a monument to Renault’s dedication to sustainable mobility. The Kangoo Z.E. blends the utility and adaptability of the traditional Kangoo van with the advantages of electric propulsion, making it the ideal vehicle for urban deliveries and companies looking for an environmentally friendly option. It has a strong electric motor and a battery pack with a respectable range, making it ideal for daily use without producing the same pollutants as conventional combustion engines. The Kangoo Z.E. offers a smooth and quiet driving experience while maintaining the large cargo area that has been a characteristic of the Kangoo range. The 2022 Kangoo Z.E. is a dependable and effective utility vehicle that appeals to both environmentally aware enterprises and individuals due to its cheap operating costs, zero exhaust emissions, and ease of driving.

ELECTRIC VEHICLE

Charging connection 3
The vehicle has a charging connection located at the front of the vehicle. In the absence of any protection against overvoltage, you are recommended not to charge the vehicle in stormy weather (lightning, etc.).

Precautions
Avoid charging and parking your vehicle in extreme temperatures (hot or cold). When the vehicle is parked in temperatures lower than around -25°C, the battery cannot be charged. To preserve the service life of your traction battery, avoid parking the vehicle for more than three months with high charge, especially when the weather is very hot. You must charge the traction battery after driving in very cold weather. Otherwise, charging may take a longer period of time or even become impossible.

Recommendations

  • – In extreme heat, favour parking and recharging the vehicle in a shaded/covered location.
    – Charging can be performed in the rain or snow.

Note: If in a snowy environment, remove snow from the vehicle charging area before plugging in or disconnecting. Snow in the socket may block the insertion of the charging cord plug.

The traction battery charging time depends on the amount of energy remaining, the power delivered by the charging terminal and the tem-perature conditions (hot or cold). The information is displayed on the instrument panel during charging. Please see the information on “Displays and indicators” in Section 1. In the event of a problem, we recommend that you replace it with an identical cord. Please see an authorised dealer.

Recharging the traction battery
With the ignition off, lever 6 in gear P and opening elements unlocked:

  • take the charging cord located in the boot of your vehicle;
  • remove it from its storage bag;
  • plug in the end of the cord to the power supply (terminal, domestic plug socket, etc.);
  •  open the charging flap 7;
  •  open valve 9;
  • grab the handle 10;
  • plug in the vehicle cord;
  • make sure you have clicked the charging cable in properly. The ṋ warning light on the instrument panel comes on, and the Z.E. 8 blue warn- ing light comes on, then flashes rapidly.

The charging cord is automatically locked with the vehicle. This will make it impossible to unplug the cord from your vehicle. When charging commences, the hazard warning lights will flash five times. A message on the instrument panel indicates the remaining charging time and the Z.E. 8 warning light flashes slowly. At the end of a full charge, the Z.E. 8 warning light will remain blue then go out after several minutes. You do not need to wait until the charge is at reserve levels to recharge your vehicle. If the Z.E. 8 warning light lights up red, the vehicle cannot start charging; re- start the charging procedure. If the problem persists, change power supply (terminal, etc.) or consult and approved Dealer.

The label 11 on the charging flap re- minds you of the instructions for the opening and closing of the flap:

  • with the vehicle stationary, the valve and the charging flap can be open;
  • when the vehicle is being driven, the valve and the charging flap must be closed.

Precautions to take when removing from the socket

  • Press the button 12 on the radio fre- quency remote control or switch 13 to release the charging cable;
  • grab the handle 10;
  • unplug the charging cable from the vehicle. Warning light ṋ goes out on the instrument panel;
  • close valve 9;
  • close the charging flap 7;
  • unplug the cord from the power supply;
  • store the cord in its storage bag and put away in the boot.

Note: immediately after a long charge of the traction battery, the cable may be hot. Please use the handles.

After pressing the charging cord re- lease button, you will have around 30 seconds to unplug it before it is locked once again. It is imperative to follow the unplug- ging steps in order.

Radio frequency remote control A

  1. Locking all the opening elements.
  2. Unlocking all opening elements and the charging cord.
  3. Coded key for ignition switch, driver’s door and fuel filler cap.

Radio frequency remote control B

  1. Locking all the opening elements.
  2. Unlocking all the opening elements.
  3. Coded key for ignition switch, driver’s door and fuel filler cap.
  4. Locking/unlocking the luggage compartment and, depending on the ve- hicle, the sliding side doors.

Advice 
Avoid leaving the remote control in hot, cold or humid areas. The key must not be used for any function other than those described in the handbook (removing the cap from a bottle, etc.).

Driver’s responsibility when parking or stopping the vehicle
Never leave an animal, child or adult who is not self sufficient alone in your vehicle, even for a short time. They may pose a risk to themselves or to others by starting the engine, activating equipment such as the electric windows or locking the doors, for example. Also, in hot and/or sunny weather, please remember that the temperature inside the passenger compartment increases very quickly. RISK OF DEATH OR SERIOUS INJURY.

Radio frequency remote control operating range
This varies according to the surroundings: take care not to lock or unlock the doors by inadvertently pressing the buttons on the remote control.

Interference
Interference by factors in the immediate vicinity (external installations or the use of equipment operating on the same frequency as the remote control) may affect the operation of the remote control.

Note: if a door is not opened within approximately 2 seconds of the door being unlocked by remote control, the doors will lock again automatically.

For replacement, or if you require an additional remote control.
You must only contact an approved Dealer.

  • To replace a remote control, the vehicle must be taken to an ap-proved Dealer as both the vehi-cle and the remote control are needed to initialise the system.
  • Depending on the vehicle, you have the option of using up to four remote controls.

Remote control unit failure
Make sure that the correct battery type is being used, and that the bat-tery is in good condition and inser-ted correctly. These batteries have a service life of approximately two years. To learn how to change the battery, please refer to the information on the “Key, radio frequency remote control: Batteries” in Section 5.

KEY, RADIO FREQUENCY REMOTE CONTROL

The doors are locked and unlocked using the remote control unit.
It is powered by a battery which must be replaced (refer to the information on the “Key, radio frequency remote con-trol: batteries” in Section 5).

Locking the doors
Remote control A or B Press locking button 1. The hazard warning lights and side indicator lights flash twice to indicate that the doors have locked. If a door or the tailgate is open or not properly shut, the doors and tailgate lock then quickly unlock and the hazard warning lights and side indicator lights do not flash.

Driver’s responsibility when parking or stopping the vehicle
Never leave an animal, child or adult who is not self-sufficient alone in your vehicle, even for a short time. They may pose a risk to themselves or to others by starting the engine, activating equipment such as the electric windows or locking the doors, for example. Also, in hot and/or sunny weather, please remember that the temperature inside the passenger compartment increases very quickly. RISK OF DEATH OR SERIOUS INJURY.

Unlocking the doors
Remote control A or B Press unlocking button 2. Pressing the button briefly unlocks all the doors. A short press on button 3 locks/unlocks the tailgate and, depending on the vehi- cle, the sliding side doors. The hazard warning lights and side in-dicator lights flash once to indicate that the doors have unlocked.

DEADLOCKING

If fitted to the vehicle, this allows the doors to be locked and prevents them from being opened with the interior handles (for example, by breaking the window and then trying to open the doors from the inside).

To activate deadlocking
Press button 1 twice in quick succession. The side indicator lights and hazard warning lights flash five times to indicate that the doors have locked.

To deactivate deadlocking
Unlock the vehicle using button 2. The hazard warning lights and side indicator lights flash once to indicate that the doors have unlocked.

Special feature
For vehicles equipped with deadlock- ing, when the vehicle is charging, every time one of the doors is unlocked, opened or closed, check that charging is still in progress. If not, the charging process needs to be restarted (connecting the cord, pro- gramming, etc.). Refer to the paragraph “Electric vehicle: charging” in section 1.

Opening from the outside
Unlock the door and pull handle 1. For information on unlocking the doors, refer to the information on the “Key, radio frequency remote control: use” in Section 1.

Opening from the inside
Pull handle 2.

Closing from the inside
Pull handle 3.

Note: do not use the handle 2 to close the door.

Lights-on reminder buzzer
A warning beep sounds when the driv- er’s door is opened to warn you that the lights are still on (to prevent discharge of the 12 volt battery). This warning indicates that a door is open or not properly closed.

Child safety
(depending on vehicle)
At the rear, to prevent the side door from being opened from the inside, move lever 4 using the end of the vehicle key. From the inside, check that the door is correctly locked.

Sliding side door

Opening from the outside
Unlock the door and pull handle 5, then slide the door towards the rear of the vehicle until it locks in position. For information on unlocking the doors, refer to Section 1 “Key, radio frequency remote control: use”.

Opening from the inside
Pull handle 7 and use handle 6 to slide the door towards the rear of the vehicle until it locks in position.

Closing from the inside
Pull handle 5 towards the front of the vehicle until the door is completely closed.

As a safety measure, the sliding side door located on the fuel filler flap side locks when the flap is opened. For more information, refer to the information on the “Central door locking/unlocking” in Section 1.

Recommendations concerning the sliding side door
The following precautions must be taken when opening and closing the doors or any other open-ing element:

  • Check that the door will not come into contact with any person, animal or object.
  • Only use the handles on the inside and outside of the door to operate it.
  • Take care when opening and closing the door.
  • Take particular care when the ve-hicle is parked on a slope: open the door with care until it is fully open and latches into its locking position.
  • Before moving off, always ensure that the sliding door is properly closed.
  • Do not use the lower support as a step.

OPENING AND CLOSING THE DOORS

Rear hinged doors
Opening from the outside Unlock the door and pull handle 8. For information on unlocking the doors, refer to Section 1 “Key, radio frequency remote control: use”.

Opening the doors to the maximum position
For each door, pull handle 9 to release the door check strap. Open the door as far as possible.

Closing manually from the outside
First close the small door and then close the large door. Position each door so that it is almost closed and then slam shut.

If the vehicle is parked on the hard shoulder with the tailgate open, the rear lights may be obscured. You should make other road users aware of your vehicle by using a warning triangle or other equipment specified by the road traffic regulations of the country concerned. Do not leave the hinged rear doors open in case of strong winds. Risk of injury.

Opening from the inside
(depending on vehicle) Pull handle 11 and open the door. Pull lever 10 to open the small door.

Closing from the inside
First close the small door and then close the large door. Position each door so that it is almost closed and then slam shut.

FAQ

What type of vehicle is the 2022 Renault Kangoo Z.E.?

The Kangoo Z.E. is an all-electric light commercial vehicle.

What is the electric range of the Kangoo Z.E.?

The range varies depending on usage and driving conditions, but it’s designed to be sufficient for daily urban operations.

How long does it take to charge the Kangoo Z.E.?

Charging times vary based on the type of charger used, with options for both standard and fast charging.

Does the Kangoo Z.E. have regenerative braking?

Yes, it features regenerative braking to help extend the battery’s range.

What is the cargo capacity of the Kangoo Z.E.?

It offers a spacious cargo area, similar to its petrol/diesel counterparts.

Is there a passenger version of the Kangoo Z.E.?

Typically, the Kangoo Z.E. focuses on cargo transport, but check with local dealers for passenger options.

What kind of battery does the Kangoo Z.E. use?

It uses a lithium-ion battery pack designed for efficiency and longevity.

How many seats are in the Kangoo Z.E.?

It generally seats two people, focusing on cargo space, but configurations may vary.

Does the Kangoo Z.E. support fast charging?

Yes, it supports fast charging for quicker battery replenishment.

What are the interior features of the Kangoo Z.E.?

The interior is functional, with a focus on comfort and practicality, and includes a modern infotainment system.

What safety features are included in the Kangoo Z.E.?

It likely includes standard safety features like airbags, ABS, and electronic stability control.

Are there any tax benefits for using the Kangoo Z.E.?

Many regions offer incentives or tax benefits for electric vehicles, which would apply to the Kangoo Z.E.

Can the cargo space in the Kangoo Z.E. be customized?

Yes, the cargo area is versatile and can be outfitted with various storage solutions.

What is the maximum payload of the Kangoo Z.E.?

The payload capacity is competitive within its class, though slightly less than petrol/diesel versions due to battery weight.

Does the Kangoo Z.E. come with a warranty for the battery?

Yes, there is usually a separate warranty for the electric battery.

Useful Link

2021 Renault Kangoo User Manual

2022 Renault Clio User Manual

Categories
Renault

2023 Renault Kangoo E-Tech User Manual

Renault-logo

2023 Renault Kangoo E-Tech User Manual

In the electric light commercial vehicle market, Renault is leading the way with the 2023 Renault Kangoo E-Tech, a vehicle that provides both private and commercial customers with an economical and environmentally friendly option. This electric version of the well-known Kangoo van demonstrates a dedication to environmentally sustainable mobility without sacrificing usefulness or efficiency. It has a cutting-edge electric drivetrain that offers a smooth and quiet ride along with a significant range to accommodate daily activities. The Kangoo E-Tech’s interior was created with functionality in mind, offering a roomy and adaptable cargo area in addition to contemporary technology features for connectivity and comfort. The 2023 Kangoo E-Tech is a great option for anyone looking for an affordable and eco-friendly vehicle for urban logistics and flexible utility needs, as it emits no emissions and has low operating expenses.

ELECTRONIC PARKING BRAKE

Assisted operation
Applying the electronic parking brake With the vehicle stationary, the electronic parking brake can be used to imobilise the vehicle:

  • by pressing the engine start/stop button 1 or by turning the ignition key to the 2 “ON 2” position);
  • when the driver’s seat belt is unfastened;
  • when the driver’s door is opened;
  • when position P is engaged.

In all other instances, e.g. if the engine stalls, the electronic parking brake is not applied automatically. Manual mode must be used. For certain country specific model versions, the assisted brake application function is not activated. Refer to the information on “Manual operation”. To confirm that the electronic parking brake is applied, the message “Parking Brake ON” is displayed, the } warning light appears on the instrument panel and the 3 warning light appears on the 4 switch. After the engine is switched off, indicator light 3 goes out several minutes after the assisted parking brake has been applied and indicator light } goes out when the vehicle is locked.

Assisted operation

Note: in some situations (electronic parking brake failure, manual release of the parking brake, etc.), a beep sounds and the message

“WARNING: Apply Parking Brake” appears on the instrument panel to warn you that the electronic parking brake has been released.

  • with the engine running: when the driver’s door is opened;
  • with the engine switched off (e.g. when the engine stalls): when a front door is opened.

In this case, pull and release switch 4 to apply the assisted parking brake.

Assisted release of the parking brake
The parking brake is released as soon as the vehicle is started and acceleration begins, or when shifting out of gear lever position P.

Manual operation
You can apply the electronic parking brake manually. Manually applying the electronic parking brake Pull switch 4. Warning light 3 and warning light } on the instrument panel light up.

Manually releasing the electronic parking brake
Press the switch 1 without pressing the brake pedals or turn the key 2 to the “ON 2” position to switch on the ignition. Press the brake pedal then press switch 4: indicator light 3 on the switch and indicator light } displayed on the instrument panel go out.

Brief stop
To apply the electronic parking brake manually (when stopping at a red light, or stopping when the engine is running, etc.): pull and release the switch 4. The brake is released as soon as the vehicle is started up again.

Special cases
To park on a slope or while towing a trailer, for example, pull switch 4 for a few seconds to gain the maximum braking.

To park the vehicle without applying the electronic parking brake (if there is a risk of freezing, for example):

  • switch off the engine by pressing the engine start/stop button 1 or by turning the ignition key 2;
  • engage any gear or the P position: the drive wheels will be mechanically locked by the driveshaft;
  • manually release the electronic parking brake.

If the “Electrical fault” or “Check battery” or “WARNING: Braking System” message appears, you must immobilise the vehicle by engaging position P or by pulling switch 4 for approximately 10 seconds.
If the conditions and the slope require it, chock the wheels of the vehicle. Risk of loss of immobilisation of the vehicle. Call an approved Dealer. For safety reasons, the automatic release is deactivated when the driver’s door is open or not shut properly and the engine is running (in order to prevent the vehicle from moving without the driver). The “Release Parking Brake Manually” message appears on the instrument panel when the driver depresses the accelerator. If no lights or sounds are apparent, this indicates a fault in the instrument panel. This indicates that it is essential to stop immediately (as soon as traffic conditions allow). Ensure that the vehicle is correctly immobilised and contact an approved Dealer. Never leave your vehicle without re-engaging P position and switching off the engine. This is because when the vehicle is stationary with the engine running and a gear engaged, the vehicle may begin to move if you accelerate.
There is a risk of accidents. It is therefore essential to immobilise the vehicle by engaging position P. Depending on the slope, check the vehicle.

DRIVING ADVICE, ECO-DRIVING

Consumption in real time depends on vehicle usage conditions, equipment fitted and the user’s driving style. To optimise fuel consumption, please refer to the following advice.

Depending on the vehicle, you will be provided with functions which enable you to lower the energy consumption:

  • charge meter;
  • the driving style indicator;
  • the journey record and eco-driving advice via the multimedia screen;
  • ECO mode, activated by the ECO button.

If fitted on the vehicle, the navigation system provides additional information.

Charge meter
(on the instrument panel)
The charge meter gives the driver a re- al-time view of the vehicle’s energy recovery or consumption.

Blue “Energy recovery” A usage zone
When driving, if you lift your foot off the accelerator pedal or apply the brake, the motor generates electrical current during deceleration, and this energy is used to slow down the vehicle and recharge the traction battery.

Optimum use zone 
Indicates nil consumption.

Green “recommended consumption” B usage zone
The traction battery supplies the elec- trical energy required for the motor to move the vehicle.

“Consumption not recommended” white use zone C
Indicates high energy consumption.

Driving style indicator 1
(depending on the vehicle) Informs you about the driving style adopted in real time. This is shown by indicator light 1. The more petals displayed on 1, the more your driving is flexible and economical. If you regularly monitor this indicator, you will reduce your vehicle’s fuel con- assumption. Please refer to the multimedia instructions for further information.

On the multimedia screen Journey record
Once the engine is switched off, you will see “Journey record” displayed on the multimedia screen 2, enabling you to view information on your last journey.

This indicates:

  • the general score;
  • score evolution;
  • distance without fuel consumption.

Please refer to the multimedia instructions for further information. An overall rating from 0 to 100 is displayed to let you assess your eco driving performance. The higher the rating, the lower the energy consumption. Eco advice is given to help improve your performance. With your favourite journeys saved, you can compare your performance between trips and the performance of other vehicle users.

ECO mode
ECO mode is a function which optimises energy consumption. ECO mode enables you to limit the power and maximum speed. Limiting acceleration enables low fuel consumption in urban and surrounding areas.

Activating the function
The function can be activated by pressing switch 3. The warning light comes on on the instrument panel to confirm activation. While driving, it is possible to leave the ECO mode temporarily in order to improve engine performance. To do this, press the accelerator pedal firmly and fully. ECO mode is reactivated when you take pressure off the accelerator pedal.

Disabling the function
The function can be deactivated by pressing switch 3. The warning light goes out on the instrument panel to confirm deactivation. With ECO mode on, the vehicle speed is limited to approximately 68 mph (110 km/h).

Driving advice and ECO driving Behaviour

  • Speed is expensive;
  • sporty driving uses a lot of fuel: go easy on the throttle;
  • avoid sudden acceleration;
  • brake as little as possible. Anticipate traffic changes by lifting your foot off the accelerator pedal in order to re- cover energy;
  • do not try to maintain the same speed up a hill; accelerate no more than you would on the level. Keep your foot in the same position on the accelerator pedal;
  • bad weather, flooded roads.
    • Do not drive through floods if the water is above the lower edge of the wheel rims.

Obstructions to the driver
On the driver’s side, only use mats that are suitable for the vehicle, attach using the pre-fitted components, and check the fittings regularly. Do not lay one mat on top of another. There is a risk of wedging the pedals

Advice on use

  • Favour the ECO mode.
  • Switch off all electrical devices that are not absolutely necessary.
  • However (safety first), keep your lights on when the visibility is bad (“see and be seen”).
  • Use the air vents. Driving with the windows open at 60 mph (100 km/h) will increase fuel consumption by 4%.
  • For vehicles fitted with air conditioning, it is normal to observe an increase in fuel consumption (especially in city conditions) when it is used. Switch off the air conditioning when it is not required on vehicles fitted with manual air conditioning.

Advice for reducing consumption and therefore helping to preserve the environment:

  • If the vehicle has been parked in the sun, open the doors for a few moments to let the hot air escape before starting the engine.
  • Do not leave an empty roof rack fitted to the vehicle.
  • It is better to fit a trailer for bulky objects.
  • When towing a caravan, fit a wind deflector and adjust it carefully.
  • Avoid using the car for door-to-door calls (short journeys with long waits in between) because the engine never reaches its normal operating temperature.
  • It is advisable to anticipate activation of the heating or air conditioning before using the vehicle when it is charging.

VEHICLE RANGE: recommendations (1/2)
In real usage, the range of an electric vehicle may vary depending on several factors over which you have partial con-trol, which may make a considerable difference to the vehicle range.

These factors are:

  • speed and driving style;
  • type of road;
  • heating level;
  • tyres;
  • use of electrical accessories;
  • vehicle loading.

Speed and driving style
Driving at high speed will significantly reduce your vehicle’s range.
Examples (at a steady speed):

  • reducing the speed from approximately 80 mph (130 km/h) to 68 mph (110 km/h) allows you to save up to around 20% of fuel range;
  • reducing your speed from approximately 56 mph (90 km/h) to 50 mph (80 km/h) allows you to save up to around 10% of fuel range.

A “sporty” driving style reduces your vehicle range: opt for a “lighter” driving style.

Advice:

  • drive at a constant speed;
  • keep an eye on the tools available to you to view the road conditions (charge meter, current consumption, journey record, etc.)
  • adapt your driving style to avoid ex- cessive energy consumption;
  • favour power recovery: anticipate traffic changes by lifting your foot off the accelerator pedal or by braking gradually.

Road type
Do not try to maintain the same speed up a hill, accelerate no more than you would on the level. Keep your foot in the same position on the accelerator pedal.

ENVIRONMENT
Your vehicle has been designed with respect for the environment in mind for its entire service life: during production, use and at the end of its life.

Manufacture
Your vehicle has been manufactured at a factory which complies with a policy to reduce the environmental impact on the surrounding areas (reduction of water and energy consumption, visual and noise pollution, atmospheric emis- sions and waste water; sorting and re- using waste).

Please make your own contribution towards protecting the environment too

  • Worn parts replaced in the course of routine vehicle maintenance (sec- ondary 12 V battery, other batteries, etc.) must be disposed of through specialist organisations.
  • At the end of the vehicle’s service life, it should be sent to approved centres to ensure that it is recycled.
  • In all cases, comply with local legis- lation.

Recycling

Your vehicle is 85% recyclable and 95% recoverable. To achieve these objectives, many of the vehicle components have been de-signed to enable them to be recycled. The materials and structures have been carefully designed to allow these components to be easily removed and reprocessed by specialist companies. In order to preserve raw material re- sources, this vehicle incorporates numerous parts made from recycled plastics or renewable materials (vegetable or animal-derived materials such as cotton or wool).

Operating principle
Each wheel (except for the emergency spare wheel) has a sensor in the inflation valve which periodically measures the tyre pressure. The system displays the current pressures on instrument panel 1 and alerts the driver in the event of insufficient pressure.

Resetting the standard level for the tyre pressures
This should be done:

  • when the standard tyre pressure needs to be changed to adapt to usage conditions (empty, carrying a load, motorway driving, etc.);
  • after swapping a wheel (however, this practice is not recommended);
  • after changing a wheel.

It should always be done after checking the tyre pressure of all four tyres when cold. Tyre pressures must correspond to the current usage of the vehicle (empty, carrying a load, motorway driving, etc.). If the wheels are swapped, the system must be reinitialised. Consult an approved dealer. If the vehicle is equipped with a navigation system, depending on the vehicle, the reset procedure may also be carried out using the multimedia screen: please see the equipment instructions.

FAQ

What type of vehicle is the 2023 Renault Kangoo E-Tech?

The Kangoo E-Tech is an electric light commercial vehicle, also suitable as a multipurpose family car.

What is the range of the Kangoo E-Tech on a single charge?

The exact range varies, but it is designed to offer a substantial range suitable for daily urban operations.

How long does it take to fully charge the Kangoo E-Tech?

Charging times vary based on the charger used, but it offers fast charging capabilities for quick top-ups.

Does the Kangoo E-Tech have regenerative braking?

Yes, like most electric vehicles, it likely features regenerative braking to recover energy during deceleration.

What is the cargo capacity of the Kangoo E-Tech?

It offers a spacious and adaptable cargo area, competitive within its class.

Is the Kangoo E-Tech available in different body styles?

It may be available in multiple configurations, including standard and extended versions for varying cargo needs.

How many passengers can the Kangoo E-Tech accommodate?

The passenger version typically seats up to five, with some configurations offering seating for more.

What kind of interior features does the Kangoo E-Tech offer?

It includes a functional interior with a focus on comfort, modern technology features, and customizable storage solutions.

Does the Kangoo E-Tech come with a warranty specifically for the battery?

Yes, electric vehicles usually have a separate warranty for the battery pack.

Can the Kangoo E-Tech be used for rapid deliveries in urban areas?

Absolutely, its zero emissions and efficient operation make it ideal for urban deliveries.

What safety features are included in the Kangoo E-Tech?

It likely includes standard safety features like airbags, ABS, and modern driver-assist technologies.

Does the Kangoo E-Tech support fast charging?

Yes, it is equipped to support fast charging for convenient and quick battery top-ups.

Is there a telematics system available for fleet management in the Kangoo E-Tech?

Such systems are often available, either as standard or optional features, particularly useful for fleet management.

How does the Kangoo E-Tech’s performance compare to its petrol/diesel counterparts?

It offers smooth and immediate electric power delivery, with performance comparable to or better than traditional engines in its class.

Does the Kangoo E-Tech feature a regenerative braking system?

Yes, it features regenerative braking, which helps to extend the driving range by converting kinetic energy back into stored energy in the battery.

Useful Link

2021 Renault Kangoo User Manual

2022 Renault Clio User Manual

Categories
Fiat

2022 Fiat Panda Keys and Smart Key Setup Guide

fiat-logo

2022 Fiat Panda Keys and Smart Key Setup Guide

The 2022 Fiat Panda is outfitted with several important features that are intended to offer security and convenience. While the smart key system incorporates cutting-edge technology for seamless and effective use, the traditional keys provide standard functionality and permit manual entry into the car. Keyless entry, push-button ignition, and other features that improve driving are all available to drivers with the smart key. Fiat’s dedication to fusing contemporary innovation with functionality in their cars is best demonstrated by these important options.

THE KEYS

MECHANICAL KEY
The metal insert of the key activates: the ignition device, the driver’s side and passenger’s side door locks (for versions/markets where provided) and the luggage compartment lock.

KEY WITH REMOTE CONTROL

(for versions/markets, where provided)
1) 2) 1) 1)
Metal insert (A) fig. 2 of the key operates:

  • The ignition device;
  • The driver side door and, for versions/markets where provided, the passenger side door.

Press button (B) fig. 2 to open/close the metal insert.

2022 Fiat Panda Keys and Smart Key (1)

Press 2022 Fiat Panda Keys and Smart Key (3)button briefly:
unlock doors and boot, timed operation of ceiling lights, two blinks of direction indicators (for versions/markets, where provided).
Briefly press the2022 Fiat Panda Keys and Smart Key (3) button: lock of doors and boot with ceiling lights off and single flash of direction indicators (for versions/markets, where provided).
If one or more door are open, the doors will not be locked. This is indicated by a rapid flashing of the direction indicators (for versions/markets, where provided).
If the boot is open, the doors will not be locked.
When a speed of over 20 km/h is reached, the doors are automatically locked if this specific function was set.
Press the 2022 Fiat Panda Keys and Smart Key 5button: remote opening of the boot and double flashing of the direction indicators.

REQUEST FOR ADDITIONAL KEYS

If you need a new mechanical key or a new key with remote control, go to a Fiat Dealership, taking an ID document and the car ownership documents. The system can recognise up to 8 keys with incorporated remote control

2022 Fiat Panda Keys and Smart Key (2)

To replace the battery, proceed as follows:

  • Press button (A) fig. 3 and open the metal insert (B);
  • Turn screw (C) to2022 Fiat Panda Keys and Smart Key (4 using a fine bit screwdriver;
  • Take out the battery case (D) and replace the battery (E) making sure that polarities are correct;
  • Refit the battery holder (D) inside the key and lock it turning the screw to (C) to2022 Fiat Panda Keys and Smart Key (3)

FAQs

What types of keys come with the 2022 Fiat Panda?

 There are two types of keys included with the 2022 Fiat Panda: traditional keys and a smart key option.

How does the traditional key function?

The conventional key enables physical door unlocking and engine starting to provide entry to the car.

What features does the smart key offer?

The smart key offers push-button ignition, keyless entry, and possibly other features like remote start.

Can I replace a lost traditional key?

You can replace a lost traditional key by getting in touch with an authorized Fiat service center or dealership.

Is it possible to get a spare smart key?

Usually, a Fiat dealership or an approved service center can provide spare smart keys.

How does the keyless entry work with the smart key?

 Keyless entry enables you to unlock the doors just by approaching the car, usually by pushing a button on the door handle.

What’s the range of the smart key’s keyless entry feature?

The range varies, but in general, for the keyless entry to work, it needs to be a few feet away from the car.

Can the smart key system be disabled for security purposes?

While some smart key systems allow you to do so, it’s best to check with the dealership or your car’s manual for more information.

How do I start the engine with the smart key?

To start the engine with the smart key inside the car, you usually press a specific button or turn on the ignition.

Are there any battery concerns with the smart key?

Smart key batteries typically need to be changed on a regular basis. Refer to the vehicle’s handbook for information on battery replacement and life.

Can I program the smart key myself?

Usually done by a dealership or qualified technician, programming a smart key may involve certain steps.

What should I do if my smart key stops working?

 If the smart key isn’t working properly, try changing the battery first. If that doesn’t resolve the problem, ask for help from a Fiat dealership.

Is the smart key system susceptible to hacking or theft?

Smart key systems employ encrypted signals to prevent unauthorized access. Adhere to suggested security procedures.

Can I retrofit my Fiat Panda with a smart key system if it doesn’t have one?

It might be feasible to retrofit a smart key system, but it might be expensive and complicated. For guidance, speak with a Fiat dealership.

Are there any specific precautions to take with the smart key system?

 To ensure the smart key’s longevity and correct operation, keep it out of the water and extreme temperatures.

Useful Link

View Full PDF : 2022 Fiat Panda Owner’s Manual| Auto User Guide
2022 Fiat Panda Seats Instructions

Categories
Renault

2021 Renault Kangoo User Manual

Renault-logo

2021 Renault Kangoo User Manual

The 2021 Renault Kangoo is a light commercial vehicle that is both versatile and functional. Its practical design and economical performance enable it to meet a wide range of business and private demands. This version of the Kangoo gained recognition for having a large and flexible cargo compartment, which made it a popular option for craftsmen and small enterprises. It provided a range of engine choices, including effective gasoline and diesel engines designed for long-distance and city driving. With its user-friendly infotainment system and vital safety features, the 2021 Kangoo also embraced current technology and improved the driving experience in general. The Renault Kangoo, which appealed to consumers looking for a flexible utility vehicle, remained a successful contender in the small van and multipurpose vehicle market thanks to its blend of versatility, dependability, and affordability.

ENGINE OIL LEVEL: general information

It is normal for an engine to use oil for lubrication and cooling of moving parts and it is normal to top up the level between oil changes.
However, contact an approved Dealer if more than 0.5 litres is being consumed every 600 miles (1,000 km) after the running in period.
Oil change frequency: check the oil level from time to time and certainly before any long journey to avoid the risk of damaging your engine.

Reading the oil level
The oil level should be read with the vehicle on level ground, after the engine has been switched off for some time. The dipstick must be used to read the exact oil level and make sure that the maximum level has not been exceeded (risk of engine damage). The instrument panel display only alerts the driver when the oil level is at its minimum.

Minimum oil level display A
If the level is above the minimum level The “OIL LEVEL” message appears on the display, accompanied by squares indicating the level. These squares disappear as the level drops and they are replaced by dashes. To advance to trip computer reading, press button 1 or 2 again. The display only warns the driver if the oil level is at the minimum level. It does not inform the driver that the oil level has exceeded the maximum level as this can only be measured using a dipstick.

Reading the level using the dipstick
Engine switched off:

  • remove the dipstick and wipe with a clean, lint-free cloth;
  • push the dipstick in as far as it will go;
  • take out the dipstick again;
  • read the level: it should never fall below the “mini” mark A and never exceed the “maxi” B mark.

Once the level has been read, push the dipstick in as far as it will go. Before performing any action in the engine com- partment, the ignition must be switched off.

Exceeding the maximum engine oil level
Under no circumstances should maximum filling level B be exceeded: this could damage the engine and the anti-pol- lution system. If the oil level exceeds the maximum level, do not start your vehicle and contact an approved Dealer.

Adding engine oil
Use a funnel or protect the filling neck area to avoid engine oil escaping onto a hot part of the engine compartment or a sensitive part (e.g. electrical components). Fire hazard. Consult your approved Dealer at once if you notice an abnormal or repeated drop in any of the fluid levels. Please note when working close to the engine that it may be hot. In addition, the engine cooling fan may start at any moment. The warning light in the engine compartment reminds you of this.
Risk of injury.

Topping up/filling
The vehicle must be parked on level ground and the engine should be cold (for instance, before the engine is started up for the first time in the day).

  • Unscrew the cap 1;
  • top up the level (as a guide, the ca-pacity between the “MINI” and the “MAXI” reading on the dipstick 2 is 0.33 gal (1.5 litres) depending on the engine); wait for approximately 10 minutes to allow the oil to flow into the engine;
  • check the level using the dipstick 2 (as described above).

Once the operation is complete, ensure that the dipstick is fully inserted, or the cap-type dipstick screwed in completely. Consult your approved Dealer at once if you notice an abnormal or repeated drop in any of the fluid levels. Before performing any action in the engine com- partment, the ignition must be switched off.

Oil change
Service interval: refer to the Maintenance Service Booklet for your vehicle.

Oil change capacity
Please refer to the maintenance document for your vehicle, or contact an authorised dealer. Always check the engine oil level using the dipstick, as explained previously (it should never fall below the “MINI”, or be over the “MAXI” level on the dipstick).

Exceeding the maximum engine oil level
Under no circumstances should the maximum filling level be exceeded: this could damage the engine and the emission control system. If the level exceeds the “MAXI”level, do not start your vehicle, contact an authorised dealer.

Adding engine oil
Use a funnel or protect the filling neck area to avoid engine oil escaping onto a hot part of the engine compartment or a sensitive part (e.g. electrical components). Fire hazard. Please note when work- ing close to the engine that it may be hot. In addition, the engine cooling fan may start at any moment. The warning light in the engine compart- ment reminds you of this. Risk of injury. Never run the engine in an enclosed space as exhaust gases are poisonous.

Engine oil grade
Refer to the Maintenance Service Booklet for your vehicle.

Engine oil change:
if you are changing the oil when the engine is hot, be careful not to scald yourself if the oil overflows.

Filling and/or checking the oil level: when topping up or checking the oil level, ensure that no oil leaks onto the engine components.
Do not forget to properly close the cap and refit the dipstick to prevent any oil spatter on hot engine components.

Brake fluid
This should be checked frequently, and immediately if you notice even the slightest loss in braking efficiency. The level should be read with the engine switched off and on level ground.

Level 1
It is normal for the level to drop as the brake shoes become worn, but it must never drop lower than the “MINI” warning line. If you wish to check the disc and drum wear yourself, you should obtain the document explaining the checking procedure from our network or from the manufacturer’s website. Consult your approved dealer at once if you notice an abnormal or repeated drop in any of the fluid levels. Before performing any action in the engine compartment, the ignition must be switched off.

Topping up
After any operation on the hydraulic circuit, a specialist must replace the fluid. Only use fluids approved by our Technical Department (and taken from a sealed container).

Replacement intervals
Refer to the Maintenance Document for your vehicle. Please note when work- ing close to the engine that it may be hot. In addition, the engine cooling fan may start at any moment. The label in the engine compartment re- minds you of this. Risk of injury.

Coolant
The level when cold should be be-tween the MINI and MAXI marks on the coolant reservoir 2. Top this level up when cold before it reaches the MINI mark. The level should be read with the engine switched off and on level ground. No operations should be carried out on the cooling circuit when the engine is hot.

Checking intervals
Check the coolant level regularly (very severe damage is likely to be caused to the engine if it runs out of coolant). If the level needs to be topped up, only use products approved by our

Technical Department which ensure:

  • antifreeze protection;
  • anticorrosion protection of the cool-ing system.

Replacement intervals
Refer to the Maintenance Document for your vehicle. Consult your approved dealer at once if you notice an abnormal or repeated drop in any of the fluid levels.

BATTERY

Battery 1 does not require any mainte- nance. You should not open it or add any fluid. Depending on the vehicle, a system continuously checks the battery charge status. When the ignition is off, some consumers may also be switched off (dipped beam headlights, radio, ventilation, etc.). On the instrument panel, the “BATTERY MODE : ECONOMY” mes- sage appears when they are switched off. When the level is extremely low, the messages “BATTERY LOW” and “START ENGINE” are displayed.

The charge status of the battery can decrease, especially if you use your vehicle:

  • for short journeys;
  • for driving in town;
  • when the temperature drops, etc.;
  • with the vehicle stopped and the engine off.

Please note when work- ing close to the engine that it may be hot. In addition, the engine cooling fan may start at any moment. The warning light in the engine compart- ment reminds you of this. Risk of injury.

Label A
Observe the indications on the battery:

  • naked flames and smoking forbid- den;
  • eye protection required;
  • keep away from children;
  • explosive materials;
  • please consult the driver’s hand- book;
  • corrosive materials.

Replacing the battery

For your own safety and to ensure the proper oper- ation of the vehicle’s elec- trical equipment (lights, windscreen wipers, ABS etc.), any actions on the battery (removal, dis- connection etc.) must categorically be performed by a qualified specialist. Risk of serious burns or electric shocks. You must respect the replacement intervals (without exceeding them) as stated in the maintenance document. The battery is a specific type. Please ensure it is replaced with the same type. Please contact an approved dealer.

Vehicle fitted with the Stop and Start function
The function will have to be restarted each time the battery is replaced. To restart the function, press and hold the Stop and Start activation/deactivation button 8 until you hear a beep. Before performing any action in the engine com- partment, the ignition must be switched off.

Label A
Open the driver’s door to read it. Tyre pressures should be checked when the tyres are cold. If the tyre pressures cannot be checked when the tyres are cold, increase the pressures from 0.2 to 0.3 bar (or 3 PSI). Never deflate a hot tyre.

Vehicle fitted with a tyre pressure loss warning system
If under-inflated (puncture, low pressure, etc.), the warning light lights up on the instrument panel. See “Tyre pressure loss warning” in Section 2. Vehicle used fully laden (Maximum Permissible All-up Weight) and towing a trailer The maximum speed must be lim- ited to 60 mph (100 km/h) and the tyre pressure increased by 0.2 bar. Refer to the information on “Weights” in Section 6. Risk of tyre blowouts.

  • front tyre pressure when driving (non-motorway), or if less than 4 people occupy the vehicle.
  • rear tyre pressure when driving (non-motorway), or if less than 4 people occupy the vehicle.
  • tyre pressures for the front wheels (motorway) or when driving with a significant load.
  • tyre pressures for the rear wheels (motorway) or when driving with a sig- nificant load.

TYRE PRESSURE WHEN cold 
Tyre dimensions
The following dimensions are specific to the vehicle:

  • 185/70 R 14 88 T;
  • 195/65 R 15 91 T;
  • 195/65 R 15 95 T;
  • 205/55 R 16 91 H.

Tyre safety and use of snow chains Refer to the information on “Tyres” in Section 5 for the servicing conditions and, depending on the version, the use of chains. For your safety, please respect the speed limit. When they need to be replaced, only tyres of the same make, size, type and profile should be used on a single axle. They must: either have a load capacity and speed rating at least equal to those of the original tyres, or conform to those recommended by an authorised dealer. Failure to heed these instructions could endanger your safety and affect your vehicle’s roadworthiness. Risk of loss of control of the vehicle.

Brake fluid
This should be checked frequently, and immediately if you notice even the slightest loss in braking efficiency. The level should be read with the engine switched off and on level ground.

Level 1
It is normal for the level to drop as the brake shoes become worn, but it must never drop lower than the “MINI” warning line. If you wish to check the disc and drum wear yourself, you should obtain the document explaining the checking procedure from our network or from the manufacturer’s website.

Topping up
After any operation on the hydraulic circuit, a specialist must replace the fluid. Only use fluids approved by our Technical Department (and taken from a sealed container).

Replacement intervals
Refer to the Maintenance Document for your vehicle. Consult your approved dealer at once if you notice an abnormal or repeated drop in any of the fluid levels. Before performing any action in the engine compartment, the ignition must be switched off. Please note when working close to the engine that it may be hot. In addition, the engine cooling fan may start at any moment. The label in the engine compartment reminds you of this. Risk of injury.

BONNET

Closing the bonnet
Check that nothing has been left in the engine compartment. To close the bonnet again, hold the bonnet in the middle and lower it to 30 cm above the closed position, then release it. Ensure that the bonnet is properly locked. Check that nothing is pre-venting the catch from locking (gravel, cloth, etc.). After carrying out any work in the engine compartment, check that nothing has been left behind (cloth tools, etc.). These may damage the engine or cause a fire. In the event of even a slight impact involving the radiator grille or bonnet, have the bonnet lock checked by an approved dealer as soon as possible.

Unlocking the bonnet catch
To open, push tab 2 to the left as you open the bonnet.

Opening the bonnet
Lift the bonnet, helping it up, and it will rest in position with the help of struts. Do not press down on the bonnet: there is a risk that the bonnet may accidentally close. Before performing any action in the engine compartment, the ignition must be switched off.

Do not press down on the bonnet: there is a risk that the bonnet may accidentally close.

Please note when work- ing close to the engine that it may be hot. In addition, the engine cooling fan may start at any moment. The warning light in the engine compart- ment reminds you of this. Risk of injury. When working in the engine compartment, ensure that the windscreen wiper stalk is in the park position.

FAQ

What type of vehicle is the 2021 Renault Kangoo?

The 2021 Renault Kangoo is a light commercial vehicle, also suitable as a multipurpose family car.

What engine options are available for the 2021 Kangoo?

It offers a selection of petrol and diesel engines, designed for efficiency and reliability.

Does the 2021 Kangoo come in an electric version?

Yes, there is an electric version known as the Kangoo Z.E.

What is the cargo capacity of the Renault Kangoo?

The Kangoo offers a spacious cargo area, which varies depending on whether it’s the standard or extended version.

Is there a passenger version of the 2021 Kangoo?

Yes, Renault offers a passenger version suitable for families or group transportation.

How many passengers can the Kangoo accommodate?

The passenger version typically seats up to five people, with some configurations seating up to seven.

What are the key safety features in the 2021 Kangoo?

Safety features likely include ABS, airbags, electronic stability control, and hill start assist.

Does the 2021 Kangoo have manual or automatic transmission options?

It is available with both manual and automatic transmissions.

What modern technology does the 2021 Kangoo offer?

It includes features like a touchscreen infotainment system, Bluetooth connectivity, and navigation in higher trims.

Can the cargo area in the Kangoo be customized?

Yes, the cargo space is versatile and can be fitted with various storage solutions for different professional needs.

Does the Kangoo offer sliding side doors?

Yes, sliding side doors are typically available for easy loading and unloading.

What is the fuel efficiency of the Renault Kangoo?

The fuel efficiency varies by engine type, with both the petrol and diesel engines designed for economical operation.

Are roof racks available for the Kangoo?

Roof racks and other external storage solutions are likely available as optional accessories or aftermarket installations.

What kind of warranty does Renault provide for the 2021 Kangoo?

Warranty terms vary by region, but Renault typically offers a standard manufacturer’s warranty.

How does the Kangoo perform in urban environments?

The Kangoo’s compact size and efficient engines make it suitable for city driving and easy to manoeuvre in tight spaces.

Useful Link

2022 Renault Clio User Manual

2022 Renault Kangoo Owner’s Manual

Categories
Blogs

2024 Cadillac Lyriq Review, Specs, Price and Mileage (Brochure)

2024 Cadillac Lyriq Review, Specs, Price and Mileage (Brochure)

The 2024 Lyriq provides the clearest look yet at Cadillac’s future; its road manners honour the company’s most recognizable luxury cars. As some competitors strive for fast acceleration and agile handling, the Lyriq is happy to cruise, a feature we believe brand loyalists will value when they trade in their shabby DTS sedans and SRX SUVs to switch to an eco-friendly vehicle. This monster isn’t even sporting a Blackwing badge, after all. The powerful GMC Hummer EV pickup truck and the Lyriq share technology because both vehicles run on GM’s Ultium scalable battery design, although they are very different from one another. The Caddy has a lower profile thanks to its elegant bodywork, and its inside is much nicer. Behind the wheel is a sleek digital display that flows into the infotainment display in the middle of the dashboard with a subtle curve. With an estimated 308 miles per charge, the driving range is competitive, and all LyriqWhat include standard DC fast charging to fully utilize the nation’s expanding public EV charging network.

2024-Cadillac-Lyriq-Review-Specs-Price-and-Mileage-(Brochure)-Img

Pricing

Trims Price
Tech $59,590
Luxury $63,690
Sport $64,190

Colours

Argent Silver Metallic

2024-Cadillac-Lyriq-Review-Specs-Price-and-Mileage-(Brochure)-Argent Silver Metallic

Celestial Metallic

2024-Cadillac-Lyriq-Review-Specs-Price-and-Mileage-(Brochure)-Celestial Metallic

Emerald Lake Metallic

2024-Cadillac-Lyriq-Review-Specs-Price-and-Mileage-(Brochure)-Emerald Lake Metallic

Nimbus Metallic

2024-Cadillac-Lyriq-Review-Specs-Price-and-Mileage-(Brochure)-Nimbus Metallic

Opulent Blue Metallic

2024-Cadillac-Lyriq-Review-Specs-Price-and-Mileage-(Brochure)-Opulent Blue Metallic

Radiant Red Tintcoat

2024-Cadillac-Lyriq-Review-Specs-Price-and-Mileage-(Brochure)-Radiant Red Tintcoat

Stellar Black Metallic

2024-Cadillac-Lyriq-Review-Specs-Price-and-Mileage-(Brochure)-Stellar Black Metallic

Specifications

Engine

2024-Cadillac-Lyriq-Review-Specs-Price-and-Mileage-(Brochure)-Engine

Back-wheel drive is standard on the Lyriq, and it has an electric motor 340 horsepower mounted on the back axle. The Lyriq feels quick and has respectable acceleration for an entry-level SUV, but it lacks the strong sensation of competitors like the Tesla Model X and the BMW iX. The rear-wheel-drive Lyriq reached 60 mph at our test track in 5.7 seconds, which is slower than competitors’ electric vehicle times but still fairly speedy for a mid-size SUV. An additional front motor is added to the 500-hp dual-motor all-wheel-drive drivetrain as an optional feature to drive those wheels. The all-wheel-drive Lyriq reached 60 mph in 4.6 seconds on our test track. Drivers who are enthusiasts will be disappointed by the Lyriq’s road manners. Even while the Lyriq feels stable and capable in its handling, it lacks excitement when driven hard. Its brake pedal is similarly tactless as the steering, which is nicely weighted. Fortunately, Cadillac has designed an aggressive regenerative braking system that permits one-pedal driving. In most everyday driving situations, simply depressing the accelerator pedal slows the car down sufficiently to prevent applying brake pressure. On flat pavement, the ride is pleasant, but on bumpier sections of the road, some people could find the suspension to be a little too hard.

Base Engine Type Horsepower Torque
Electric 340 hp 325 lb-ft

Battery & Range

With the Lyriq, General Motors unveiled their new Ultium EV battery series last year. The manufacturer can now produce batteries ranging in capacity from 50.0 to 200.0 kWh thanks to scalable technology, albeit the maximum size is reportedly exclusively intended for huge EV pickup trucks like the GMC Hummer EV SUT. With a single motor model’s projected driving range of up to 308 miles and a dual motor model’s estimated driving range of 307 miles, the Lyriq’s battery has a capacity of 102.0 kWh. The rear-wheel-drive Lyriq in our highway range test traveled 270 miles before requiring a recharge, while the all-wheel-drive Lyriq covered only 220 miles. In relation to charging, all models come with the capacity to fast-charge DC, and the Lyriq can also be charged using ordinary household power outlets.

Specification Value
Fuel Type Electric
EPA City/Highway MPGe 95/82 MPGe
EPA Combined MPGe 88 MPGe
EPA Electricity Range 314 mi.
EPA kWh/100 mi 38
EPA Time to Charge Battery 6.5 hr.
Battery Capacity 102 kWh
Fast-Charge Port Type SAE Combo


Towing & Hauling Value
Max Towing Capacity 3,500 lbs.


Drivetrain Value
Transmission 1-speed direct drive
Drive Type Rear wheel drive

Dimensions

Specification Value
Length 196.7 in.
Overall Width with Mirrors 86.9 in.
Overall Width without Mirrors 77.8 in.
Height 63.9 in.
Wheelbase 122.0 in.
Cargo Capacity, All Seats in Place 28.0 cu.ft.
Maximum Cargo Capacity 60.8 cu.ft.
Turning Circle 39.6 ft.
Ground Clearance 7.0 in.
Curb Weight 5,557 lbs.
Maximum Towing Capacity 3,500 lbs.
Country of Final Assembly United States


Overview Value
Vehicle Type Electric
Engine Type Electric
Transmission 1-speed direct drive
Drive Type Rear wheel drive
Total Seating 5
Basic Warranty 4 yr./ 50,000 mi.
EV Battery Warranty 8 yr./ 100,000 mi.

Front Seat Dimensions

Front Seat Dimensions and Features Value
Front Head Room 38.6 in.
Front Leg Room 44.3 in.
Front Shoulder Room 58.9 in.
Front Hip Room 56.5 in.
Leatherette Standard
Bucket Front Seats Standard
8-Way Power Driver Seat Standard
Height Adjustable Driver Seat Standard
Driver Seat with Power Adjustable Lumbar Support Standard
2 Memorized Driver Seat Settings Standard
6-Way Power Passenger Seat Standard
2-Way Manual Passenger Seat Adjustment Standard
Height Adjustable Passenger Seat Standard
Passenger Seat with Power Adjustable Lumbar Support Standard
Multi-Level Heated Driver Seat Standard
Multi-Level Heated Passenger Seat Standard


Rear Seat Dimensions and Features Value
Rear Head Room 37.7 in.
Rear Leg Room 39.6 in.
Rear Shoulder Room 58.6 in.
Rear Hip Room 54.0 in.
Split-Folding Rear Seatback Standard
Reclining Rear Seats Standard

Interior, Comfort, and Cargo

2024-Cadillac-Lyriq-Review-Specs-Price-and-Mileage-(Brochure)-Engin

2024-Cadillac-Lyriq-Review-Specs-Price-and-Mileage-(Brochure)-Seating

An opulent interior design lends the Lyriq a sophisticated appearance. On the door panels and central console, open-pore wood is mixed with metallic brightwork. Bright blue leather upholstery lines a sizable storage tray between the driver and front passenger, adding a playful flash of color. The real Lyriq has a more conventional rear bench seat, despite the concept car having just four seats and a central console that splits the two front and two rear seats with a touchscreen for the backseat occupants. Not only does the Lyriq’s lack of a gasoline engine contribute to its quiet interior, but it also uses cutting-edge noise cancellation technology to lessen road noise. Although the inside is roomy, Cadillac hasn’t included any under-the-hood storage, and the cargo area isn’t as large as it is in other SUVs.

Infotainment and Connectivity

2024-Cadillac-Lyriq-Review-Specs-Price-and-Mileage-(Brochure)-Entertainment

Similar to the Escalade, the Lyriq’s dashboard is dominated by a massive 33.0-inch curved sophisticated LED touchscreen that doubles as the infotainment system for the SUV and the display for the driver’s gauge. For drivers who dislike touchscreens, the infotainment system can also be operated by a click wheel located on the centre console. Standard features include a Wi-Fi hotspot, Android Auto, and Apple CarPlay. All models include a rich-sounding 19-speaker stereo system from the premium audio specialists at AKG.

Frequently Asked Questions

What is the Price of the 2024 Cadillac Lyriq?

The Price of the Cadillac Lyriq is $59,590.

What is the Engine Type of the Cadillac Lyriq?

The Engine Type of the Cadillac Lyriq is the Electric Engine.

What is the Horsepower of the 2024 Cadillac Lyriq?

The Horsepower of the 2024 Cadillac Lyriq is the 340hp.

What is the Torque of the 2024 Cadillac Lyriq?

The Torque of the 2024 Cadillac Lyriq is the 325lb-ft.

What is the Drive type of the 2024 Cadillac Lyriq?

The Drive type of the 2024 Cadillac Lytiq is the rear-wheel-drive.

What is the Electric range of the 2024 Cadillac Lyriq?

Thr Electric Range of the 2024 Cadillac Lyriq is 314mi.

What is the Wheel Size of the 2024 Cadillac Lyriq?

The Wheel Size of the 2024 Cadillac Lyriq is 20 inches.

What is the Length of the 2024 Cadillac Lyriq?

The Length of the 2024 Cadillac Lyriq is 196.7 inches.

What is the Width of the 2024 Cadillac Lyriq?

The Width of the 2024 Cadillac Lyriq is 77.8 inches.

What is the Height of the 2024 Cadillac Lyriq?

The Height of the 2024 Cadillac Lyriq is 63.7 inches.

Conclusion

A preview of Cadillac’s future is provided by the 2024 Cadillac Lyriq, which combines elegance and environmental friendliness. It prioritizes a smooth cruising experience over sporty handling and acceleration. It features a smooth digital display, a stylish exterior, and an elegant interior, and it shares technologies with the GMC Hummer EV. The Lyriq is a great daily driver, boasting a competitive 308-mile driving range and standard DC fast charging. With a 340 horsepower electric motor, the rear-wheel drive variant offers decent acceleration but lacks the thrill of some competitors.

2023 Cadillac Escalade Specs, Price, Features, Mileage and Torque

2024 Cadillac XT6 Specs, Price, Features, Mileage (Review)

2023 Cadillac XT5 Specs, Price, Features, Mileage (Brochure)

2023 Cadillac XT4 Specs, Price, Features, Mileage and Torque (Review)

Categories
Blogs

2024 Royal Enfield Continental GT Specs, Price, Mileage And Review

2024 Royal Enfield Continental GT

The Royal Enfield Continental GT is an iconic two-wheeled masterpiece! This motorcycle encompasses both antique beauty and modern performance with its sleek design, which is reminiscent of the cafe racer era. For fans looking for a ride that combines vintage and modern engineering, its potent engine and iconic style make it an enthralling experience. Every rider’s spirit will be stirred by the thrilling feeling that the Continental GT delivers, whether you’re speeding through urban streets or slicing through twisting roads.

2024-Royal-Enfield-Continental-GT-Product

Price: $6,349 est.

Colours: Rocker Red, Mr. Clean, Dux Deluxe, Ventura Storm and British Racing Green

Specifications

Engine

2024-Royal-Enfield-Continental-GT-Engine

Engine Specification
Type Parallel twin, 4-stroke, single overhead cam, air/oil-cooled
Displacement 648cc
Ignition System Fuel injection, digital spark ignition – TCI
Gearbox 6-speed constant mesh
Maximum Power 47 bhp @ 7150 RPM
Maximum Torque 52 Nm @ 5250 RPM

Chassis2024-Royal-Enfield-Continental-GT-Front

2024-Royal-Enfield-Continental-GT-Back

Chassis & Suspension  Specification
Type Tubular steel frame with bolted trussing
Front Suspension 41 mm front fork, 110 mm travel
Rear Suspension Twin coil-over shocks, 88 mm travel

Dimensions

2024-Royal-Enfield-Continental-GT-Front-wheel

Dimensions Specification
Wheelbase 1400 mm
Ground Clearance 174 mm
Length 2122 mm
Width 1165 mm
Height 789 mm
Seat Height 804 mm
Fuel Capacity 13.7 litres
Kerb Weight 202 kg (without fuel)

Brakes

Brakes and Tyres Specification
Front Tyre 100/90-18
Rear Tyre 130/70-18
Front Brake 320 mm disc (ABS)
Rear Brake 240 mm disc (ABS)

Electrical

Electricals Specifications
Electrical System 12 volt – DC
Battery 12 V, 12 Ah
Head Lamp 12V, H4-60/55W (Halogen)
Tail Lamp 12V, P21/5W
Turn Signal Lamp 12V, 10W X 4nos

Additional Features

Classic Café Racer Design
 The Continental GT was known for its sleek and aerodynamic shape, which was reminiscent of the vintage racing motorcycles of the 1960s.

Clip-On Handlebars
The bike may have had clip-on handlebars installed, which offer a more aggressive riding position perfect for a café racer look.

Twin Exhaust System
A twin exhaust system was available on some models, which enhanced the bike’s appearance and might have produced a distinctive exhaust tone.

Extra equipment
Riders can customize their Continental GT with a variety of extra equipment from Royal Enfield, including upgraded exhaust systems, windshields, and various seats.

Instrument Cluster
The motorcycle may have a traditional analogue-digital instrument cluster that shows vital data such as trip meters, fuel levels, speed, and more.

ABS
For increased safety, the Continental GT may have had an Anti-lock Braking System (ABS) installed, depending on the model year and applicable laws.

Colour Options
Royal Enfield usually offers a range of colour options for their models, letting riders select a paint job that best fits their personal tastes.

LED Lighting
For better visibility and a more contemporary look, some models may use LED lighting.

FAQs

What is the price of the Royal Enfield Continental GT?

The price of the Royal Enfield Continental GT is $6,349 est.

What is the engine type of the Royal Enfield Continental GT?

The engine type of the Royal Enfield Continental GT is Parallel twin, 4-stroke, single overhead cam, air/oil-cooled.

What is the engine displacement of the Royal Enfield Continental GT?

The engine displacement of the Royal Enfield Continental GT is 648cc.

What is the horsepower of the Royal Enfield Continental GT?

The horsepower of the Royal Enfield Continental GT is 47 bhp @ 7150 RPM.

What is the torque of the Royal Enfield Continental GT?

The torque of the Royal Enfield Continental GT is 52 Nm @ 5250 RPM.

What is the seat height of the Royal Enfield Continental GT?

The seat height of the Royal Enfield Continental GT is 804 mm.

What is the battery type of the Royal Enfield Continental GT?

The battery type of the Royal Enfield Continental GT is 12 V, 12 Ah.

What is the ground clearence of the Royal Enfield Continental GT?

The ground clearence of the Royal Enfield Continental GT is 174 mm.

What is the kerb weight of the Royal Enfield Continental GT?

The kerb weight of the Royal Enfield Continental GT is 202 kg (without fuel).

What is the fuel capacity of the Royal Enfield Continental GT?

The fuel capacity of the Royal Enfield Continental GT is 13.7 litres.

What is the wheelbase of the Royal Enfield Continental GT?

The wheelbase of the Royal Enfield Continental GT is 1400 mm.

Conclusion

The timeless look and nostalgic appeal of the Royal Enfield Continental GT perfectly capture the essence of a vintage café racer. This bike pays homage to the racing motorcycles of the 1960s with its sporty features, twin exhaust system, and elegant appearance. Its distinctive and customized riding experience is provided by its fusion of modern technologies, like ABS technology and available customisation accessories, with retro aesthetics. It’s more than just a motorcycle; it’s a piece of history that entices riders looking for flair, uniqueness, and a hint of nostalgia in their riding experience by bringing the excitement of vintage racing to modern roadways.

2023 Royal Enfield Super Meteor 650 Specs, Price, Mileage And Review

2023 Royal Enfield Hunter 350 Specs, Price, Mileage And Review

2023 Royal Enfield Scram 411 Specs, Price, Mileage And Review

Categories
Blogs

2023 Royal Enfield Scram 411 Specs, Price, Mileage And Review

2023 Royal Enfield Scram 411

The 2023 Royal Enfield Scram 411 is a motorbike that is ready for an adventure. It has a thrilling mix of classic style and tough capability. This bike was made for explorers and people who like to take risks. It embodies the spirit of off-road exploring while still having a classic look. The Scram 411 is built to last, has a reliable 411cc engine, and was designed to be fun to ride, whether you’re tackling difficult tracks or just riding through the city. It’s a modern tribute to the classic scramblers of the past, encouraging riders to go on new adventures and enjoy the nostalgic feel of a truly iconic motorbike.

2023-Royal-Enfield-Scram-411-Product

Price: $5,099 est.

Colours: Graphite Red, Graphite Blue and Graphite Yellow.

Specifications

Engine

2023-Royal-Enfield-Scram-411-engine

Engine Description
Type Single Cylinder, 4 Stroke, Air Cooled, SOHC, Fuel Injection
Dimensions 78mm x 86mm
Displacement 411cc
Compression Ratio 9.5:1
Maximum Power 24.3BHP / 17.88KW @ 6500RPM
Maximum Torque 23.6 ft-lb (32Nm) @ 4000–4500RPM
Idle RPM 1300±100RPM
Starting System Electric Start
Air Filter Element Paper Element
Lubrication Wet Sump
Engine Oil Grade Semi-Synthetic SAE 15W 50 API SL, JASO MA 2
Ignition System Digital Electronic Ignition
Clutch Wet Multi Plates
Gearbox 5 Speed, Constant Mesh
Fuel Supply Electronic Fuel Injection

Dimensions

2023-Royal-Enfield-Scram-411-Front-wheel

Dimensions Description
Wheelbase 57.3″ / 1455 mm
Ground Clearance 7.9″ / 200 mm
Length 85″ / 2160 mm
Width 33″ / 840 mm
Height 45.9″ / 1165 mm
Seat Height 31.3″ / 795 mm
Curb Weight Without Fuel: 407.85 lbs (approx)
Fuel Capacity 3.9 gallons (approx)

Brakes and Tires

Brakes and Tires Description
Front Tire 100/90 – 19″
Rear Tire 120/90 – 17″
Brakes Front 300mm Disc, 2-piston Floating Caliper
Brakes Rear 240mm Disc, Single Piston Floating Caliper
ABS Dual Channel ABS
Frame Type Half-duplex split Cradle Frame
Front Suspension Telescopic, 41mm Forks, 190mm Travel
Rear Suspension Monoshock with Linkage, 180mm Wheel Travel
Chassis & Suspension

Chassis2023-Royal-Enfield-Scram-411-Front

2023-Royal-Enfield-Scram-411-Back

Chassis Description
Frame Type Half-duplex split Cradle Frame
Front Suspension Telescopic, 41mm Forks, 190mm Travel
Rear Suspension Monoshock with Linkage, 180mm Wheel Travel

Additional Features

Engine
It may have a 411cc single-cylinder air-cooled engine that produces a respectable level of torque appropriate for off-roading.

Design

An upright riding position for improved handling in off-road conditions, knobby tires, and a high-mounted exhaust complete this traditional scrambler design.

Frame and Suspension
You can count on a strong chassis to manage unpaved areas, and a long-travel suspension system to cushion blows and make for a more comfortable ride.

Disc Brakes 
Disc brakes may be used on the front and rear of the vehicle for improved stopping force and control.

Technology
 It may have contemporary features like LED lighting, a digital instrument cluster that shows important information, and perhaps Bluetooth connectivity for smartphone pairing all without sacrificing its vintage appeal.

Extras
Luggage racks, crash protectors, and various seat configurations are just a few of the extras that Royal Enfield frequently offers for personalization.

Ride Modes
To provide greater traction and control on varied terrain, there may be a variety of riding modes available.

Drivetrain and Efficiency
The 411cc four-stroke single-cylinder air-cooled engine only produces 24.3 horsepower, therefore the Scram’s ability to cruise the freeway is restricted. It was an effort to get to and stay at freeway speeds because the 70 mph mark requires the single-cylinder engine to get momentum. Fortunately, for a small single, the counter-balanced engine vibrates quite little. There are no rider aids on the Scram 411, including traction control and ride modes.

Wheels, Brakes, Suspension, and Frame
The Scram 411 weighs 407 pounds dry; a full 3.9-gallon tank will add 24 pounds to that weight. When it comes to gasoline, the 411 consumes gas like a bird; nevertheless, after you reach a quarter tank, the gas gauge tends to drop rather irregularly and unreliably.

FAQs

What is the price of the Royal Enfield Scram 411?

The price of the Royal Enfield Scram 411 is $5,099 est.

What is the engine type of the Royal Enfield Scram 411?

The engine type of the Royal Enfield Scram 411 is Single Cylinder, 4 Stroke, Air Cooled, SOHC, Fuel Injection.

What is the engine displacement of the Royal Enfield Scram 411?

The engine displacement of the Royal Enfield Scram 411 is 411cc.

What is the torque of the Royal Enfield Scram 411?

The torque of the Royal Enfield Scram 411 is 23.6 ft-lb (32Nm) @ 4000–4500RPM.

What is the horsepower of the Royal Enfield Scram 411?

The horsepower of the Royal Enfield Scram 411 is Maximum Power 24.3BHP / 17.88KW @ 6500RPM.

What is the ground clearance of the Royal Enfield Scram 411?

The ground clearance of the Royal Enfield Scram 411 is 7.9″ / 200 mm.

What is the seat height of the Royal Enfield Scram 411?

The seat height of the Royal Enfield Scram 411 is 31.3″ / 795 mm.

What is the height of the Royal Enfield Scram 411?

The height of the Royal Enfield Scram 411 is 45.9″ / 1165 mm.

What is the fuel capacity of the Royal Enfield Scram 411?

The fuel capacity of the Royal Enfield Scram 411 is 3.9 gallons (approx).

What is the wheelbase of the Royal Enfield Scram 411?

The wheelbase of the Royal Enfield Scram 411 is 3.9 gallons (approx).
 

Conclusion

Combining a timeless aesthetic with cutting-edge functionality results in the lovely Royal Enfield Scram 411. Its elegant yet tough exterior makes it the perfect choice for anyone with an adventurous spirit looking for both urban appeal and off-road adventure. This bike is perfect for exploring both city streets and wild terrain because of its sturdy construction, nimble handling, and powerful motor. It truly turns heads because to its classic design and modern amenities like LED lighting and digital instrumentation. The Scram 411 offers riders who are looking for a special combination of functionality and nostalgia an exciting and thrilling ride on a variety of terrains.

2023 Royal Enfield Super Meteor 650 Specs, Price, Mileage And Review

2023 Royal Enfield Hunter 350 Specs, Price, Mileage And Review

2024 Royal Enfield Continental GT Specs, Price, Mileage And Review

Categories
Blogs

2023 Royal Enfield Hunter 350 Specs, Price, Mileage And Review

2023 Royal Enfield Hunter 350

the Royal Enfield Hunter 350 is a motorcycle that effortlessly combines timeless design with modern functionality. It’s a fantastic choice for riders who appreciate a classic look and a smooth, comfortable ride. Imagine a bike that not only turns heads with its sleek, vintage-inspired appearance but also delivers a powerful and reliable performance on the road. The Hunter 350 embodies that spirit perfectly. Its sturdy build and ergonomic design make it a joy to ride, whether you’re cruising through city streets or exploring winding country roads.

2023-Royal-Enfield-Hunter-350-Product

Price: $3,999 est.

Colours: Dapper White, Dapper Ash, Dapper Grey and  Rebel Blue

Specifications

Engine

2023-Royal-Enfield-Hunter-350-engine

Engine Description
Engine SOHC, air-cooled, four-stroke single-cylinder
Displacement 349cc
Bore x Stroke 72.0 x 85.8mm
Compression Ratio 9.5:1
Transmission/Final Drive 5-speed/chain
Claimed Horsepower 20.2hp @ 6,100 rpm
Claimed Torque 19.91ft-lb. @ 4,000 rpm
Fuel System EFI
Clutch Wet, multi-plate

Suspensions

2023-Royal-Enfield-Hunter-350-Front

2023-Royal-Enfield-Hunter-350-Back

Suspensions Description
Frame Harris Performance–designed twin downtube spine
Front Suspension 41mm telescopic fork; 5.1 in. travel
Rear Suspension Twin-tube emulsion shock absorbers, preload adjustable; 4.8 in. travel
Front Brake 2-piston ByBre caliper, 300mm disc

Dimensions

2023-Royal-Enfield-Hunter-350-Front-wheel

Dimensions Description
Wheels, Front/Rear Aluminium alloy; 17 in./17 in.
Tires, Front/Rear 110/70-17 / 140/70-17
Rake/Trail 25.0°/3.7 in.
Wheelbase 53.9 in.
Seat Height 31.1 in.
Fuel Capacity 3.4 gal.
Claimed Wet Weight 400 lb.

Additional Features

CHARGING ON THE GO
The Hunter 350 has a USB port so you can keep your gadgets connected while you’re out on the hunt.

ABS WITH TWO CHANNELS
The anti-lock braking system with 300mm front and 270mm back discs stops you safely at even the shortest distances, keeping you in full control. It was designed to work in unpredictable urban environments.

CUBES FOR ANALOG SWITCH
The Hunter’s retro-styled rotating switch cubes make turning it on and off a tactile, hands-on experience that is meant to wake you up.

CLUSTER FOR DIGI-ANALOG INSTRUMENTS
The Hunter’s tachometer looks like it came from the 1980s, but it works perfectly with today’s riding styles. It also has a digital LCD screen that tells you everything you need to know and works with the Royal Enfield Tripper Navigation System.

A FRIENDLY CHASSIS 
If it weren’t Indian-made, the Royal Enfield Hunter 350 is an unabashedly conventional motorbike that I would compare to vintage Universal Japanese Motorcycles. The design is practical and useful. That is not to say that attractive bodywork cannot be supported by the dual down tube spine structure built by Harris Performance. It does, and the Hunter’s allure stems in part from that.

THE BRAKE AND SUSPENSIONS
Save for one significant exception, suspension and brakes were inexpensive components. The suspension is very basic, with the non-adjustable 41mm conventional fork up front and the preload-adjustable dual shocks at the back, but then again, the Hunter’s job description doesn’t call for much either. The main objective of these bikes is bump absorption rather than chassis control on the city streets where they will be used most of the time, and the Hunter performs admirably in this regard. A furious drive down a twisty route, however, will quickly draw attention to the suspenders’ limitations.

APPEALING STYLE AND COST
Royal Enfield showcased the Hunter 350 as a motorcycle suitable for the Gen Z crowd, complete with hip young riders enjoying themselves while cruising through different cities on their Hunters. Thanks to social media, the younger generation is aware of style, and the designers of the Hunter 350 put a lot of it on the platform. The Hunter exudes approachability in everything from the classic round headlight to the solitary instrument to the contoured bench seat to the stubby exhaust. The six colour choices can then be added for even more attractiveness.

FAQs

What is the price of the Royal Enfield Hunter 350?

The price of the Royal Enfield Hunter 350 is $3,999 est.

What is the engine type of the Royal Enfield Hunter 350?

The engine type of the Royal Enfield Hunter 350 is SOHC, air-cooled, four-stroke single-cylinder.

What is the engine displacement of the Royal Enfield Hunter 350?

The engine displacement of the Royal Enfield Hunter 350 is 349cc.

What is the horsepower of the Royal Enfield Hunter 350?

The horsepower of the Royal Enfield Hunter 350 is 20.2hp @ 6,100 rpm.

What is the torque of the Royal Enfield Hunter 350?

The torque of the Royal Enfield Hunter 350 is 19.91ft-lb. @ 4,000 rpm.

What is the fuel system of the Royal Enfield Hunter 350?

The fuel system of the Royal Enfield Hunter 350 is EFI.

What is the seat height of the Royal Enfield Hunter 350?

The seat height of the Royal Enfield Hunter 350 is 31.1 in.

What is the fuel capacity of the Royal Enfield Hunter 350?

The fuel capacity of the Royal Enfield Hunter 350 is 3.4 gal.

What is the wheelbase of the Royal Enfield Hunter 350?

The wheelbase of the Royal Enfield Hunter 350 is 3.4 gal.

Conclusion

The Royal Enfield Hunter 350 is a stylish and versatile motorbike that can be used on city streets or for off-road rides. Because of its strong 349cc engine and well-thought-out design, it’s smooth and fun to ride. With features like EFI, 5-speed gearbox, and a well-designed frame, along with its classic yet modern look, it promises to be reliable and comfortable on the road. The Hunter 350 is a good choice for riders who want a mix of nostalgia and modern usefulness in their motorcycle experience because it strikes a good balance between performance, comfort, and looks.

2023 Royal Enfield Super Meteor 650 Specs, Price, Mileage And Review

2023 Royal Enfield Scram 411 Specs, Price, Mileage And Review

2024 Royal Enfield Continental GT Specs, Price, Mileage And Review

Categories
Renault

2022 Renault Kangoo Owner’s Manual

Renault-logo

2022 Renault Kangoo Owner’s Manual

With its adaptable styling and improved practicality, the 2022 Renault Kangoo represented a substantial advancement in the company’s lineup of light commercial vehicles, appealing to both individual and commercial consumers. With a redesigned exterior, an improved cargo capacity, and a more ergonomic and pleasant interior, the most recent Kangoo model stands out and is very useful for a range of personal and business uses. It meets the growing demand for environmentally responsible transportation by providing a selection of efficient engine options under the hood, including gasoline, diesel, and an electric variation. In addition, the car has a number of cutting-edge technological elements that make driving safer and more connected, such as an upgraded infotainment system and a number of safety assists. The 2022 Kangoo is a formidable competitor in the small van and multipurpose vehicle markets thanks to its innovative combination of technology, efficiency, and adaptability.

REAR SCREEN WASHER, WIPER

Activation/deactivation of the rear screen wiper
Engaging reverse gear triggers intermittent wiping (if the front wipers are in operation). If your vehicle is equipped with a vehicle settings customisation menu, you can opt to activate or deacti- vate this function. In the event of obstacles present on the rear window (dirt, snow, etc.), the wiper will try to sweep away all the obstacles. If an obstacle prevents the blade from moving, it can be stopped. Remove the obstacle, wait for around 30 seconds and reactivate the wiper using the wiper stalk.

Precautions

  • In the event of ice, check that the blades are not stuck to the windscreen before operating the wipers. If you activate the wiper while the blade is blocked by ice, you risk damaging both the blade and the wiping motor.
  • Do not operate the wipers on a dry screen. This will lead to premature wear or damage to the blades.

Rear screen wash/wipe
With the ignition on, push and hold stalk 1, then release. Holding the stalk for longer will trigger (in addition to the windscreen washer) two sweeps of the wipers followed, a few seconds later, by a third (drip wiping function). When the stalk is released, it returns to the rear wipe position.

TANK

Useable capacity of the tank: 12 gal (54 litres) approximately.
With the vehicle unlocked, to open cover 1, press area A then release. The cover 1 opens. Use the cap holder 2 on the flap 1 during filling to hold the cap 3 in place. For details on filling the fuel tank, refer to the information on “Filling with fuel”. To close it, press on the fuel filler flap by hand, as far as it will go.

Fuel grade
Use a high-grade fuel that complies with the legislation in force in each country and which must comply with the specifications given on the label on the cover 1.

Filler cap: this is specific.
If you have to replace it, make sure it is identical to the original cap. Contact an approved Dealer. Never place the cap near a source of heat or flame. Do not wash the filler area with a high-pressure washer. Do not mix even small amounts of petrol (un- leaded or E85) with diesel. Do not use ethanol-based fuel if your vehicle is not compatible with this fuel. Do not add reagent to the fuel – other wise you risk damaging the engine  If you wish to add an additive to the fuel, use a product approved by our Technical Department. Consult an approved dealer.

Diesel version
It is essential to use diesel fuel that conforms with the information given on the label inside cover 1.

Petrol version
It is essential to use unleaded petrol. The octane rating (RON) must comply with the information given on the label on the cover 1.

Filling with fuel
With the ignition off, insert the nozzle and insert it fully before turning it on to fill the fuel tank (risk of splashing). Keep the nozzle in this position through- out the entire filling operation. When the pump cuts out automatically at the end of the filling procedure, a maximum of two further filling attempts may be made, as there must be suffi-cient space in the fuel tank to allow for expansion. Make sure that no water enters the fuel tank during filling. The cover 1 and its surround must remain clean.

Special case
When the vehicle has been stopped for around three months, you must add fuel to prevent damage to the fuel pump. To do this, with the ignition off, top-up at least 1.10 gallons (5 litres) then start the engine to operate the pump and renew the fuel in the circuit. If it is not possible to add at least 1.10 gallons (5 litres) of fuel due to the fuel level in the tank, drive the vehicle until the tank has capacity.

Petrol version
Using leaded petrol will damage the antipollution system and may lead to a loss of warranty. To ensure that the fuel tank is not filled with leaded petrol, the fuel tank filler neck contains a restrictor fitted with a foolproof system which only allows the nozzle for unleaded petrol to be used (at the pump).

Running out of fuel on diesel versions
Vehicles with key/remote control

  • Turn the ignition key 4 to the “On” position ON 2 and wait a few minutes before starting to allow the fuel circuit to be primed;
  • turn the key to position START 3. If the engine does not start, repeat the procedure;
  • If the engine does not start after several attempts, contact an approved dealer.

Vehicles with card
With the card in the passenger compartment, press the start button 5 without pressing any of the pedals. Wait a few minutes before starting. This will enable the fuel circuit to be primed. If the engine does not start, repeat the procedure. If the engine does not start after several attempts, please contact an authorised dealer. No modifications whatsoever are permitted on any part of the fuel supply system (electronic units,  wiring, fuel circuit, injectors, protective covers, etc.) as this may be dangerous (unless undertaken by qualified Network personnel).

Persistent fuel odour
If you notice a persistent fuel odour you should:

  • stop the vehicle as soon as traffic conditions allow and switch off the ignition;
  • switch on the hazard warning lights and ask your passengers to leave the vehicle and stay clear of the traffic;
  • contact an approved Dealer.

REAGENT TANK 
Please ensure that you comply with the legislation of your country. It is important to remember that failure to respect regulations in force could lead to legal action being taken against the vehicle owner.

Operating principle
The reagent is intended for diesel engines fitted with the SCR (selective catalytic reduction) system. The use of reagents reduces exhaust emissions by transforming the pollutants into water vapour and nitrogen. Reagent consumption in real time depends on vehicle usage conditions, the equipment fitted, and driving style.

Reagent quality
Use only reagents which conform to standard ISO 22241 and in accordance with the mark on the tank filler cap.

Filling
Useable capacity of the tank: 3.74 gallons (17 litres) approximately. With the ignition switched off, open the cover A, then unscrew the cap.

Note: ammonium hydroxide vapour may escape from the cap opening when the tank temperature is high. To fill up with reagent, the engine must be stopped (and not only on standby in the case of vehicles equipped with the function) STOP and START: you must switch off the ignition If the “XXX miles (XXX km) lockout refill AdBlue” message appears, fill the rea- gent tank and refer to the filling instructions.
Risk of immobilisation of the vehicle.

Fuel filler cap: this is a specific type.
If you have to replace it, make sure it is identical to the original cap. Contact an ap-proved Dealer. Do not wash the filler area with a high pressure washer.

REAGENT TANK
Filling (continued)
The tank can be filled at the pump. With the ignition off, insert the nozzle fully before activating it to fill the fuel tank (risk of splashing). Keep the nozzle in this position throughout the entire filling operation.
When the pump cuts out automatically at the end of the filling procedure, a maximum of two further filling attempts may be made, as there must be sufficient space in the fuel tank to allow for expansion.
In other filling cases, it is essential to read the information shown on the reagent container (e.g. the can or bottle).

Precautions for use
When filling:

  • handle the reagent with care. They can damage clothes, shoes, bodywork components etc.;
  • make sure that no water enters the fuel tank.

If the reagent overflows, or contami- nates any paintwork, clean the affected area quickly with plenty of cold water and a soft cloth.

Note: if the reagent crystallises, use a soft sponge.

In extreme cold weather conditions
In frosty weather conditions, the rea- gent tank should be refilled when the indicator and the message “TOP UP AdBlue before 1200 km” appear on the instrument panel.

Special cases
The reagent fluid freezes below about -10°C. In these conditions, do not attempt filling when the fluid is frozen. In the event of needing to top up or fill the tank with reagent (on), park the vehicle in a hotter location if possible so that the reagent becomes liquid again. Otherwise, have a qualified professional top up or fill up with reagent fluid. After filling the reagent tank, check that the cap and cover are closed, start the engine and WAIT 10 sec- onds with the vehicle stationary, engine running before setting off again. If this operation is not carried out, the filling of the tank will not be taken into account automatically until after several dozens of minutes of driving. The message “— TOP UP AdBlue” and/or the warning lights will con- tinue to appear until the filling has been registered by the system. No work whatsoever is permitted on any part of the system. To prevent damage, only qualified personnel from our network may work on the system.

Petrol version
For the first 600 miles (1,000 km), do not exceed 78 mph (130 km/h) in the highest gear, or 3,000 to 3,500 rpm. You may only expect top performance from your vehicle after approximately 1,800 miles (3,000 km).

Service intervals: refer to the Maintenance Document for your vehi-cle.

Diesel version
For the first 1,000 miles (1,500 km), do not exceed 80 mph (130 km/h) in the highest gear, or 2,500 rpm. After completing this mileage you may drive faster, although you may only expect top performance after approximately 3,600 miles (6,000 km). During the running in period, do not accelerate hard while the engine is still cold and do not let the engine over-rev. Service intervals: refer to the Maintenance Document for your vehicle.

Ignition switch
Off position LOCK 0 (steering lock applied)

  • To lock: remove the key and turn the steering wheel until the steering column locks.
  • To unlock: turn the key and the steering wheel slightly.

“Ignition” position ON 2
The ignition is switched on: Any accessories (radio etc.) can be used.

“Start” position START 3
If the engine fails to start at the first attempt, the key must be turned back before the starter can be activated again. Release the key as soon as the engine starts.

Note: on diesel versions, several seconds may pass between turning the key and the engine starting to allow for engine preheating.

Special features

  • If any of the starting conditions are not met, the message “Press Brake + START” or “Press Clutch + START” or “Select Gearbox Position “P”” is displayed on the instrument panel;
  • in some cases, it will be necessary to move the steering wheel whilst pressing the start button 3 to help unlock the steering column; the message “Turn Steering Wheel + START” will warn you of this;

Note: on vehicles equipped with a manual gearbox, in the event of engine stalling the message “Press Clutch” will be displayed on the instrument panel. Fully press the clutch pedal to restart the engine.

“Hands-free” starting with the tailgate open
In this case, the card should not be lo- cated in the luggage compartment, to prevent the risk of loss.

Accessories function

(switching on the ignition)
Once you have gained access to your vehicle, you may use some of its func- tions (radio, navigation, wipers, etc.). To use the other functions, with the card in the passenger compartment, press the 3 button without pressing the pedals.

Operating faults
In certain cases, the hands-free card may not work:

  • when the card battery is dead;
  • near to appliances operating on the same frequency as the card (monitor, mobile phone, video game, etc.);
  • vehicle located in a high electromagnetic radiation zone.

The message “Place card on zone + START” appears on the instrument panel. Press the brake or clutch pedal, then place the card 5 (button side) on the placement area marked by the 4 symbol. Press the 3 button to start the vehicle. The message goes out.

Conditions for stopping the engine
The vehicle must be stationary, lever in position P on vehicles with an automatic gearbox. With the card in the vehicle, press button 3: the engine stops. The steer- ing column is locked when a door is opened or the vehicle is locked. If the card is no longer in the passen- ger compartment or if the card’s battery is worn, when the vehicle is stationary and you try to switch the engine off, the message “Keycard absent: press/ hold START” appears on the instrument panel: press button 3 for longer than two seconds. If the card is no longer in the passenger compartment, make sure you can retrieve it before press- ing and holding the button. Without the card, you will not be able to restart the vehicle. With the engine switched off, any ac-cessories being used (radio, etc.) will continue to function for approximately 10 minutes. When the driver’s door is opened, the accessories stop working. Never switch off the igni- tion before the vehicle has stopped completely. Once the engine has stopped, the brake servo, power-assisted steer- ing etc., and the passive safety de- vices such as the airbags and pre- tensioners will no longer operate.

Driver’s responsibility when parking or stopping the vehicle
Never leave an animal, child or adult who is not self-suffi- cient alone in your vehicle, even for a short time. They may pose a risk to themselves or to others by starting the engine, activating equipment such as the electric windows or locking the doors, for example. Also, in hot and/or sunny weather, please remember that the tempera- ture inside the passenger compartment increases very quickly. RISK OF DEATH OR SERIOUS INJURY.

Preventing the engine from standing by
In certain situations, such as negotiating a crossroads for instance, it is possible (with the system activated) to keep the engine running so as to be ready to move off quickly.

For vehicles equipped with automatic gearboxes and when the engine standby is performed only when the vehicle stopped:
Keep the vehicle stationary without pressing too hard on the brake pedal.

For vehicles equipped with manual gearboxes:
Keep the clutch pedal pressed right down.

Conditions preventing the standby of the engine
Certain conditions prevent the system from using the engine standby function, including when:

  • the driver’s door is not closed;
  • the driver’s seat belt is not fastened or was not fastened when driving began;
  • reverse gear is engaged;
  • the bonnet is not locked;
  • the outdoor temperature is too low or too high;
  • the battery is not sufficiently charged;
  • the difference between the vehicle interior temperature and the auto- matic climate control instruction is too high;
  • parking distance control is in operation;
  • the altitude is too high;
  • the slope is too steep for vehicles fitted with an automatic gearbox;
  • the “Clear view” function is activated.
  • the engine temperature is too low;
  • the emission control system is being regenerated;

Warning light is displayed on the instrument panel. This notifies you that engine standby is not available.

The warning light may appear along with a message on the instrument panel:

  • “Optimising Battery Recharge” to prioritise battery charging;
  • “Prioritising Thermal Comfort” to prioritise air conditioning;
  • “Prioritising running engine” to priori- tise engine operations.

FAQ

What type of vehicle is the 2022 Renault Kangoo?

The Renault Kangoo is a light commercial vehicle, also popular as a compact multi-purpose van.

What engine options are available for the 2022 Kangoo?

It offers a range of engines, including petrol, diesel, and an electric variant.

Is the 2022 Kangoo available in an electric version?

Yes, there is an electric version known as the Kangoo Z.E.

What is the cargo capacity of the Renault Kangoo?

The Kangoo provides a generous cargo space, varying with the configuration and model (standard or extended).

Does the Kangoo have a passenger version?

Yes, there is a passenger version of the Kangoo, which is designed more for personal use.

How many passengers can the 2022 Kangoo accommodate?

The passenger version can typically seat up to five or seven people, depending on the configuration.

What are the key safety features in the 2022 Kangoo?

Safety features may include ABS, airbags, electronic stability control, and driver-assist systems like lane-keeping assist.

Does the 2022 Kangoo have a manual or automatic transmission?

It is likely available with both manual and automatic transmission options.

Is the 2022 Kangoo equipped with modern technology and connectivity?

Yes, it includes modern infotainment systems with touchscreen interfaces, Bluetooth connectivity, and potentially navigation systems.

Can the cargo area in the Kangoo be customized for specific business needs?

Yes, the cargo area is adaptable and can be fitted with various shelving and storage solutions.

Does the Kangoo offer sliding side doors?

Yes, sliding side doors are typically available for easy access.

What is the fuel efficiency of the Renault Kangoo?

Fuel efficiency varies by engine type, but both the petrol and diesel variants are designed for economy, and the electric version offers zero emissions.

Are there any roof rack options available for the Kangoo?

Roof racks and other external storage solutions are available as optional accessories.

What kind of warranty does Renault offer for the 2022 Kangoo?

The warranty varies by region but generally includes a standard manufacturer’s warranty.

How does the Kangoo perform in urban environments?

Its compact size and efficient engines make it well-suited for city driving and manoeuvring in tight spaces.

Useful Link

2022 Renault Clio User Manual

2023 Renault Express User Manual

Categories
Blogs

2023 Royal Enfield Super Meteor 650 Specs, Price, Mileage And Review

2023 Royal Enfield Super Meteor 650

The 2023 Royal Enfield Super Meteor 650 is more than just a motorbike; it’s a beautiful example of how tradition and modernity can work together in one beautiful ride. This bike is a great example of how classic style and modern function can work together. Imagine the classic style of a cruiser mixed with the power of current engineering. This spirit is perfectly captured by the Super Meteor 650, which promises riders a trip that is both thrilling and beautiful. It has a strong 650cc engine that gives this bike the speed that makes the open road exciting. But it’s not just about the show; it’s also about the experience. Imagine riding along scenic routes, enjoying the wind, and the pure joy of riding a machine that was made with great care and has a history of greatness.

2023-Royal-Enfield-Super-Meteor-650-Product

Price: $6,999 est

Colours: Astral Green, Astral Blue, Interstellar Grey, Celestial Red and Celestial Blue

Specifications

Engine

2023-Royal-Enfield-Super-Meteor-650-Engine

Engine Description
Engine Type Parallel twin, 4 stroke, SOHC, Air-Oil Cooled
Engine Displacement 648 cc
Max Power 47 PS @ 7250 rpm
Max Torque 52.3 Nm @ 5650 rpm
Emission Type BS6-2.0
Bore 78 mm
Stroke 67.8 mm
No Of Cylinders 2
Drive Type Chain Drive
Fuel Type Petrol
Compression Ratio 9.5: 1

Dimensions

2023-Royal-Enfield-Super-Meteor-650-Front

2023-Royal-Enfield-Super-Meteor-650-Back

Dimension Specification Measurement
Seat Height 740 mm
LengthWidthHeight 88.98, 35, 45.5 in
Wheelbase 1500 mm
Length 2260 mm
Ground Clearance 135 mm
Height 1155 mm
Width 890 mm
Fuel Capacity 15.7 Liters
Kerb Weight 241 Kg
Tail Light LED
Front Brake Diameter 320 mm
Rear Brake Diameter 300 mm

Transmission

Transmission Specification Description
No Of Gears 6 Speed
Transmission Manual

Brakes

Brakes Specification Description
Brakes Front Disc
Brakes Rear Disc

Performance and Fuel Economy

Performance and Fuel Economy Specification Description
Mileage (Overall) 25 kmpl

Electrical

Electricals Specification Description
USB charging port Yes
Additional Features Air Cleaner – Paper element, CO2 Emissions – 99 g/km, Noise Emissions – 76.3 dB(A)
LED tail lights Yes
Turn Signal Lamp LED

Wheels

Tyres and Wheels Specification Description
Tyre Size Front: 100/90 – 19, Rear: 150/80 – 16
Wheel Size Front: 482.6 mm, Rear: 406.4 mm
Tyre Type Tubeless
Wheels Type (Pressed Steel/Alloy) Alloy

Additional Features

Seat with a low back

2023-Royal-Enfield-Super-Meteor-650-Low-Slung-SeatIt’s easy to cruise when you have a low, wide seat and a relaxed riding position. It doesn’t matter how many miles are behind you or how many are ahead.

Fuel Tank with Shapes

2023-Royal-Enfield-Super-Meteor-650-Sculpted-Fuel-TankThe Super Meteor 650’s large, teardrop-shaped fuel tank can hold up to 4.15 gallons of fuel, so even the longest rides will go without a hitch.

Suspension of USD
Forks on the front suspension that are upside down give you full trust and control on highways, city streets, and everything in between.

LED Bike Light

2023-Royal-Enfield-Super-Meteor-650-LED-HeadlampA brand-new headlamp blends retro looks with modern LED lights to save power and make you more visible no matter where you’re going.

Digi-Analog Instrument Group

2023-Royal-Enfield-Super-Meteor-650-Alloy-Wheels-With-Wider-Rear-TireAll the information you need is on a digi-analog instrument panel that looks like it came from the 1970s. It has a floating LCD screen and built-in Tripper guidance.

Steel wheels with a wider back tire

2023-Royal-Enfield-Super-Meteor-650-SD-SuspensionTubeless tires on stylish alloy wheels make sure that nothing can go wrong with your plans. A bigger rear tire gives you better grip and stability, even at the fastest speeds.

FAQs

What is the price of the Royal Enfield Super Meteor 650?

The price of the Royal Enfield Super Meteor 650 is $6,999 est.

What is the engine type of the Royal Enfield Super Meteor 650?

The engine type of the Royal Enfield Super Meteor 650 is Parallel-twin, 4-stroke, SOHC, Air-Oil Cooled.

What is the engine displacement of the Royal Enfield Super Meteor 650?


What is the horsepower of the Royal Enfield Super Meteor 650?

The horsepower of the Royal Enfield Super Meteor 650 is 47 PS @ 7250 rpm.

What is the torque of the Royal Enfield Super Meteor 650?

The torque of the Royal Enfield Super Meteor 650 is 52.3 Nm @ 5650 rpm.

What is the ground clearance of the Royal Enfield Super Meteor 650?

The ground clearance of the Royal Enfield Super Meteor 650 is 135 mm.

What is the fuel type of the Royal Enfield Super Meteor 650?

The fuel type of the Royal Enfield Super Meteor 650 is Petrol.

How many cylinders does the Royal Enfield Super Meteor 650 have?

Royal Enfield Super Meteor 650 have 2 cylinders.

What is the wheel size of the Royal Enfield Super Meteor 650?

The wheel size of the Royal Enfield Super Meteor 650 is Front: 482.6 mm, Rear: 406.4 mm.

Conclusion

The Royal Enfield Super Meteor 650 is more than just a bike; it’s an interesting trip through history and modern technology. It has a classic cruiser look with a modern twist, so users can get the best of both worlds. Just picture yourself riding along on the open road, and you can hear the strong 650cc engine rumbling below you. You don’t just go on the ride; you have an experience that feels like it’s from another time but is driven by cutting-edge technology. The Super Meteor 650 is more than just a bike. It’s a statement. Its sleek design, comfortable ergonomics, and the right mix of vintage looks and modern features make it stand out. It’s a call to find new roads, make experiences that will last a lifetime, and enjoy the journey.

2023 Royal Enfield Hunter 350 Specs, Price, Mileage And Review

2023 Royal Enfield Scram 411 Specs, Price, Mileage And Review

2024 Royal Enfield Continental GT Specs, Price, Mileage And Review

Categories
Fiat

2020 Fiat Talento Transmission Guide

fiat-logo

2020 Fiat Talento Transmission Guide

The transmission system of the 2020 Fiat Talento is smooth and effective, providing a seamless driving experience. This car provides optimal fuel efficiency and responsive handling thanks to its cutting-edge transmission technology, making it a dependable option for a variety of driving situations. This Fiat Talento’s transmission promises a comfortable and performance-driven ride for both drivers and passengers, whether you’re speeding down the freeway or through the city.

TRANSMISSION

2020 Fiat Talento Transmission (2

STEERING

Multijet – Ecojet (Euro 5 – Euro 6)


Short wheelbase (L1)


Long wheelbase (L2)

Power steering


Hydraulic


Turning circle between pavements (mm)


11.84


13.17

Turning circle between walls (mm)


12.40


13.73

TYRES

Versions


Multijet 115 (Euro 5)


Ecojet 120 (Euro 4 – Euro 5)


Ecojet 140 (Euro 5)


205/65 R16


205/65 R16


215/65 R16


215/65 R16


215/65 R16


205/65 R16 All season


205/65 R16 All season


205/65 R16 All season


215/65 R16 All season


215/60 R17 (*)


215/65 R16 All season


215/60 R17 (*)


195/75 R16


215/60 R17 (*)


195/75 R16


Spare tyre


215/65 R16


(*) Chains cannot be fitted

2020 Fiat Talento Transmission (2)

FAQs

What type of transmission does the 2020 Fiat Talento offer?

Typically, a six speed manual transmission is included with the 2020 Fiat Talento, offering precise control and seamless gear changes.

Is an automatic transmission available for the 2020 Fiat Talento?

For those who prefer automatic gear shifting, the Fiat Talento does indeed come with an automatic transmission option.

How many gears does the automatic transmission in the Talento have?

A six speed gearbox is standard on the Fiat Talento’s automatic transmission, which ensures effective power delivery in a variety of driving scenarios.

Does the transmission affect the Talento’s fuel efficiency?

When it comes to the car’s fuel efficiency, the transmission is very important. The transmissions on the Talento are designed to balance fuel efficiency with power delivery.

Can I manually shift gears in the automatic transmission version of the Talento?


Yes, the Fiat Talento’s automatic transmission frequently has a manual shifting mode that gives drivers more control over changing gears if they so choose.

How often should the transmission fluid be changed in the Fiat Talento?

When changing the transmission fluid, which should normally happen every 30,000 to 60,000 miles, depending on driving circumstances, it is advised to adhere to the manufacturer’s recommendations.

What type of transmission maintenance does the Talento require?

The functioning of the transmission depends on routine checks and changes of the transmission fluid as well as periodic inspections for leaks or strange noises.

Does the Talento’s transmission have a warranty?

Indeed, the warranty on the car usually extends to the transmission. Fiat’s specific warranty details must be consulted, as the terms of the warranty may differ.

Can towing heavy loads impact the transmission’s longevity in the Talento?

The transmission may be subjected to additional stress when towing large loads. To avoid premature wear on the transmission components, it is advisable to adhere to the recommended towing capacity.

Are there any common transmission issues reported in the 2020 Fiat Talento?

Like any vehicle, problems can occur from time to time. However, when used in accordance with its specifications and maintained correctly, the 2020 Fiat Talento’s transmission is generally dependable.

How responsive is the transmission in the Talento during acceleration?

The Fiat Talento’s transmission is built to provide responsive acceleration, guaranteeing steady and reliable power delivery.

Can I upgrade or modify the transmission in the Talento for enhanced performance?

Performance and the warranty of the car may be affected by transmission modifications. Before making any changes, it is advised to speak with dealerships or certified mechanics.

Are there different driving modes available that affect the transmission in the Talento?

Different driving modes (such as Eco, Normal, or Sport modes) that modify transmission behavior to suit varied driving conditions may be available on some Talento variants.

How does the transmission contribute to the Talento’s overall driving experience?

The Fiat Talento’s transmission, which strikes a balance between performance, economy, and control, is essential to providing a comfortable and pleasurable driving experience.

Can improper driving habits affect the transmission’s lifespan in the Talento?

Indeed, driving erratically, stopping suddenly, or skipping maintenance checks may shorten the transmission’s lifespan. Its lifespan can be increased by following advised maintenance and driving procedures.

Useful Link

View Full PDF : 2020 Fiat Talento Owner’s Manual| Auto User Guide 2020 Fiat Talento Instrument Panel Guide

Categories
Fiat

2020 Fiat Talento Engine Instruction Guide

fiat-logo

2020 Fiat Talento Engine Instruction Guide

The dynamic and effective engine of the 2020 Fiat Talento is its heart; it is a carefully engineered powerplant intended to provide performance, dependability, and versatility for a variety of commercial needs. This engine powers the Talento’s capabilities, providing a power-to-efficiency ratio that meets a range of demands in the business and transportation sectors. Let’s examine the 2020 Fiat Talento engine’s features and capabilities to learn more about its technical wonders and how it enhances the van’s overall performance.

Engine

ENGINE


Multijet 115


Ecojet 120


Ecojet 140

EMISSION LEVEL


Euro 5


Euro4/ Euro5


Euro5

ENGINE


Engine type


R9M


Engine displacement (cm³)


1598


Type of injection


Common rail turbo


Common rail twin turbo


Common rail twin turbo

Type of fuel


Diesel


Start&Stop


Standard


Optional equipment

Number of cylinders


4


Number of valves


16


Bore/stroke ratio (at rpm)


80/79.5


Particulate filter


Yes


Yes


Maximum engine power


84 KW (115 HP) at 3500 rpm


88 KW (120 HP) at 3500 rpm


103 KW (140 HP) at 3500 rpm

Maximum torque


300 Nm at 1500 rpm


320 Nm at 1550 rpm


340 Nm at 1550 rpm

Tank capacity (litres)


80


Multijet 95


Ecojet 95


Multijet 120


Ecojet 125


Ecojet 145

EMISSION LEVEL


Euro 6


ENGINE


Engine type


R9M


Engine displacement (cm³)


1598


Type of injection


Common rail turbo


Common rail turbo


Common rail turbo


Common rail twin turbo


Common rail twin turbo

Type of fuel


Diesel


Start&Stop


Standard


Standard


Standard

Number of cylinders


4 in line


Number of valves


16


Bore/stroke ratio (at rpm)


80/79.5


2020 Fiat Talento Engine 01

WARNING
Modifications or repairs to the supply system that are not carried out correctly or do not take the system technical specifications into account can cause malfunctions leading to the risk of fire.

FAQs

What type of engine powers the 2020 Fiat Talento?

A variety of diesel engine options are available for the Talento, including the 1.6-liter and 2.0-liter Multijet engines.

What is the horsepower and torque output of the Talento’s engines

Engine options differ in terms of power output, but in general, power outputs fall between 95 and 170 horsepower and torque between 260 and 380 Nm.Engine options differ in terms of power output, but in general, power outputs fall between 95 and 170 horsepower and torque between 260 and 380 Nm.

What transmission options are available for the 2020 Fiat Talento?

The Talento usually comes with a choice of manual or automatic transmission, giving drivers of various driving styles flexibility.

What is the fuel efficiency of the Talento’s engines?

Although the exact engine version and driving circumstances affect fuel efficiency, the Talento typically has competitive fuel economy for its class.

What is the towing capacity of the 2020 Fiat Talento?

The engine and configuration determine the towing capacity, which usually varies between 2,000 and 2,500 kg, providing significant hauling capacity.

How often does the engine oil need to be changed in the Talento?

Generally speaking, oil changes should occur every 10,000 to 20,000 kilometers, but it’s best to abide by the manufacturer’s recommendations.

What kind of maintenance does the engine require?

Oil changes, filter replacements, fluid level checks, and following the owner’s manual’s suggested service schedule are all considered forms of routine maintenance.

Does the 2020 Fiat Talento have turbocharged engines?

Indeed, turbochargers are a feature of some engine variants that improve power and efficiency.

Are there any known common issues with the Talento’s engines?

Although generally dependable, some drivers may experience problems with fuel or turbocharger components. Regular upkeep aids in the prevention of these problems.

Can the Talento’s engine run on alternative fuels, such as biodiesel?

Certain biofuels can be used with fiat engines, but it’s important to check the owner’s manual for exact fuel recommendations.

What are the warranty terms for the engine in the 2020 Fiat Talento?

Warranty coverage is typically offered for a specific period of time or mileage, and it varies depending on the manufacturer’s policies and the region.

Does the Talento engine feature start-stop technology for fuel efficiency?

Some models may have start-stop systems installed, which automatically turn off the engine when the car is stationary.

How long does the engine take to warm up in cold conditions?

After driving, engines usually reach their ideal operating temperatures in a few minutes, though this can vary depending on the weather and engine size.

Can I enhance the engine’s performance through aftermarket modifications?

Changing the engine could nullify the warranty, impact the vehicle’s dependability, and be against the law. Before making any changes, it is advised to speak with licensed experts.

What steps should I take if I notice unusual engine noises or performance issues?

It is best to have the car checked out by a trained mechanic if you hear strange noises or see strange behavior from the vehicle so that any possible problems can be quickly identified and fixed.

Useful Link

View Full PDF : 2020 Fiat Talento Owner’s Manual| Auto User Guide 2020 Fiat Talento Warning and indicator Lights Guide

Categories
Renault

2022 Renault Express Owner’s Manual

Renault-logo

2022 Renault Express Owner’s Manual

In the compact commercial vehicle market, the 2022 Renault Express stood out as a useful and effective option designed to meet the demands of urban logistics and small enterprises. With this model, Renault reaffirmed its commitment to the light commercial vehicle industry by providing a dependable and affordable option for those in need of a practical, manoeuvrable van. It had a range of fuel-efficient engines, a roomy cargo area with clever storage options, and a sturdy build that could withstand regular use. The Express boasts a plethora of contemporary technologies and safety features that combine to make driving safe and pleasurable. Because of its small size and roomy cabin, the 2022 Renault Express was a great option for companies looking for a reliable, affordable, and adaptable car for their operations.

CRUISE CONTROL

The cruise control function helps you to maintain your driving speed at a speed that you choose, called the cruising speed. This cruising speed may be set at any speed above 20 mph (30 km/h). This function is an additional driving aid. The function does not take the place of the driver. Therefore, it can under no circumstances replace the driver’s responsibility to respect speed limits and to be vigilant (the driver must always be ready to brake). Cruise control must not be used in heavy traffic, on undulating or slippery roads (black ice, aquaplaning, gravel) and during bad weather (fog, rain, side winds etc.).
There is a risk of accidents.

Switching on
Press switch 1 on the side showing. The 6 warning light appears in green and, depending on the vehicle, the message “Cruise control ON” or “Cruise Control — mph (— km/h)” appears on the instrument panel, accompanied by dashes to indicate that the cruise control function is in operation and waiting to memorise a cruising speed.

Activating cruise control
At a steady speed (above approximately 19 mph (30 km/h)) press switch 3 (SET/-): the function is activated and the current speed is stored. The cruising speed replaces the dashes and the cruise control function is confirmed by the appearance, depending on the vehicle, of the message “Cruise control ON” or “Cruise Control XXX mph (XXX km/h)” and the 5 warn- ing light in green, in addition to the 6 warning light.

Driving
Once a cruising speed is stored and the cruise control function is active, you may lift your foot off the accelerator pedal. Please note that you must keep your feet close to the pedals in order to react in an emergency.

Adjusting the cruising speed
The cruising speed may be changed by pressing the following repeatedly:

  • switch 2 (RES/+) to increase speed;
  • switch 3 (SET/-) to reduce speed.

The cruise control function is in no way linked to the braking system.

Exceeding the cruising speed
The cruising speed may be exceeded at any time by depressing the accelerator pedal. While it is being exceeded, the cruising speed flashes on the instrument panel. Then, release the accelerator: after a few seconds, the vehicle will automatically return to its set cruising speed.

Cruising speed cannot be maintained
When driving down a steep gradient, the system may be unable to maintain the cruising speed: the stored speed will flash on the instrument panel information display to inform you of this situation. If the cruise control is no longer available (after several attempts to activate it), contact an approved dealer.

Putting the function on standby

The function is set to standby if you:

  • use the switch 4 (0);
  • the brake pedal;
  • the clutch pedal;

In all three cases, the cruising speed remains stored and, depending on the vehicle, the message “Memorised XXX mph (XXX km/h)” appears on the instrument panel. Standby is confirmed when the indicator light goes out.

Returning to the cruising speed
If a speed is stored, it can be recalled, once you are sure that the road conditions are suitable (traffic, road surface, weather conditions, etc.). Press the switch 2 (RES/+) if the vehicle speed is above 19 mph (30 km/h). When the stored speed is recalled, activation of the cruise control is confirmed by the illumination of the warning light.

Note: if the speed previously-stored is much higher than the current speed, the vehicle will accelerate more rapidly to reach this threshold.
When the cruise control is set to standby, pressing switch 3 (SET/-) re-activates the cruise control function without taking into account the stored speed: it is the speed at which the vehicle is moving that is taken into account.

Exceeding the limit speed
It is possible to exceed the limit speed at any time. To do this: press the accelerator pedal firmly and fully (beyond the resistance point). While the speed is being exceeded, the programmed speed displayed on the instrument panel flashes. Then, release the accelerator: the speed limiter function will return as soon as you reach a speed lower than the stored speed.

Limited speed cannot be maintained
When driving down a steep gradient, the system may be unable to maintain the limited speed: the limited speed will flash on the instrument panel and, depending on the vehicle, an audible signal will sound at regular intervals to inform you of this situation.

Putting the function on standby
The speed limiter function is suspended when you press switch 4 (0). The limit speed remains stored and, depending on the vehicle, the message “Memorised XXX mph (XXX km/h)” appears on the instrument panel accompanied by the stored speed.

Recalling the limit speed
If a speed has been stored, it can be recalled by pressing switch 2 (RES/+). When the speed limiter is set to standby, pressing switch 3 (SET/-) reactivates the function without taking into account the memorised speed: it is the speed at which the vehicle is moving that is taken into account.

Switching off the function
The speed limiter function is deactivated if you press switch 1: in this case a speed is no longer stored. The orange instrument panel warning light goes out, confirming that the function is stopped.

PARKING DISTANCE CONTROL

Operating principle
Ultrasonic sensors, indicated by arrows 1, are fitted in the bumpers to measure the distance between the ve- hicle and an obstacle. This measurement is indicated by beeps which become more frequent the closer you come to the obstacle, until they become a continuous beep when the vehicle is approximately 20 to 30 centimetres from the obstacle. The system detects obstacles to the front, the rear and the sides of the vehicle. The parking distance control system is only activated when the vehicle is driven at a speed below approximately 6 mph (10 km/h). The parking distance control system does not take into account towing and load-carrying systems etc.

Special features
Ensure that the ultrasonic sensors indicated by arrow 1 are not obscured (by dirt, mud, snow, or a badly fitted/attached number plate), impacted, modified (including paintwork) or obstructed by any accessory fitted to the front or rear of your vehicle. This function is an additional aid that indicates the distance between the vehicle and an obstacle whilst reversing, using sound signals. Under no circumstances should it replace the driver’s care or responsibility whilst reversing. The driver should always be ready for sudden incidents while driving: always ensure that there are no small, narrow moving obstacles (such as a child, animal, pushchair, bicycle, stone, post etc.) in the blind spot when manoeuvring.

Operation
Most objects located near the rear and, depending on the vehicle, near the front end are detected. Depending on the vehicle, the areas will be shown on the 2 display.

Deactivating the system
Deactivating the parking distance control manually Press switch 3 to deactivate the system. The switch warning light 3 appears to indicate that the system is deactivated. Pressing the switch again will reactivate the system and switch off the indicator light.

You must disable the function if:

  • towing, carrying or trailer equipment is present in front of the ultrasonic detectors;
  • in the event of damage to the ultra-sonic sensors.

Automatic deactivation of the parking distance control

The system deactivates:

  • when the vehicle speed is above approximately 6 mph (10 km/h);
  • depending on the model, when the vehicle is stationary for more than approximately 5 seconds and an obstacle is detected (such as when in a traffic jam, etc.);
  • when you are in neutral..

Operating faults
Depending on the vehicle, when the system detects an operating fault, the message “Parking sensors to check” appears on the instrument panel, accompanied by the warning light © and a beep lasting approximately 5 seconds. Consult an approved dealer. An impact to the under-side of the vehicle while manoeuvring (e.g.: striking- ing a post, raised kerb or other street furniture) may result in damage to the vehicle (e.g.: deformation of an axle). To avoid any risk of accident, have your vehicle checked by an approved Dealer.

REVERSING CAMERA

Operation
Moving into reverse gear, camera 1 located on the rear-hinged door provides a view of the area behind the vehicle on the rearview mirror 2 or, depending on the vehicle, on the multimedia screen 3, accompanied by one or two (moving and fixed) guide lines 4 and 5.

Note: depending on the vehicle, certain settings can be adjusted from the multi-media screen 3. Refer to the handbook for the equipment.

This function is an additional aid. It cannot, therefore, under any circumstances replace the vigilance or the responsibility of the driver.

The driver should always be ready for sudden incidents while driving: always ensure that there are no small, narrow moving obstacles (such as a child, animal, pushchair, bicycle, stone, post, etc.) in the blind spot when manoeuvring.

Dynamic gauge 4 (depending on the vehicle)
This is shown in blue on the multimedia screen 3. It indicates the vehicle trajectory according to the position of the steering wheel.

Static guideline 5:
The fixed clearance gauge comprises coloured markers A, B and C, indicating the distance behind the vehicle:

  • A (red) approximately 30 centime-tres from the vehicle;
  • B (yellow) approximately 70 centi-metres from the vehicle;
  • C (green) approximately 150 centi-metres from the vehicle.

This gauge remains fixed and indicates the vehicle trajectory if the wheels are in line with the vehicle. This system is initially used with the aid of several gauges (mobile for trajectory and fixed for distance). When the red zone is reached, use the bumper image to stop accurately.

Special feature
Ensure that the reversing camera is not obscured (dirt, mud, snow, condensa- tion, etc.).

The screen shows a reverse image. The frames are a representation projected on a flat surface. This in- formation is to not be taken into ac- count when superimposed on a vertical object or an object on the ground. Objects which appear on the edge of the screen may be deformed. In very bright light (snow, vehicle in sunshine etc.), the camera vision may be adversely affected. If the rear doors are open or poorly closed, the message “BOOT OPEN” appears and, depending on the ve- hicle, the camera display disap- pears.

BLIND SPOT WARNING
This system alerts the driver to other vehicles in the detection zone A. The system is activated when the vehi- cle’s speed is between approximately 30 km/h (19 mph) and 140 km/h (87 mph). This function uses sensors 1 installed in the front and rear bumper of both sides.

Special feature
Make sure that the sensors are not obs- cured (by dirt, mud, snow, etc.).
If a sensor is obscured, the message “Clean Blind Spot Sensor” will appear on the instrument panel. Clean the sen-sors. This function is an addi- tional aid which indicates other vehicles in the blind spot area. It can never in any case be a subs- titute for care nor for the driver’s responsibility while in charge of his vehicle. The driver should always be ready for sudden incidents while driv- ing: always ensure that there are no small, narrow moving obstacles (such as a child, animal, pushchair, bicycle, stone, post, etc.) in the blind spot when manoeuvring.

Activation/deactivation
If you press switch 2, the system is ac- tivated. The message “Blind spot alert on” is displayed on the instrument panel and the warning light on the switch is il- illuminated. If you press the switch 2 again, the system is deactivated.

Special condition with trailer
If the vehicle is equipped with a towbar recognised by the system, the “Trailer: blind spot alert off” message displayed on the instrument panel informs you that the function is not operational. The indicator light in the switch goes out. For information on the range of equip- ment adapted to your vehicle, we advise you to consult an approved Dealer.

Operation
This function gives a warning:

  • when the vehicle speed is between approximately 19 mph (30 km/h) and 87 mph (140 km/h);
  • when another vehicle is in the blind spot area and travelling in the same direction as your vehicle.

If your vehicle is overtaking another ve- hicle, the indicator 3 will be activated only if that vehicle remains in the blind spot for more than one second. When the engine is started, the system remembers its position when the ignition was last switched off.

Conditions for non-function

  • If the object is not moving;
  • if traffic is heavy;
  • the road is winding;
  • if front and rear sensors both detect an object at the same time (e.g. when passing an articulated lorry).

Operating faults
If the system detects a fault, the mes- sage “Check blind spot alert” is dis- played on the instrument panel. Call an approved Dealer.

Note: when the engine is started, the indicator light 3, display B, flashes three times. It is normal.

If a trailer is attached to the vehicle, the system must be disabled with the 2 switch. Because sensors have been installed in the bumpers, any work (repairs, replacements, touching up of paintwork etc.) should be carried out by a qualified professional.

FAQ

What type of vehicle is the 2022 Renault Express?

The Renault Express is a compact light commercial vehicle.

What engine options are available for the 2022 Express?

It typically offers a selection of efficient petrol and diesel engines.

It typically offers a selection of efficient petrol and diesel engines.

As of my last update, there was no electric version of the 2022 Renault Express.

What is the payload capacity of the Renault Express?

The payload capacity is designed to be competitive within its class, suitable for small businesses and urban deliveries.

Does the 2022 Express have a manual or automatic transmission?

It is likely available with both manual and automatic transmission options.

How many passengers can the 2022 Express accommodate?

The Express is primarily designed as a two-seater for commercial use.

What are the key safety features in the 2022 Express?

Key safety features may include ABS, airbags, electronic stability control, and potentially rear parking sensors.

What is the cargo space capacity of the Renault Express?

The Express offers a spacious and practical cargo area, suitable for various professional needs.

Is the 2022 Express equipped with modern technology and connectivity?

It likely includes basic modern technology like a functional infotainment system and Bluetooth connectivity.

Does the Express feature sliding side doors?

Yes, it typically includes sliding side doors for easy loading and unloading.

What are the interior features of the Express?

The interior is designed with practicality in mind, featuring durable materials and functional storage spaces.

Can the cargo area be customized for specific business needs?

The cargo area is adaptable and can be fitted with various shelving and storage solutions.

Are there roof rack options available for the Express?

Roof racks and other external storage solutions are likely available as optional accessories.

What kind of warranty does Renault offer for the Express?

The warranty varies by region but usually includes a standard manufacturer’s warranty.

How does the Express perform in urban environments?

Its compact size and efficient engines make it well-suited for city driving and tight spaces.

Useful Link

2022 Renault Clio User Manual

2023 Renault Express User Manual

Categories
Fiat

2020 Fiat Talento Fuses Guidelines

fiat-logo

2020 Fiat Talento Fuses Guidelines

The 2020 Fiat Talento is a flexible and effective van made to meet a range of business requirements. Fuse protection is one of its most important parts. Fuse protection is the process of breaking a circuit when an excessive amount of current flows through a vehicle’s electrical system. It is essential to comprehend the fuses in your Talento to guarantee the seamless functioning of its electrical features. In order to equip you with the necessary knowledge to properly maintain and troubleshoot the 2020 Fiat Talento’s electrical systems, let’s dig into the specifics of its fuses.

PASSENGER COMPARTMENT FUSES

Fuses in compartment A
If electrical equipment does not work, check the fuse state. Release the glove compartment A fig. 246.

2020 Fiat Talento Fuses 01 (1)

IMPORTANT
Depending on the local laws or as a precaution, buy an emergency box containing a series of light bulbs and fuses from a Fiat Dealership.

Fuse extracting pliers
Take out the fuse using pliers 1 fig. 247, located behind flap A. To remove the fuse from the pliers, slide it sideways. We recommend you not use the free fuse positions.

2020 Fiat Talento Fuses 01 (2)

The presence of fuses will depend on the vehicle’s trim level.

2020 Fiat Talento Fuses 01 (3)

2020 Fiat Talento Fuses (3)

  1. Contact a Fiat Dealership to replace these fuses.

2020 Fiat Talento Fuses (4)

  1. Contact a Fiat Dealership to replace these fuses.

WARNING

  1. If the replaced fuse blows again, contact a Fiat Dealership.
  2. Never replace a fuse with another with a higher amp rating; DANGER OF FIRE.
  3. If a general protection fuse (MAXI-FUSE, MEGA-FUSE, MIDI-FUSE) blows, do not attempt any repair and contact a Fiat Dealership.
  4. Before replacing a fuse, make sure that the key has been removed from the starter switch and that all the other services are switched off and/or disengaged.
  5. Contact Fiat Dealership if a safety system (airbags, brakes), engine system (engine, gearbox) or steering system general protection fuse blows.

IMPORTANT

  • Never replace a fuse with metal wires or anything else.
  • If it is necessary to wash the engine compartment, take care not to directly hit the fuse box and the window wiper motors with the water jet.

FAQs

Where are the fuses located in the 2020 Fiat Talento?

Usually, the fuses are kept in one or more fuse boxes that are situated throughout the car, like the engine compartment or beneath the dashboard.

How many fuse boxes does the 2020 Fiat Talento have?

There could be several fuse boxes in the Talento. Typical places include the engine compartment and beneath the driver’s side dashboard.There could be several fuse boxes in the Talento. Typical places include the engine compartment and beneath the driver’s side dashboard.

What do the different fuse box symbols mean?

The circuits that each fuse protects are denoted by symbols and acronyms in the owner’s manual or on the cover of the fuse box.

How can I identify a blown fuse in my Talento?

Examine the fuses with your eyes or check for continuity with a multimeter. Usually, a blown fuse indicates a break in the interior metal strip.

What size fuses does the 2020 Fiat Talento use?

The Talento may use fuses with amperage ratings ranging from a few to several dozen amps, in different sizes (mini, standard, etc.).

Can I replace a fuse with one of a different amperage rating?

Replacing a blown fuse with one of the same amperage rating is essential to keeping the electrical circuit protected as intended.

What tools do I need to replace a fuse in the Talento?

For removal and replacement, all you usually need is a fuse puller or a pair of needle-nose pliers.

How do I access the fuse box in the 2020 Fiat Talento?

For detailed instructions, consult the owner’s manual. Typically, access to the fuse box is obtained by removing a cover or panel.

Can a single fuse control multiple systems in the Talento?

Indeed, a blown fuse may have an impact on several systems or circuits that it protects.

What should I do if a replaced fuse continues to blow?

If a replaced fuse blows right away again, there may be an electrical problem or possible short circuit that requires professional repair.

Are there spare fuses included with the vehicle?

Some models may have extra fuses that are kept in the vehicle’s designated compartment or fuse box.

Is there a specific order for removing and replacing fuses in the Talento?

Although there isn’t a set procedure, it’s advisable to disconnect the battery before changing the fuses for extra security.

Can extreme weather conditions affect the fuses in the Talento?

The integrity of the fuses may be impacted by extremely high or low temperatures or moisture. It’s best to keep the fuse box dry and steer clear of extremely high or low temperatures.

Are there any common electrical issues in the Talento related to fuses?

It is frequently possible to fix non functioning systems (such as lights or radios) by changing blown fuses.

Should I consult a professional for fuse-related problems in my Talento?

Seeking advice from a qualified mechanic or electrician is advised if you’re not confident handling fuses or if the problem still exists after replacing the fuse.

Useful Link

View Full PDF : 2020 Fiat Talento Owner’s Manual| Auto User Guide 2020 Fiat Talento Instrument Panel Guide

Categories
Fiat

2020 Fiat Talento Lightnings Instructions

fiat-logo

2020 Fiat Talento Lightnings Instructions

The 2020 Fiat Talento Lightnings revolutionizes the commercial vehicle market with a stunning blend of electrification and functionality. This cutting-edge Fiat Talento model embodies a dedication to environmentally friendly transportation without sacrificing usability or effectiveness.

The Lightnings model, an electric take on the well-known Fiat Talento, is notable for both its outstanding performance and environmentally friendly design. This car offers an emission-free driving experience thanks to its electric drivetrain, helping to create a more sustainable and clean transportation future.

EXTERNAL LIGHTS

SIDE LIGHTS

2020 Fiat Talento Lightnings Instructions (1)

Switching off
Turn the knurled ring 2 fig. 68 to position 0.

DAYTIME RUNNING LIGHTS

(only front lights)

Ignition
Daytime running lights go on automatically without using lever 1 fig. 69 when you start the engine and they go off when you turn the engine off.

2020 Fiat Talento Lightnings Instructions (2)

IMPORTANT
If you are driving on the left in a vehicle equipped for left hand drive (or vice versa), you need to regulate the lights for the visiting time (refer to the “Headlight alignment adjustment” paragraph in the “Knowing your vehicle” chapter).

DIPPED HEADLIGHTS

Manual activation
Turn the knurled ring 2 fig. 68 so the corresponding symbol on the instrument panel lights up.

Automatic activation
(For versions/markets where provided)
Turn the knurled ring 2 fig. 68 to correspond with the AUTO symbol: with the engine started, the low beam lights go on or off automatically depending on the outside light, without having to use lever 1 fig. 68.

Switching off
Manually turn the knurled ring 2 fig. 68 to position 0;
With the knurled ring 2 fig. 68 in the position of the AUTO symbol, the low beam lights go off after the engine is turned off, the driver’s door is opened or the vehicle is closed. In this case, when the engine is started again, the low beam headlights go on again depending on the outside lighting, without using lever 1 fig. 68.

NOTE
When the low beams or fog lights are on, the lights do not go off automatically.

MAIN BEAM HEADLIGHTS

Ignition
When the engine is running and the main beam headlights are lit, press lever 1 fig. 68. The warning light switches on in the instrument panel. To go back to the low beam lights, pull the lever 1 fig. 68 towards you.

Switching off
Turn the knurled ring 2 fig. 68 to position 0.
In case the lights have been turned on manually, when the driver’s door is opened, an acoustic warning goes off to indicate the lights are still on.

FRONT FOG LIGHTS
Turn the central knurled ring 4 fig. 70 on the lever 1 until the symbol appears, then release it. Operation depends on the exterior light position selected, with the relative light going on on the instrument panel.

2020 Fiat Talento Lightnings Instructions (3)

Light function in a curve
In a curve, with parking lights on and in certain conditions (speed, vehicle angle, going forward, direction indicators on, etc.), one of the front fog lights goes on to light up the curve.

REAR FOG LIGHT

Turn the central knurled ring 4 fig. 70 until the symbol appears in front of reference 5 fig. 70, then release it.
Operation depends on the exterior light position selected, with the relative light going on on the instrument panel.

Do not forget to turn this light off when you no longer need it so it does not bother other drivers.
Switching off
Turn the knurled ring 4 fig. 70 so it corresponds to the relative symbol of the front and rear fog lights that you want to turn off. The warning light goes off on the instrument panel. When you turn off the exterior lights, this also causes the front and rear fog lights to go off.

IMPORTANT
With fog, snow or when moving items that are longer than the roof, the automatic light turning on is not systematic. Turning on front and rear fog lights is at the driver’s discretion: the warning lights on the instrument panel indicate they are on (light on) or off (light off).

HEADLIGHT ALIGNMENT ADJUSTMENT
(For versions/markets where provided)
For vehicles equipped with them, knob A fig. 71 lets you adjust the headlights depending on the load. Rotate knob A down to lower the lights and up to raise them.

2020 Fiat Talento Lightnings Instructions (4)2020 Fiat Talento Lightnings Instructions (8)

IMPORTANT
If you are driving on the left in a vehicle equipped for left hand drive (or vice versa), you must adjust the headlight orientation for the duration of the visit.

2020 Fiat Talento Lightnings Instructions (5)

Adjusting the headlights externally
Open the engine compartment and identify the B fig. 72 printed near one of the front lights.
For each light, turn screw 1 fig. 72 a quarter turn towards the – with a screwdriver to lower the lights.
Once the parking ends, return to the original position: turn screw 1 a quarter turn to the + to raise up the lights.

DIRECTION INDICATORS

Lever 1 fig. 73:
upwards: engage the right directional signal;
downwards: engage the left directional signal.

2020 Fiat Talento Lightnings Instructions (2)

Press functions
When driving, the steering wheel manoeuvres can be not enough to automatically bring the lever back to its original position. In this case, move the lever 1 halfway and release it: it will return to its starting point and the direction indicator lights will flash three times.

WARNING

  • Before travelling at night: make sure the electrical equipment is in good condition and check the headlight height (if you do not have your usual load conditions). Check that nothing interferes with the headlight beams (dust, mud, snow, etc.).
  • The daytime running lights are an alternative to the dipped headlights for driving during the daytime in countries where it is compulsory to have lights on during the day; where it is not compulsory, the use of daytime running lights is permitted.
  • Daytime running lights cannot replace dipped beam headlights when driving at night or through tunnels. The use of daytime running lights is governed by the highway code of the country in which you are driving. Comply with legal requirements.
  • When you stop by the side of the road, if the tailgate is completely open, the rear lights might not be visible. Warn other road users that your vehicle is there by placing the pre-signal triangle or other device allowed by law in the country you are driving in.

INTERIOR LIGHTS

ROOF LIGHTS
Using 1 fig. 74, 2 fig. 75, or 3 fig. 75, you get:

  • Permanent lighting;
  • Lighting controlled by opening one of the doors. It will go off only when the doors concerned are properly closed;
  • It will go off immediately.

2020 Fiat Talento Lightnings (1)

IMPORTANT
Unlocking and opening the doors causes the timed lighting of the courtesy lights.

2020 Fiat Talento Lightnings (2)

Move the switch 4 fig. 76 (for versions /markets where provided) to turn on the reading light.

GLOVE COMPARTMENT LIGHT

2020 Fiat Talento Lightnings (4)

It goes on when the compartment 4 fig. 77 is opened.

LUGGAGE COMPARTMENT LIGHT

It goes on when the compartment is opened.

IMPORTANT
With the doors correctly closed, starting or stopping the engine will make the luggage compartment courtesy light go off.

2020 Fiat Talento Lightnings (5)

REAR LIGHT

By moving switch 7 fig. 79, you get:

  • Permanent lighting;
  • Lighting controlled by opening one of the rear doors. It will go off only when the doors concerned are properly closed;
  • It will go off immediately.

2020 Fiat Talento Lightnings 9

FAQs

How many headlights does the 2020 Fiat Talento have?

The front of the 2020 Fiat Talento typically has two headlights installed.

What type of bulbs do the headlights use in the Fiat Talento?

Halogen bulbs are typically used in headlights, however some models may also have LED or Xenon lighting options.

Are the headlights adjustable for different driving conditions in the Fiat Talento?

Yes, to accommodate different driving conditions, the headlights on the majority of Fiat Talento models have adjustable beam levels.

Can I install aftermarket LED headlights in the Fiat Talento?


The electrical system and warranty of the car may be impacted by the installation of aftermarket headlights. Before making changes, it’s best to speak with a Fiat service center.

How do I replace a headlight bulb in the Fiat Talento?

Check your owner’s manual for detailed instructions on how to change your headlight bulbs. Typically, it entails reaching the lightbulb located behind the headlight housing.

Do the rear lights in the Fiat Talento include brake lights and indicators?

Yes, the tail lights, brake lights, and indicators usually make up the rear lights.

Are the fog lights standard on the Fiat Talento?

It is possible that certain Fiat Talento models offer fog lights as an add-on.

How often should I check the condition of the lights in the Fiat Talento?

During routine maintenance, make sure to regularly check the lights to make sure they are operating correctly.

Can I adjust the brightness of the interior lights in the Fiat Talento?

The dashboard controls on the majority of models enable you to change the brightness of the interior lights.

Are there automatic headlights in the Fiat Talento?

Certain models may have automatic headlights that adjust to the level of ambient light before turning on or off.

What should I do if my Fiat Talento’s lights flicker or dim?

It is advised that you have the electrical system inspected by a qualified technician if you observe any irregularities with the lights.

Do the headlights have a leveling system in the Fiat Talento?Do the headlights have a leveling system in the Fiat Talento?

An automated headlight leveling system that modifies the beam angle in response to vehicle load may be present in certain models.

Can I change the color temperature of the headlights in the Fiat Talento?

Without certain adjustments, changing the color temperature of the headlights might not be as simple as it seems. Seek advice from an expert prior to making any modifications.

Are there daytime running lights (DRLs) in the Fiat Talento?

Indeed, daytime running lights are fitted to a number of Fiat Talento models for improved visibility during the day.

Are the bulbs in the Fiat Talento’s lights covered under warranty?

As wear-and-tear items, bulbs may not normally be covered under the terms of the standard vehicle warranty. For specifics, see the warranty details.

Useful Link

View Full PDF : 2020 Fiat Talento Owner’s Manual| Auto User Guide
2020 Fiat Talento Warning and indicator Lights Guide

Categories
Renault

2023 Renault Express User Manual

Renault-logo

2023 Renault Express User Manual

An important development in Renault’s utility portfolio is the 2023 Renault Express, a useful and adaptable light commercial vehicle that provides a solution for companies and individuals needing a small but roomy van. With a focus on efficiency and functionality, the Express is built to satisfy the needs of small businesses and urban distribution. It has a wide range of engines, including ones that use less fuel. Its small size makes it simple to maneuver in urban settings, and its inside has a surprisingly large cargo area that can be adjusted to meet a variety of professional needs. In addition, the car incorporates contemporary technology, such as a useful infotainment system and standard safety features, giving it an affordable and dependable option for anyone looking for a dependable work vehicle that meets the practicality and quality standards expected from Renault.

SPECIAL FEATURES OF PETROL VERSIONS, PARTICLE FILTER

The following operating conditions:

  • driving for long periods when the low fuel level warning light is lit;
  • using leaded petrol;
  • using fuel or lubrication additives which are not approved.

Or operating faults such as:

  • faulty ignition system, running out of fuel or disconnected spark plugs resulting in the engine misfiring or cutting out when driving;
  • loss of power,

as they may cause the catalytic converter to overheat and thus reduce its efficiency, or damage it irreparably and cause heat damage to the vehicle. If you notice any of the above operating faults, have the necessary repairs carried out as soon as possible by an approved Dealer. These faults may be avoided by regularly taking your vehicle to your approved dealer at the intervals specified in the maintenance document.

Starting problems
To avoid damaging the catalytic converter, do not keep trying to start the engine (using the start button, or by pushing or towing the vehicle) without having identified and corrected the starting fault. If the fault cannot be identified, do not continue to try and start the engine, but contact an approved dealer. Do not park the vehicle or run the engine in locations where combustible substances or materials such as grass or leaves can come into contact with the hot exhaust system.

Particle filter
The particle filter is used in the treatment of exhaust gases from petrol engines. Depending on the vehicle, the warning light displayed on the instrument panel indicates that the filter is becoming clogged and requires cleaning. To clean it, when the warning light appears, and as traffic conditions and speed limits allow, drive at between about 31 mph (50 km/h) and 68 mph (110 km/h) until the light goes out.
After between approximately 5 and 20 minutes, the warning light should go out.

Note: The indicator light may go out after 20 minutes when the driving conditions needed to clean the filter are not completely met. If the vehicle is stopped before the warning light disappears you will have to restart the process from the begin- ning.

DRIVING ADVICE, ECO DRIVING (1/4)
Fuel consumption is accredited in accordance with a standard regulatory method. Identical for all manufactur- ers, this enables vehicles to be com- pared with one another. Consumption in real time depends on vehicle usage conditions, the equipment fitted and the user’s driving style. To optimise fuel consumption, please refer to the following advice.

Depending on the vehicle, you will have various functions which enable you to lower your fuel consumption:

  • the rev counter;
  • gear change indicator;
  • ECO mode;

ECO mode
ECO mode is a function which optimises fuel consumption. It affects certain driving operations (acceleration, shifting gears, cruise control, deceleration etc.). Limiting acceleration enables low fuel consumption in urban and surrounding areas.

Activating the function
Press switch 2. The 3 warning light comes on on the instrument panel to confirm activation. While driving, it is possible to leave the ECO mode temporarily in order to improve engine performance. To do this, press the accelerator pedal firmly and fully. ECO mode is reactivated when you take pressure off the accelerator pedal.

Disabling the function
Press switch 2. Warning light 3 goes out on the instrument panel to confirm deactiva- tion.

Behaviour

  • Drive carefully for the first few miles until the engine reaches its normal operating temperature, rather than let it warm up while the vehicle is stationary.
  • Speed is expensive.
  • Dynamic driving with a lot of frequent acceleration and braking is expensive on fuel in comparison to the time saved.
  • Do not overrev the engine in the intermediate gears.
    You should always use the highest gear possible.
  • Avoid sudden acceleration.
  • Brake as little as possible. If you anticipate an obstacle or bend in advance, you may then simply release the accelerator pedal.
  • Do not try to maintain the same speed up a hill, accelerate no more than you would on the level. Keep your foot in the same position on the accelerator pedal.
  • Double declutching and accelerating before switching off are unnecessary in modern vehicles.
  • Bad weather, flooded roads:
    • Do not drive through floods if the water is above the lower edge of the wheel rims.

Obstructions to the driver On the driver’s side, only use mats suitable for the vehicle, attached with the pre-fitted components, and check the fitting regularly. Do not lay one mat on top of another.
There is a risk of wedging the pedals.

REAR CAMERA
When the vehicle ignition is switched on, the screen 2 fixed to the windscreen will display a warning message for approximately five seconds, then it will display the view behind the vehicle using the camera 1.

Note: the screen 2 can be positioned left to right or top to bottom.

Special features
The camera is equipped with an auto- matic de-icer which is activated when the temperature is below approximately 8°C. Make sure that the 1 camera is not ob- scured (by dirt, mud, snow, condensa- tion etc.).

This function is an additional aid. It cannot, therefore, under any circumstances replace the vigilance or the responsibility of the driver.
The driver should always be ready for sudden incidents while driv- ing: always ensure that there are no small, narrow moving obstacles (such as a child, animal, pushchair, bicycle, stone, post, etc.) in the blind spot when manoeuvring.

Operation
The camera’s field of vision does not cover the entire area behind the vehi- cle, particularly the blind spot area A. On vehicles equipped with the Stop and Start function, the display remains active when the engine is in standby. Objects which appear on the edge of screen 2 may be deformed. In very bright light (snow, vehicle in sunshine, etc.), the camera view may be partially disturbed. In low brightness or poor weather, the image on the screen may be dis- torted.

Anti-lock braking system (ABS)
Under heavy braking, the ABS prevents the wheels from locking, allowing the stopping distance to be managed and keeping control of the vehicle. Under these circumstances, the vehi- cle can be steered to avoid an obstacle whilst braking. In addition, this system can increase stopping distances, particularly on roads with low surface grip (wet ground, etc.). You will feel a pulsation through the brake pedal each time the system is activated. The ABS does not in any way improve the vehicle’s physical per- formance relating to the road surface and road-holding. It is still essential to follow the rules of good driving practice (such as driving at a safe distance from the vehicle in front, etc.).

DRIVER CORRECTION DEVICES, AIDS

Electronic stability control (ESC) with understeer control and traction control

  • Electronic stability control ESC
    This system helps you to keep control of the vehicle in critical driving condi-tions (avoiding an obstacle, loss of grip on a bend, etc.).
  • Operating principle
    A sensor in the steering wheel detects the direction selected by the driver. Other sensors throughout the vehicle measure the actual direction. The system compares driver input to the actual trajectory of the vehicle and corrects the trajectory if necessary by controlling the braking of certain wheels and/or engine power. In the event that the system is engaged, indicator light flashes on the instrument panel.
  • Understeer control
    This system optimises the action of the ESC in the case of pronounced under- steering (loss of front axle road hold- ing).
  • Traction control
    This system helps to limit wheelspin of the drive wheels and to control the ve- hicle when pulling away accelerating or decelerating.
  • Operating principle
    Using the wheel sensors, the system measures and compares the speed of the drive wheels at all times and slows down their over-rotation. If a wheel is starting to slip, the system brakes au- tomatically until the drive supplied be- comes compatible with the level of grip under the wheel again. The system also adjusts the engine speed to the grip available under the wheels, independently of the pressure exerted on the accelerator pedal

These functions are an additional aid in the event of critical driving conditions, enabling the vehicle behaviour to be adapted to suit the driving conditions. The functions do not take the place of the driver. They do not increase the vehicle’s limits and should not encourage you to drive more quickly. Therefore, they can under no circumstances replace the vigi- lance or responsibility of the driver when manoeuvring the vehicle (the driver must always be ready for sudden incidents which may occur when driving).

Disabling the traction control system
In some situations (driving on very wet ground: snow, mud, etc. or driving with snow chains fitted), the system may reduce the engine output to limit wheel- spin. If this is not required, it is possible to deactivate the function by pressing switch 1. In this case, the warning light comes on steady on the instru- ment panel accompanied by the message “ESC OFF”. This action does not deactivate the ESC. The traction control system offers ad- ditional safety. It is recommended that you do not drive with the function disa- bled. Correct this as soon as possible by pressing the switch 1 again.

Note: The function is reactivated auto-matically when the ignition is switched on or when a speed of approximately 30 mph (50 km/h) is exceeded.

Emergency brake assist
This is an additional system to ABS which helps reduce vehicle stopping distances.

Operating principle
The system is for detecting an emer- gency braking situation. In this case, the braking system immediately devel- ops maximum power and may trigger ABS regulation. ABS braking is maintained as long as the brake pedal is not released.

Hazard warning lights switching on
Depending on the vehicle, these may light up in the event of sudden decel- eration.

Operating faults
When the system detects an operating fault the message “CHECK BRAKING SYSTEM” appears on the instrument panel along with the © warning light. Consult an approved dealer.

Hill start assistance
Depending on the gradient of the in- cline, this system assists the driver when starting on a hill. It prevents the vehicle from rolling backwards by au- tomatically applying the brakes when the driver lifts his/her foot off the brake pedal to depress the accelerator pedal.

System operation
It only operates when the gear lever is in a position other than neutral and the vehicle is completely stationary (brake pedal depressed).
The system holds the vehicle for ap- proximately 2 seconds. The brakes are then gradually released (the vehicle will move according to the slope).

The hill start assistance system cannot completely prevent the vehicle from rolling backwards in all situations (extremely steep gradients etc.).
In all cases, the driver may depress the brake pedal to prevent the vehi- cle from rolling backwards.

The hill start assistance function should not be used for prolonged stops: use the brake pedal. This function is not designed to immobilise the vehicle permanently.
If necessary, use the brake pedal to stop the vehicle. The driver must remain particularly vigilant when driving on slippery or low-grip surfaces. Risk of serious injury.

Driver assistance with a trailer
This system helps to maintain control over the vehicle while using a trailer. It detects shaking caused by towing a trailer under certain driving conditions.

Operating conditions

  • The towbar must be approved by an authorised dealer;
  • the harness must be approved by an authorised dealer;
  • the towbar must be connected to the vehicle.

Operating principle
The function stabilises the vehicle by:

  • asymmetric braking of the front wheels to reduce shaking caused by the trailer;
  • braking of all four wheels and limita- tion on engine torque to reduce the vehicle speed until the shaking has stopped.

Traction control – Extended grip
If fitted on the vehicle, grip control makes it easier to control the vehicle on low grip surfaces (soft ground, etc.). These functions are an ad- ditional aid in the event of critical driving conditions, enabling the vehicle behaviour to be adapted to suit the driving conditions. The functions do not take the place of the driver. They do not increase the vehicle’s limits and should not encourage you to drive more quickly. Therefore, they can under no circumstances replace the vigi- lance or responsibility of the driver when manoeuvring the vehicle (the driver must always be ready for sudden incidents which may occur when driving).

“Road” mode
When the vehicle starts, the message “Standard road mode on” is displayed on the instrument panel. The default mode Road enables opti- mal use under normal road conditions (dry, wet, light snow, etc.). “Road” mode uses traction control func- tions.

“Soft ground” mode
Press the 2 switch: the message “Grip Extend Loose Surface ON” is displayed on the instrument panel. This position enables optimal usage on soft ground (mud, sand, dead leaves, etc.). In this position, engine speed is left under the driver’s control. The system automatically switches to “Road” mode at speeds above about 31 mph (50 km/h). The message “Standard road mode on” is displayed on the instrument panel to warn you.

Switching on
Press switch 1 on the side showing The warning light 5 illuminates in orange and, depending on the vehi- cle, the message “Speed limiter ON” or “Speed Limiter XXX mph (km/h)” ap- pears on the instrument panel accom- panied by dashes to indicate that the speed limiter function is activated and waiting to store a limit speed.

To store the current speed, press switch 3 (SET/-): the limited speed re- places the dashes. The minimum stored speed is 20 mph (30 km/h).

Driving
When a limited speed has been stored and provided this speed is not reached, driving is similar to driving a vehicle without the speed limiter function. Once you have reached the stored speed, no effort on the accelerator pedal will allow you to exceed the programmed speed except in an emergency (refer to information on “Exceeding the limit speed”).

Varying the limit speed
The limit speed may be changed by repeatedly pressing:

  • switch 2 (RES/+) to increase speed;
  • switch 3 (SET/-) to reduce speed.

FAQ

What type of vehicle is the 2023 Renault Express?

The Renault Express is a compact light commercial vehicle or small van.

What engine options are available for the 2023 Express?

It likely offers a selection of efficient petrol and diesel engines.

Is the 2023 Express available in electric or hybrid versions?

As of my last update, there were no indications of an electric or hybrid version for the 2023 Express.

What is the payload capacity of the Renault Express?

The payload capacity is expected to be competitive within its class, suitable for small business needs and urban deliveries.

Does the Express have a manual or automatic transmission?

It is likely available with both manual and automatic transmission options.

How many passengers can the 2023 Express accommodate?

The Express is primarily designed as a two-seater for commercial use.

What are the key safety features in the 2023 Express?

Key safety features may include ABS, airbags, electronic stability control, and rear parking sensors.

What is the cargo space capacity of the Renault Express?

The Express offers a generous cargo space, optimized for utility and ease of access.

Is the 2023 Express equipped with modern technology and connectivity?

It likely includes basic modern technology like a functional infotainment system, Bluetooth connectivity, and USB ports.

Does the Express have sliding side doors?

Yes, it typically features sliding side doors for convenient loading and unloading.

What are the interior features of the Express?

The interior is designed for practicality, with durable materials and functional storage solutions.

Can the cargo area be customized for specific business needs?

The cargo area is versatile and can be customized with various shelving and storage solutions to suit different professional requirements.

Are there roof rack options available for the Express?

Roof racks and other external storage solutions are likely available as optional extras or aftermarket additions.

What kind of warranty does Renault offer for the Express?

The warranty terms vary by region but typically include a standard manufacturer’s warranty for a certain period or mileage.

How does the Express perform in urban environments?

With its compact size and efficient engines, the Express is well-suited for urban driving and manoeuvring in tight spaces.

Useful Link

2022 Renault Clio User Manual

2018 Renault Clio Owner’s Manual

Categories
Renault

2018 Renault Clio Owner’s Manual

Renault-logo

2018 Renault Clio Owner’s Manual

The 2018 Renault Clio, a notable model in the supermini class, persisted in providing a combination of fashionable styling, practical compactness, and effective performance. The 2018 Clio, which was well-known for its unique look and well-designed interior, came with a number of engine choices, including both gasoline and diesel, to accommodate a range of driving tastes. Its small size made it the perfect option for city driving, and the inside had contemporary technology elements coupled with surprisingly spacious and comfortable accommodations. Another primary priority was safety, as evidenced by the car’s numerous cutting-edge safety features. A broad range of people, including young professionals and small families, found the 2018 Clio appealing when searching for a dependable, affordable, and fashionable car for daily use.

MAINTENANCE AND ANTIPOLLUTION ADVICE

Your vehicle complies with criteria for recycling and recovering vehicles at the end of their service life, which entered into force in 2015. Some parts of your vehicle have there-fore been designed to facilitate future recycling. These parts are easy to remove so that they can be recovered and reproc-essed by recycling companies. By virtue of its design, moderate fuel consumption and initial settings, your vehicle also conforms to current anti-pollution regulations. The manufac-turer is actively striving to reduce pol-lutant exhaust gas emissions and to save energy. But the fuel consumption of your vehicle and the level of pollutant exhaust gas emissions are also your responsibility. Ensure that it is main-tained and used correctly.

Maintenance
It is important to remember that failure to respect antipollution regulations could lead to legal action being taken against the vehicle owner.In addition, replacing engine, fuel supply system and exhaust compo-nents with parts other than those origi-nally recommended by the manufac-turer may alter your vehicle so that it no longer complies with anti-pollution regulations. Have your vehicle adjusted and checked by an authorised dealer, in ac-cordance with the instructions given in your maintenance schedule: they will have all the equipment necessary for ensuring that your vehicle is maintained to its original standard.

Engine adjustments

  • Spark plugs: for optimum conditions of use, output and performance the specifications laid down by our Design Department must be strictly applied.
  • If the spark plugs have to be changed, use the make, type and gap specified for your vehicle’s engine. Contact an authorised dealer for this.
  • Air filter, fuel filter: a choked ele-ment will reduce efficiency. It must be replaced.
  • Ignition and idle speed: no adjust-ment is needed.

Exhaust gas monitoring system
The exhaust gas monitoring system will detect any operating faults in the vehi-cle’s antipollution system. If this system malfunctions, toxic sub-stances may be released into the at-mosphere or damage may occur. This warning light on the in-strument panel will indicate if
there are any faults in the system: This lights up when the ignition is switched on and goes out when the engine is started.

  • If it lights up continuously, consult an approved Dealer as soon as possi-ble;
  • if it flashes, reduce the engine speed until the light stops flashing. Contact an authorised dealer as soon as pos-sible.

ENVIRONMENT
Your vehicle has been designed with respect for the environment in mind for its entire service life: during production, use and at the end of its life. This commitment is illustrated by the Renault eco² signature.

Manufacture
Your vehicle has been manufactured at a factory which complies with a policy to reduce the environmental impact on the surrounding areas (reduction of water and energy consumption, visual and noise pollution, atmospheric emis-sions and waste water; sorting and re-using waste).

Emissions
Your vehicle has been designed to emit fewer greenhouse gases (CO2) while in use, and therefore to consume less fuel (eg. 140 g/km, equivalent to 5.3 l/100 km for a diesel vehicle). Our vehicles are also equipped with a particle filter system including a cata-lytic converter, an oxygen sensor and an active carbon filter (the latter pre-vents vapour from the fuel tank being released into the open air). For certain diesel vehicles, this system also has a particle filter to reduce the volume of soot particles emitted.

Please make your own contribution towards protecting the environment too

  • Worn parts replaced in the course of routine vehicle maintenance (vehi-cle battery, oil filter, air filter, batter-ies, etc.) and oil containers (empty or filled with used oil) must be disposed of through specialist organisations.
  • At the end of the vehicle’s service life, it should be sent to approved centres to ensure that it is recycled.
  • In all cases, comply with local legis-lation.

Recycling
Your vehicle is 85% recyclable and 95% recoverable. To achieve these objectives, many of the vehicle components have been de-signed to enable them to be recycled. The materials and structures have been carefully designed to allow these components to be easily removed and reprocessed by specialist companies. In order to preserve raw material re-sources, this vehicle incorporates nu-merous parts made from recycled plas-tics or renewable materials (vegetable or animal-derived materials such as cotton or wool). If fitted on the vehicle, this system warns the driver of pressure loss in one or several tyres. The system is fitted if there is a A label in the vehicle. To verify its presence, open the driver’s door.

Operating principle
This system detects a loss of pressure in one of the tyres by measuring the wheel speed while driving. Warning light 1 comes on to alert the driver in the event of insuffi-cient pressure (deflated wheel, punc-tured tyre, etc.).

TYRE PRESSURE LOSS WARNING

Operating conditions
The system should be reset with an inflation pressure equal to that given on the tyre inflation pressure label. Otherwise it risks not giving a reliable warning in the event of a significant loss of pressure. Please refer to the informa-tion on “Tyre pressures” in Section 4.

In the following situations, the system risk coming into action late or not func-tioning correctly:

  • system not reset after reinflation or any operation on the wheels;
  • system badly reset: different inflation pressures from the recommended pressures;
  •  significant change in load or distribu-tion of load on one side of the vehi-cle;
  • sporty driving with strong accelera-tion;
  • driving on snowy or slippery surface;
  • driving with snow chains;
  • fitting a single new tyre;
  • use of tyres not approved by the net-work.

This function is an addi-tional driving aid. However, the function does not take the place of the driver. It cannot, therefore, under any circumstances replace the vig-ilance or the responsibility of the driver. Check the tyre pressures, including the emergency spare wheel, once a month.

Resetting the standard level for the tyre pressures
This should be done:

  • after each reinflation or readjustment of the pressure of one of the tyres;
  • when the standard tyre pressure needs to be changed to adapt to usage conditions (empty, carrying a load, motorway driving, etc.);
  • after changing a wheel;
  • after using the tyre inflation kit;
  • after swapping a wheel (however, this practice is not recommended).

It should always be done after checking the tyre pressure of all four tyres when cold. Tyre pressures must correspond to the current usage of the vehicle (empty, carrying a load, motorway driving, etc.).

Resetting procedure With the ignition on:

  • repeatedly press one of the but-tons 3 or 4 to select the “TIRES SET TPW” function on the display 2;
  • press and hold (around 3 seconds) button 3 or 4 to start initialisation. The display of the message “SET TPW LAUNCHED” for around five seconds indicates that the reset re-quest for the tyre pressure reference value has been taken into account.

Reinitialisation is carried out after a few minutes’ driving.

Display
The display 2 on the instrument panel informs you of any tyre pressure faults (flat tyre, punctured tyre, etc.).

“INFLATE TIRES AND SET TPW”
Warning light comes on, along with the message “INFLATE TIRES AND SET TPW”. They indicate that at least one tyre is flat or punctured. In the event of a flat tyre, inflate the re-levant tyre. In the event of a puncture, change the tyre or consult an authorised dealer. Check and readjust the pressure of the four tyres when cold, and launch the reset of the tyre pressure reference value. Warning light goes out after launching the reinitialisation of the tyre pressure reference value.

TYRE PRESSURE LOSS WARNING

“RECALIBRATE SET TPW”
The warning light flashes for several seconds, then stays on, along with the message “RECALIBRATE SET TPW”. They indicate that the request to reset the reference value of the tyre pres-sures must be restarted.

“TPW NOT AVAILABLE”
The warning light flashes for sev-eral seconds, then stays on, along with the message “TPW NOT AVAILABLE”. They indicate that the vehicle is equipped with an emergency spare wheel which is smaller than the other four and that it is fitted to the vehicle.

“CHECK TPW”
The warning light flashes for several seconds, then stays on, along with the message “CHECK TPW”. This message is accompanied by the warning light ©. They indicate a system fault. Please consult an authorised dealer.

Readjustment of tyre pressures
The tyre pressures must be adjusted when cold (please refer to the label lo-cated on the edge of the driver’s door). If tyre pressures cannot be checked when the tyres are cold, the recom-mended pressures should be increased by 0.2 to 0.3 bar (3 PSI).

Never deflate a hot tyre.
After each reinflation or readjustment of the tyre pressure, launch the reinitiali-sation of the tyre pressure reference value.

Replacing wheels/tyres
Only use equipment approved by the brand network, or the system risks being activated late or not operating correctly. Please see the information on “Tyres” in Section 5. After each change of wheel/tyre, read-just the tyre pressure and launch the reset of the tyre pressure reference value.

Emergency spare wheel
If fitted on the vehicle, readjust the tyre pressure and launch the reinitialisation of the tyre pressure reference value.

Tyre repair product and inflation kit
Only use equipment approved by the brand network, or the system risks being activated late or not operating correctly. Please refer to

“Tyre inflation kit” in Section 5.
After using the tyre inflation kit, readjust the tyre pressure and launch the reini-tialisation of the tyre pressure reference value.

Depending on the vehicle, this is com-posed of:

  • anti-lock braking system (ABS); electronic stability program (ESC)
  • with understeer control and trac-tion control;
  • emergency brake assist;
  • hill start assistance.

These functions are an ad-ditional aid in the event of critical driving conditions, enabling the vehicle behaviour to be adapted to suit the driving conditions. These functions do not take the place of the driver. They do not increase the vehicle’s limits and should not encourage you to drive more quickly. Therefore, they can under no circumstances replace the vigilance or responsibil-ity of the driver when manoeuvring the vehicle (the driver must always be ready for sudden incidents which may occur when driving).

Anti-lock braking system (ABS)
Under heavy braking, the ABS prevents the wheels from locking, allowing the stopping distance to be managed and keeping control of the vehicle. Under these circumstances, the vehi-cle can be steered to avoid an obstacle whilst braking. In addition, this system can increase stopping distances, par-ticularly on roads with low surface grip (wet ground etc.). You will feel a pulsation through the brake pedal each time the system is activated. The ABS does not in any way improve the vehicle’s physical per-formance relating to the road surface and road-holding. It is still essential to follow the rules of good driving practice (such as driving at a safe distance from the vehicle in front etc.).

In an emergency, apply firm and continuous pressure to the brake pedal. There is no need to pump it repeatedly. The ABS will modu-late the force applied in the braking system.

DRIVER CORRECTION DEVICES AND AIDS

Electronic stability program
(ESC) with understeer control and traction control

Electronic stability control ESC
This system helps you to keep control of the vehicle in critical driving condi-tions (avoiding an obstacle, loss of grip on a bend, etc.).

Operating principle
A sensor in the steering wheel detects the direction selected by the driver. Other sensors throughout the vehicle measure the actual direction. The system compares driver input to the actual trajectory of the vehicle and corrects the trajectory if necessary by controlling the braking of certain wheels and/or engine power. In the event that the system is engaged, indicator light flashes on the instrument panel.

Understeer control
This system optimises the action of the ESC in the case of pronounced under-steer (loss of front axle road holding).

Traction control
This system helps to limit wheelspin of the drive wheels and to control the ve-hicle when pulling away accelerating or decelerating.

Operating principle
Using the wheel sensors, the system measures and compares the speed of the drive wheels at all times and slows down their over-rotation. If a wheel is starting to slip, the system brakes au-tomatically until the drive supplied be-comes compatible with the level of grip under the wheel again. The system also adjusts the engine speed to the grip available under the wheels, independently of the pressure exerted on the accelerator pedal.

Operating faults
When the system detects an operating fault the message “CHECK ESC” and warning light and appear on the instrument panel. In this case, the ESC and traction control system are deactivated. Consult an approved dealer.

Disabling the traction control system
In some situations (driving on very wet ground: snow, mud, etc. or driving with snow chains fitted), the system may reduce the engine output to limit whee-lspin.

Emergency brake assist
This system supplements the ABS and helps reduce vehicle stopping dis-tances.

Operating principle
The system is for detecting an emer-gency braking situation. In this case, the braking assistance immediately de-velops maximum power and may trig-ger ABS regulation. ABS braking is maintained as long as the brake pedal is applied.

Hazard warning lights switching on
Depending on the vehicle, these may light up in the event of sudden decel-eration.

Braking anticipation
Depending on the vehicle, when you rapidly release the accelerator, the system anticipates the braking ma-noeuvre in order to reduce stopping distances.

When using the cruise control:

  • – if you use the accelerator, when you release it, the system may be trig-gered;
    – if you do not use the accelerator, the system will not be triggered.

Operating faults
When the system detects an operating fault the message “CHECK BRAKING SYSTEM” appears on the instrument panel along with the © warning light. Consult an approved dealer.

These functions are an ad-ditional aid in the event of critical driving conditions, enabling the vehicle behaviour to be adapted to suit the driving conditions. These functions do not take the place of the driver. They do not increase the vehicle’s limits and should not encourage you to drive more quickly. Therefore, they can under no circumstances replace the vigilance or responsibil-ity of the driver when manoeuvring the vehicle (the driver must always be ready for sudden incidents which may occur when driving).

Hill start assistance
Depending on the gradient of the in-cline, this system assists the driver when starting on a hill. It prevents the vehicle from rolling backwards, de-pending on the slope, by automatically applying the brakes when the driver lifts his/her foot off the brake pedal to de-press the accelerator pedal.

System operation
It only operates when the gear lever is in a position other than neutral (other than N or P for automatic transmissions) and the vehicle is completely stationary (brake pedal depressed)
The system holds the vehicle for ap-proximately 2 seconds. The brakes are then gradually released (the vehicle will move according to the slope).

FAQ

What type of vehicle is the 2018 Renault Clio?

The 2018 Renault Clio is a supermini or subcompact car.

What engine options are available for the 2018 Clio?

It typically offers a range of petrol and diesel engines.Does the 2018 Clio offer an automatic transmission option?

Does the 2018 Clio offer an automatic transmission option?

Yes, the Clio is available with both manual and automatic transmission options.

Is the 2018 Clio fuel-efficient?

Yes, the Clio is known for its fuel efficiency, particularly in its smaller petrol and diesel engines.

How many passengers can the 2018 Clio accommodate?

The Clio can comfortably seat up to five passengers.

Does the 2018 Clio have a touchscreen infotainment system?

Yes, it typically comes equipped with a touchscreen infotainment system in higher trims.

What are the key safety features in the 2018 Clio?

Safety features may include Electronic Stability Control, Anti-lock Braking System, and multiple airbags.

What is the boot capacity of the Renault Clio?

The Clio offers a practical boot space, which is quite generous for its class.

Is there a sporty version of the 2018 Clio?

Renault often offers a sportier version of the Clio, such as the RS or GT Line, with enhanced performance features.

Does the 2018 Clio support Apple CarPlay or Android Auto?

This depends on the trim and options, but higher trims might support Apple CarPlay and Android Auto.

What type of driving aids are available in the 2018 Clio?

The Clio may include driving aids like cruise control, parking sensors, and a speed limiter.

How does the Clio perform in urban environments?

Its compact size and agile handling make the Clio well-suited for urban driving.

What interior comforts does the 2018 Clio offer?

The interior includes comfortable seating, adjustable features, and in some trims, climate control and a higher-quality finish.

Are there any customization options for the 2018 Clio?

The Clio typically offers various color choices and may have different interior trim options.

What is the warranty period for the 2018 Renault Clio?

The warranty varies by region but usually includes a standard manufacturer’s warranty for a specified period or mileage.

Useful Link

2022 Renault Clio User Manual

2019 Renault Clio Owner’s Manual

Categories
Fiat

2020 Fiat Talento Seat Belt Guidelines

fiat-logo

2020 Fiat Talento Seat Belt Guidelines

Any car should prioritize safety, and the 2020 Fiat Talento does just that with a sophisticated and dependable seat belt system. The Fiat Talento’s seat belt system is expertly crafted to guarantee each passenger in the car the best possible protection. One of the most important safety features of the 2020 Fiat Talento is the seat belt system, which has been painstakingly designed to satisfy strict safety regulations. This system is a comprehensive safety network meant to reduce injuries during unforeseen events on the road, not just a collection of belts.

The seat belts in the Fiat Talento are made with premium materials and precise engineering to provide each passenger with a secure but comfortable fit. They provide passengers peace of mind on every trip by being outfitted with a variety of cutting-edge features that improve both usability and safety. The 2020 Fiat Talento’s seat belt design and installation are emphasized by adherence to safety regulations and a dedication to protecting every passenger.

SEAT BELTS

For obvious safety reasons, always fasten the seat belts. In addition, always comply with the laws of the country you are in.

IMPORTANT
For full effectiveness of the rear seat belts, make sure that the single rear seat is correctly locked in place. Refer to the “Rear single seats” paragraph in the “Knowing your vehicle” chapter.
Before starting the engine, first adjust the driving position and adjust the seat belts to obtain the best possible protection (for all the passengers).
The safety belts must always be kept clean. Use products selected by Fiat Dealership services or soap and warm water, rubbing with a sponge and drying with a dry cloth. Do not use detergents or chemical products.

ADJUSTING THE DRIVER’S POSITION
Sit with your back against the backrest (after taking off clothing like coat, jacket, etc.). This is an essential factor for correctly positioning the back;
adjust the seat position according to the pedals. The seat position must be so as to allow pressing the clutch pedal all the way. The backrest must be inclined so arms are slightly bent;

  • Adjust the headrest. For maximum safety, the distance between the head and headrest must be minimum;
  • Adjust cushion (seat) height. This adjustment optimises visibility;
  • Adjust the steering wheel.

ADJUSTING THE SEAT BELTS
Sit firmly on the backrest.
The chest belt 1 fig. 169 must be as close as possible to the neck without touching it.
The waist belt 2 fig. 169 must be resting on the thighs and against the pelvis.
The belt must adhere as much as possible to the body. (e.g. avoid wearing clothes that are too bulky or placing obstacles between the body and belt).

Locking
Pull out the belt slowly without forcing it and insert the tab 3 fig. 170 into the buckle 5 (make sure it is locked by pulling the tab 3).

2020 Fiat Talento Seat Belt 7

Repeat the operation if the seat belt blocks.
If the belt is completely blocked, pull slowly but firmly and draw out at least 3 cm. Let it rewind normally then pull it out again. If the problem persists, contact a Fiat Dealership.

Front seat belts not fastened warning light
If the seat belt is not buckled, the light stays on when the engine is started, then, when you reach 16 km/h, it flashes and there is an acoustic signal for about two minutes.

Adjusting the front seat belt height
Move the lever 6 fig. 171 to select the adjustment position so the chest belt 1 fig. 169 adheres to the body as described above.

2020 Fiat Talento Seat Belt 8

After adjusting, make sure it is properly locked in place.

Unlocking
Press button 4 fig. 170, the belt rewinds. Accompany it as it rewinds.

Rear side belts
For the first row in the rear, you must use belts 8 fig. 172;
for the last row at the rear, you must use the seat belts 7 fig. 172.
When the seat belt 8 fig. 172 is not worn, insert the tab 9 into the buckle 10.

2020 Fiat Talento Seat Belt (1)

Conditions for use: before using the rear side seat belts, make sure that each belt’s tab 11 fig. 173 is locked into the buckle 12.

2020 Fiat Talento Seat Belt (2)

Locking and unlocking are done in the same way as for the front seat belts.

Access to the last row: to facilitate access to the last row, release the second row seat belt from the buckle 13 fig. 174.

2020 Fiat Talento Seat Belt (3)

Do not forget to lock the belt again when a passenger is sitting there.

Central seat belts
Slowly unwind the belt until you can lock the tab into the buckle 14 fig. 175.

2020 Fiat Talento Seat Belt (4)

IMPORTANT
For rear seat operation, refer to the “Rear single seats” paragraph in the “Knowing your vehicle” chapter.

WARNING

  • Seat belts that are not adjusted or are twisted could cause injuries in case of an accident. Use one seat belt per person, child or adult. Even pregnant women have to fasten their seat belts. In this case, make sure the pelvis belt does not press too hard on the lower stomach area, but not be too loose either.
  • Make sure the rear seat belts are positioned and operating properly after adjusting the single rear seat.
  • To make full use of seat belt protection, make sure the rear single seat is locked in place. Read the “Single rear seat” paragraph in the “Knowing your vehicle” chapter.
  • Do not change the originally installed restraining system components in any way: belts, seats and related fasteners. In special cases (e.g.: installing a child seat) see a Fiat Dealership.
  • Do not use anything that could loosen the buckles (diaper pins, clips, etc.) because a loose seat belt can cause injury in case of an accident.
  • Never pass the shoulder belt under your arm or behind your back.
  • Never use the same belt for more than one person, and never fasten your seat belt across a newborn or child you are holding in your lap.
  • The seat belt must not be twisted.
  •  After an accident, check the seat belts and if necessary replace them. In addition, replace the seat belts if they start to show any sign of wear or deterioration.
  • When refitting the single rear seat, make sure the safety belts and their tabs are positioned correctly so they can be used normally.
  • Check that the seat belt locking device is correctly inserted into the buckle.
  • Do not insert any object that could block the belt and compromise its correct operation.
  • Make sure you have positioned the locking housing (it should not be covered, crushed or flattened by people or objects).

PRE-TENSIONERS

When the pretensioners intervene, they make the seat belt adhere to the seat occupant’s body, increasing the effectiveness of the seat belt.
With starter switch on, in the event of a violent frontal collision, depending on its magnitude, the system may trigger the seat belt winder pretensioner 1 fig. 176 causing it to retract the belt immediately.

2020 Fiat Talento Seat Belt (5)

LOAD LIMITERS
Depending on the collision’s degree of violence, this mechanism activates to limit the seat belt action against the body to a supportable level.

WARNING

  • Check the safety devices after every accident. Any intervention on the complete system (pre-tensioners, air bags, electronic modules, wiring) or re-use on another vehicle, even if identical, is strictly prohibited. In order to prevent accidental deployments that could cause damage, only qualified Fiat Dealership personnel can intervene in pre-tensioners and air bags. Checking the electrical features of the actuator can only be effected by specifically prepared personnel using the proper tools. When the vehicle is scrapped, see a Fiat Dealership to remove the pre-tensioner gas generator and air bags.

FAQs

How many seat belts does the 2020 Fiat Talento have?

For every seating position in the Fiat Talento, a three point seat belt is normally included.

Are the seat belts adjustable in the Fiat Talento?

Yes, the 2020 Fiat Talento’s seat belts are adjustable to comfortably fit riders of varying heights.

Do the seat belts in the Fiat Talento have pretensioners?

Yes, pretensioners are a common feature of the seat belts in the Fiat Talento that tighten the belts automatically in the event of a collision, reducing the force applied to the occupants.

Can I install child seats using the seat belts in the Fiat Talento?

Indeed, the purpose of the seat belts is to fasten kid safety seats that are compatible. For correct installation, adhere to the manufacturer’s instructions.

Are there seat belt reminders in the Fiat Talento?

Yes, seat belt reminder systems are normally installed in cars to remind drivers to buckle up before taking to the road.

Can the seat belt warning chime be turned off in the Fiat Talento?

No, the seat belt warning chime typically cannot be turned off for safety reasons.

How often should I check the seat belts for wear and tear in the Fiat Talento?

Make sure the seat belts are regularly inspected for wear or damage. It is advised that you check them when you perform regular auto maintenance.

Can seat belts be repaired if they’re damaged in the Fiat Talento?

Repairing broken seat belts is not advised. To guarantee appropriate safety, they should be replaced if there is any damage.

Do seat belts have a specific lifespan in the Fiat Talento?

Although there is no set lifespan for seat belts, it is advised to replace them if there are indications of wear, damage, or a decline in functionality.

Can seat belts be adjusted for a more comfortable fit in the Fiat Talento?

Yes, in order to ensure that passengers have a comfortable fit, seat belts typically feature height-adjustable anchors.

Do the rear seats have seat belts in the Fiat Talento?

Yes, seat belts are standard on all seating positions in the Fiat Talento, including the back seats.

What should I do if a seat belt gets stuck in the Fiat Talento?

Refrain from attempting to force a seat belt that becomes stuck. For assistance, get in touch with an approved Fiat service center.

Are the seat belts covered under the vehicle’s warranty in the Fiat Talento?

The warranty of the car often protects seat belts against manufacturing flaws. For specifics, see the warranty details.

Can I replace the seat belts myself in the Fiat Talento?

Professionals with certification should replace seat belts to guarantee correct installation and adherence to safety regulations.

What’s the purpose of the seat belt pre-tensioners in the Fiat Talento?

In the event of a collision, seat belt pre tensioners retract and tighten the belts, limiting forward passenger movement and minimizing potential injury.

Useful Link

View Full PDF : 2020 Fiat Talento Owner’s Manual| Auto User Guide
2020 Fiat Talento Warning and indicator Lights Guide

Categories
Renault

2019 Renault Clio Owner’s Manual

Renault-logo

2019 Renault Clio Owner’s Manual

The 2019 Renault Clio, a well-known competitor in the supermini class, represented a major advancement in Renault’s technological and design capabilities. This version of the Clio featured an updated, more luxurious interior along with a redesigned exterior that maintained its famous, youthful charm. With an emphasis on efficiency, it provided a selection of engine options, including both gasoline and diesel versions, that were designed to provide a performance and fuel economy ratio that was in harmony. The vehicle was outfitted with upgraded entertainment systems and a host of cutting-edge safety technologies that increased passenger security and the driving experience. Notably, the 2019 Clio upheld its reputation for comfort and usefulness, preserving its heritage as a well-liked model in Renault’s portfolio and making it a good option for both small families and city commuters.

RUNNING IN

Petrol version
For the first 600 miles (1,000 km), do not exceed 78 mph (130 km/h) in the highest gear, or 3,000 to 3,500 rpm. You may only expect top performance from your vehicle after approximately 1,800 miles (3,000 km). Service intervals: refer to the Maintenance Document for your vehi-cle.

Diesel version
For the first 1,000 miles (1,500 km), do not exceed 80 mph (130 km/h) in the highest gear, or 2,500 rpm. After completing this mileage you may drive faster, although you may only expect top performance after approximately 3,600 miles (6,000 km). During the running-in period, do not accelerate hard while the engine is still cold and do not let the engine over-rev.

Service intervals: refer to the Maintenance Document for your vehicle.

Ignition switch
Off position LOCK 0 (steering lock applied)

  • To lock: remove the key and turn the steering wheel until the steering column locks.
  • To unlock: turn the key and the steering wheel slightly.

“Ignition” position ON 2
The ignition is switched on: Any accessories (radio etc.) can be used.

“Start” position START 3
If the engine fails to start at the first attempt, the key must be turned back before the starter can be activated again. Release the key as soon as the engine starts.

Note: on diesel versions, several seconds may pass between turning the key and the engine starting to allow for engine preheating.

STARTING, STOPPING THE ENGINE: vehicle with card

The card must be inserted in detection zone 1.

To start:

  • vehicles with an automatic gearbox, place the lever in position P, depress the brake pedal and press button 2;
  • vehicles with a manual gearbox, depress the brake or clutch pedal and press the button 2. If a gear is engaged, the vehicle may only be started by depressing the clutch pedal.

Special features

  • If one of the conditions required for starting is not met, the message “Press Brake + START” or “Press Clutch + START” or “Set to P” will appear on the instrument panel;
  • in some cases, it will be necessary to move the steering wheel whilst pressing the start button 2 to help unlock the steering column; the message “Turn Steering Wheel + START” will warn you of this;

Note: on vehicles equipped with a manual gearbox, in the event of engine stalling the message “Press Clutch” will be displayed on the instrument panel. Fully press the clutch pedal to restart the engine.

Driver’s responsibility when parking or stopping the vehicle

Never leave an animal, child or adult who is not self-suffi-cient alone in your vehicle, even for a short time. They may pose a risk to themselves or to others by starting the engine, activating equipment such as the electric windows or locking the doors, for example. Also, in hot and/or sunny weather, please remember that the temperature inside the passenger compartment increases very quickly.

“Hands-free” starting with the tailgate open
In this case, the card should not be located in the luggage compartment, to prevent the risk of loss.

Accessories function (switching on the ignition)
Once you have gained access to your vehicle, you may use some of its functions (radio, navigation, wipers, etc.). To use the other functions, with the card in the passenger compartment, press the 2 buttons without pressing the pedals.

Operating faults
In certain cases, the hands-free card may not work:

  • when the card battery is dead;
  • near to appliances operating on the same frequency as the card (monitor, mobile phone, video game, etc.);
  • vehicle located in a high electromagnetic radiation zone.

The message “Place card on zone + START” appears on the instrument panel. Press the brake or clutch pedal, then place card 4 (button side) on the placement area 3. Press the 2 button to start the vehicle. The message goes out.

Conditions for stopping the engine
The vehicle must be stationary, with the lever positioned in P for vehicles with an automatic gearbox.

With the card in the vehicle, press button 2: and the engine stops. The steering column is locked when a door is opened or the vehicle is locked. If the card is no longer in the passenger compartment when you try to switch the engine off, the message “Card missing: press and hold” appears on the instrument panel: press the 2 buttons for at least two seconds. If the card is no longer in the passenger compartment, make sure you can retrieve it before pressing and holding the button. Without the card, you will not be able to start. With the engine switched off, any accessories being used (radio, etc.) will continue to function for approximately 10 minutes. When the driver’s door is opened, the accessories stop working.

Never switch off the ignition before the vehicle has stopped completely. Once the engine has stopped, the brake servo, power-assisted steer-ing etc., and the passive safety de-vices such as the airbags and pre-tensioners will no longer operate. When you leave your vehi-cle, especially if you have your card with you, check that the engine is completely switched off.

Driver’s responsibility when parking or stopping the vehicle
Never leave an animal, child or adult who is not self-suffi-cient alone in your vehicle, even for a short time. They may pose a risk to themselves or to others by starting the engine, activating equipment such as the electric windows or locking the doors, for example. Also, in hot and/or sunny weather, please remember that the temperature inside the passenger compartment increases very quickly.

Conditions preventing the standby of the engine
Certain conditions prevent the system from using the engine standby function, including when:

  • the driver’s door is not closed;
  • the driver’s seatbelt is not fastened;
  • reverse gear is engaged;
  • the bonnet is not locked;
  • the outdoor temperature is too low or too high;
  • the battery is not sufficiently charged; the difference between the vehicle interior temperature and the automatic climate control instruction is too high;
  • parking distance control is in operation;
  • the altitude is too high;

Special feature of the automatic engine re-start
Under certain conditions, the engine can restart on its own in order to guarantee your safety and comfort.

This can occur especially when:

  • – the outdoor temperature is too low or too high;
    – the “Clear view” function is activated
    ➥ 3.10 ;
    – the battery is not sufficiently charged;
    – the vehicle speed is above 3 mph (5 km/h) (downhill slope, etc.);
    – repeated pressing on the brake pedal or braking system require-ment;
    – .

Deactivating, activating the function
Press 1 to deactivate the function. The message “Stop & Start deactivated” appears on the instrument panel and the 1 switch warning light illuminates. Pressing again will reactivate the system. The message “Stop & Start Activated” appears on the instrument panel and the 1 switch warning light goes out. The system is automatically reactivated each time the vehicle is started using the start button.

Operating faults
If the message “Check Stop & Start” appears on the instrument panel and the 1 switch warning light illuminates, this indicates that the system is deactivated. Please consult an authorised dealer.

SPECIAL FEATURES OF PETROL VERSIONS, PARTICLE FILTER 

  • driving for long periods when the low fuel level warning light is lit;
  • using leaded petrol;
  • using lubricant or fuel additives which are not approved.

Or operating faults such as:

  • faulty ignition, running out of fuel or disconnected spark plugs resulting in the engine misfiring or cutting out when driving;
  • loss of power.

may cause the catalytic converter to overheat, reducing its efficiency which may irreparably damage it and cause heat damage to the vehicle. If you notice any of the above operating faults, have the necessary repairs carried out as soon as possible by an approved dealer. These faults may be avoided by regularly taking your vehicle to an approved Dealer at the intervals specified in the Maintenance Document.

Starting problems
To avoid damaging the catalytic converter, do not keep trying to start the engine (using the start button, or by pushing or towing the vehicle) without having identified and corrected the cause of the fault. If the fault cannot be identified, do not keep trying to start the engine, but contact an approved Dealer.

Brief stop
To apply the electronic parking brake manually (when stopping at a red light, or stopping when the engine is running, etc.): pull and release the switch 4. The brake is released as soon as the vehi-cle is started up again.

Special cases
To park on a slope or while towing a trailer, for example, pull switch 4 for a few seconds to gain the maximum braking.

To park the vehicle without applying the electronic parking brake (if there is a risk of freezing, for example):

  • switch off the engine by pressing the engine start/stop button 1 or by turning the ignition key 2;
  • manually release the electronic parking brake;
  • with a gear or position P engaged, release the brake pedal and the switch 4.

Versions with an automatic gearbox
For safety reasons, the automatic release is deactivated when the driver’s door is open or not shut properly and the engine is running (to prevent the vehicle from moving without the driver). The “Release Parking Brake Manually” message appears on the instrument panel when the driver depresses the accelerator.

DRIVING ADVICE, ECO-DRIVING 
Fuel consumption is accredited by a standard regulatory method. Identical for all manufacturers, this enables vehicles to be compared with one another. Consumption in real-time depends on vehicle usage conditions, the equipment fitted and the user’s driving style. To optimise fuel consumption, please refer to the following advice.

Depending on the vehicle, you will have various functions which enable you to lower your fuel consumption:

  • the rev counter;
  • gear change indicator;
  • the driving style indicator;
  • the journey record and eco-driving advice via the multimedia screen;
  • Eco acceleration indicator;
  • ECO mode;

If fitted on the vehicle, the navigation system provides additional information.

DRIVING ADVICE, ECO-DRIVING

Driving style indicator 2
Informs you about the driving style adopted in real life. This is shown by indicator light 2. The more petals displayed on 2, the more your driving is flexible and economical. If you regularly monitor this indicator, you will reduce your vehicle’s fuel con-sumption. Please refer to the multimedia instructions for further information.

Journey record
Once the engine is switched off, you will see “Journey record” displayed on multimedia screen 4, enabling you to view information on your last journey.

This indicates:

  • the general score;
  • score evolution;
  • distance without fuel consumption.

An overall rating from 0 to 100 is displayed to let you assess your eco-driving performance. The higher the rating, the lower the fuel consumption. Eco advice is given to help improve your performance. With your favourite journeys saved, you can compare your performance between trips and the performance of other vehicle users.
Please refer to the multimedia instructions for further information.

ECO mode
ECO mode is a function which optimises fuel consumption. It acts upon certain power-consuming systems in the vehicle (heating, air conditioning, power-assisted steering, etc.) and on certain driving actions (acceleration, gear changing, cruise control, deceleration, etc.).
Limiting acceleration enables low fuel consumption in urban and surrounding areas. Reduced usage of the air conditioning reduces fuel consumption without affecting heating comfort.

Driving advice and ECO driving

Behaviour

  • Drive carefully for the first few miles until the engine reaches its normal operating temperature, rather than let it warm up while the vehicle is stationary.
  • Speed is expensive.
  • Dynamic driving with a lot of frequent acceleration and braking is expensive on fuel in comparison to the time saved.
  • Do not over-rev the engine in the intermediate gears. You should always use the highest gear possible.
  • Avoid sudden acceleration.
  • Brake as little as possible. If you anticipate an obstacle or bend in advance, you may then simply release the accelerator pedal.
  • Do not try to maintain the same speed up a hill, accelerate no more than you would on the level. Keep your foot in the same position on the accelerator pedal.
  • Double declutching and accelerating before switching off are unnecessary in modern vehicles.
  • Bad weather, flooded roads:
    • Do not drive through floods if the water is above the lower edge of the wheel rims.

Tyres

  • – An underinflated tyre increases fuel consumption.
    – To optimise fuel consumption, set the highest speed tyre pressure or the recommended pressure indicated on the edge of the driver’s door. ➥ 4.10.
    – The use of non-recommended tyres can increase fuel consumption.

Advice on use

  • Favour the ECO mode.
  • Electricity is fuel; switch off all the electrical components which are not really needed. However (safety first), keep your lights on when the visibility is bad (“see and be seen”).
  • Use the air vents. Driving with the windows open at 60 mph (100 km/h) will increase fuel consumption by 4%.
  • Never fill the fuel tank right to the brim to avoid overflow.
  • In vehicles fitted with air conditioning, it is normal to observe an increase in fuel consumption (especially in urban conditions) when it is used. For vehicles fitted with manual air conditioning, switch off the system when it is not required.
  • Advice for reducing consumption and therefore helping to preserve the environment:
    • If the vehicle has been parked in the sun, open the doors for a few moments to let the hot air escape before starting the engine.
    • Do not leave an empty roof rack fitted to the vehicle.
  • It is better to fit a trailer for bulky objects.
  • When towing a caravan, fit a wind deflector and adjust it carefully.
  • Avoid using the car for door-to-door calls (short journeys with long waits in between) because the engine never reaches its normal operating temperature.

MAINTENANCE AND ANTIPOLLUTION ADVICE
Your vehicle complies with the criteria for recycling and recovering vehicles at the end of their service life, which entered into force in 2015. Some parts of your vehicle have therefore been designed to facilitate future recycling. These parts are easy to remove so they can be recovered and reprocessed by recycling companies. By virtue of its design, moderate fuel consumption and initial settings, your vehicle also conforms to current anti-pollution regulations. The manufacturer is actively striving to reduce pollutant exhaust gas emissions and to save energy. But the fuel consumption of your vehicle and the level of pollutant exhaust gas emissions are also your responsibility. Ensure that it is maintained and used correctly.

Maintenance
It is important to remember that failure to respect antipollution regulations could lead to legal action being taken against the vehicle owner. In addition, replacing the engine, fuel supply system and exhaust components with parts other than those originally recommended by the manufacturer may alter your vehicle so that it no longer complies with anti-pollution regulations. Have your vehicle adjusted and checked by an authorised dealer, in accordance with the instructions given in your maintenance schedule: they will have all the equipment necessary for ensuring that your vehicle is maintained to its original standard.

FAQ

What type of vehicle is the 2019 Renault Clio?

The 2019 Renault Clio is a supermini or subcompact car.

What engine options are available for the 2019 Clio?

It offers a range of petrol and diesel engines, with various outputs to suit different driving needs.

Does the Clio have a hybrid or electric version?

The 2019 Clio was not available in a hybrid or electric version.

What is the fuel efficiency of the 2019 Renault Clio?

The Clio is known for its good fuel efficiency, especially in its diesel variants.

How many passengers can the 2019 Clio accommodate?

The Clio can comfortably seat up to five passengers.

Does the 2019 Clio come with a manual or automatic transmission?

It is available with both manual and automatic transmission options.

What are the key safety features of the 2019 Clio?

Safety features may include Automatic Emergency Braking, Lane Departure Warning, and Traffic Sign Recognition.

What is the cargo capacity of the Renault Clio?

The Clio offers a practical and spacious boot for its class.

Is the 2019 Clio equipped with an infotainment system?

Yes, it comes with a modern infotainment system that includes a touchscreen interface.

Does the 2019 Clio have a sunroof option?

A sunroof might be available in higher trims or as an optional extra.

What are the interior features of the Clio?

The interior features a stylish design with quality materials and customizable options in some trims.

What exterior colour options are available for the Clio?

The Clio comes in various colours, often with options for customization.

Are there any special editions of the 2019 Renault Clio?

Special editions may be available, offering unique styling and additional features.

What is the warranty period for the Clio?

The warranty period varies by region, but Renault typically offers a comprehensive warranty for several years.

How does the Clio perform in urban environments?

The Clio is well-suited for urban driving, offering easy manoeuvrability and compact dimensions.

Useful Link

2024 Renault Austral Owner’s Manual
2022 Renault Clio User Manual