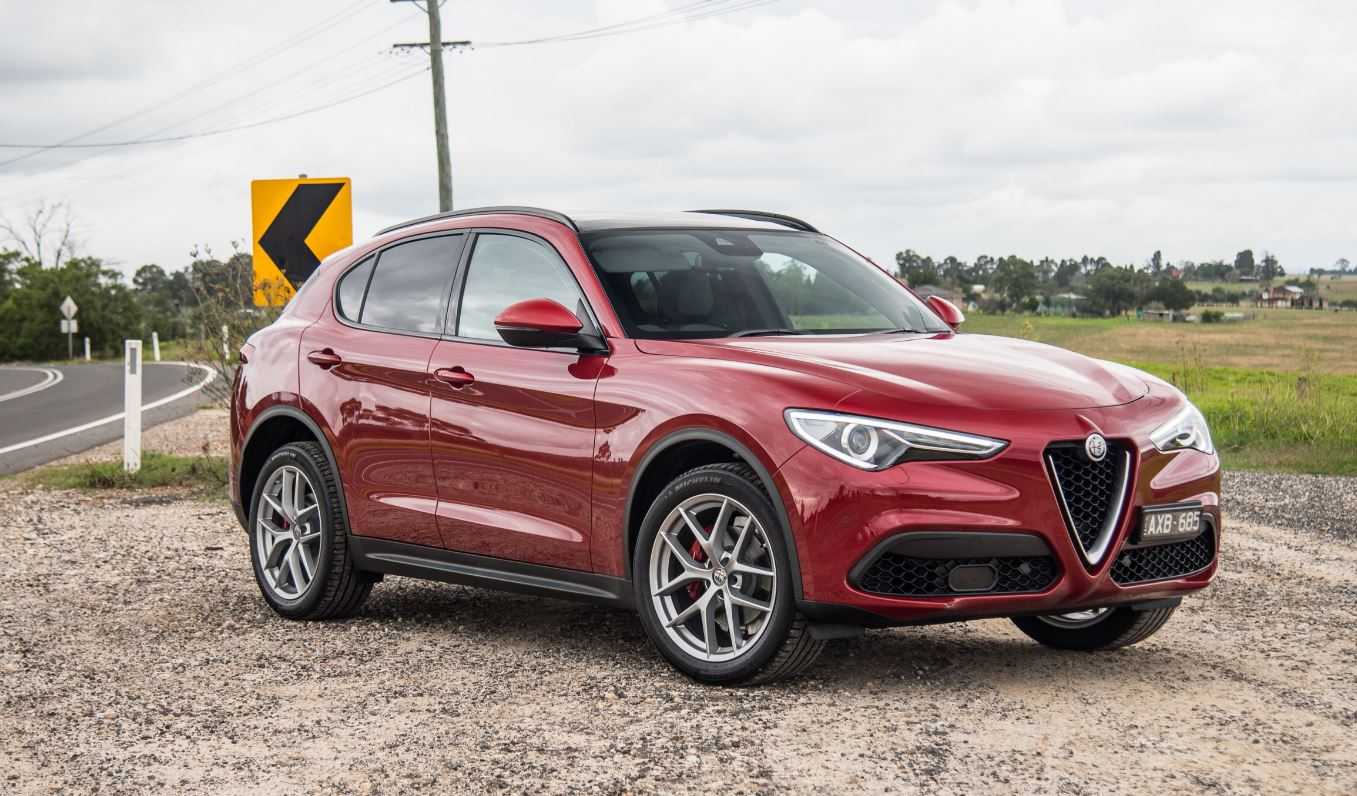
Alfa Romeo Stelvio 2019
The 2019 Alfa Romeo Stelvio is a luxury compact SUV that shows off the style, speed, and craftsmanship that the Italian brand is known for. The Stelvio is a fascinating and interesting car to drive because of how it looks, how it drives, and how it is equipped. The Stelvio looks both stylish and sporty from the outside, with smooth lines, muscular curves, and the famous Alfa Romeo grille. Its streamlined shape not only makes it look better, but it also helps it go faster and use less gas. Every part of the design shows how much care was put into it, which shows how much the brand values craftsmanship.
Inside the Stelvio, you’ll find a luxurious and comfy space. Crafted with care, high-end materials like leather upholstery and wood trim create an air of class. The large seats and flexible cargo area give passengers and their things plenty of room, making it perfect for both short and long trips.
The Stelvio has a number of powerful engines to choose from. The base model has a turbocharged 2.0-liter four-cylinder engine that is both powerful and fuel-efficient. Alfa Romeo has high-performance models, like the Quadrifoglio, for people who want to feel a rush. The Quadrifoglio has a twin-turbocharged V6 engine that makes a lot of horsepower and torque.
The Stelvio is built with the latest technology in mind. The infotainment system has a touchscreen display that is easy to use and gives you access to guidance, entertainment, and connection options. Advanced driver-assistance systems like adaptive cruise control, blind-spot tracking, lane-keep assist, and forward collision warning make driving safer and easier.
When it comes to safety, the Stelvio comes with a full set of safety features. With active stopping systems and smart sensors, the Stelvio puts its passengers’ safety first and gives them peace of mind every time they drive.
STEERING WHEEL
Steering Wheel Adjustments
The steering column is able to be tilted upward or downward. It also allows you to lengthen or shorten the steering column. The tilt/telescoping lever is located below the steering wheel at the end of the steering column.
Warning!
Do not adjust the steering column while driving. Adjusting the steering column while driving or driving with the steering column unlocked, could cause the driver to lose control of the vehicle. Failure to follow this warning may result in serious injury or death.
To Adjust The Position:
- Pull the Tilt/Telescoping Control Handle down to the open position.
- Adjust the steering wheel to the desired position.
- Lock the desired position by pushing the Tilt/Telescoping Control Handle to the closed position.
Warning!
It is absolutely forbidden to carry out any after-market operation involving steering system or steering column modifications (e.g. installation of the anti-theft device) that could adversely affect performance. Doing so could void the NewVehicle Limited Warrant, cause SERIOUS SAFETY PROBLEMS INCLUDING INJURY, and also result in the vehicle not meeting type-approval requirements.
Heated Steering Wheel — If Equipped
With the ignition in the ON position, push the heated steering wheel button on the instrument panel.
Heated Steering Wheel Button
The indicator on the button will illuminate when this feature is enabled.
Note: The heated steering wheel function can only be activated in temperatures below 39°F (4°C).
Vehicles Equipped With Remote Start
On models that are equipped with remote start, the heated steering wheel can be programmed to come on during remote start. The feature can be activated through the Information and Entertainment System. Refer to the Information and Entertainment System Owner’s Manual Supplement for further information.
Warning!
- Persons who are unable to feel pain to the skin because of advanced age, chronic illness, diabetes, spinal cord injury, medication, alcohol use, exhaustion, or other physical conditions must exercise care when using the steering wheel heater. It may cause burns even at low temperatures, especially if used for long periods.
- Do not place anything on the steering wheel that insulates against heat, such as a blanket or steering wheel cover of any type and material. This may cause the steering wheel heater to overheat.
MIRRORS
Electrochromic Mirror
This mirror automatically adjusts for headlight glare from vehicles behind you. The electrochromic mirror has a power button to activate/deactivate the automatic dimming/anti-glare function.
Electrochromic Mirror Power Button
When the vehicle is in REVERSE, the automatic dimming feature is deactivated.
Power Adjustment
The power mirrors can be adjusted with the ignition ON. Select the desired mirror by rotating the power mirror control knob to the left (L) or right (R) position. To adjust the selected mirror, push the knob in the direction desired.
Note: Once the adjustment is complete, rotate the knob to the neutral position to prevent accidental movements.
Power Folding
With the power mirror control knob in the neutral position, rotate it to the power folding position. Rotate the knob back to the neutral position to return the mirrors to the driving position. If the power mirror control knob is moved again during door mirror folding (from the closed to the open position and vice versa), the movement direction is reversed.
Automatic Activation
Activating the central door locking system from outside the vehicle automatically folds the mirrors. The mirrors return to the driving position when the vehicle is then unlocked. If the door mirrors were folded using the power mirror control knob, they can only be returned to the driving position by rotating the knob again.
Note: The power folding operation can be enabled only when the vehicle speed is lower than 31 mph (50 km/h).
Automatic Dimming Mirrors — If Equipped
Like the electrochromic mirror, an automatic dimming feature is also available on the outside rear-view mirrors to prevent glare. The automatic dimming button for these mirrors is the same as the electrochromic mirror.
Warning!
Vehicles and other objects seen in an outside convex mirror will look smaller and farther away than they really are. Relying too much on side convex mirrors could cause you to collide with another vehicle or other object. Use your inside mirror when judging the size or distance of a vehicle seen in a side convex mirror.
Heated Mirrors
Push the rear defrost button, located within the climate controls, to activate the heated mirrors.
EXTERIOR LIGHTS
Headlight Switch
The headlight switch is located to the left of the steering wheel on the instrument panel. This switch controls the operation of the headlights, parking lights, instrument panel lights, instrument panel light dimming, interior lights and rear fog lights. In addition, there are buttons for parking sensors deactivation and stop/start. Refer to “Starting And Operating” for further information. The exterior lights can be activated only when the ignition is in the ON mode, except for the parking lights. Refer to “Parking Lights” in this section for more information. The instrument panel and the various controls on the dashboard will be illuminated when the exterior lights are turned on.
Automatic Headlights
This system automatically turns the headlights on or off according to ambient light levels.
Function Activation
From the O (off) position, rotate the light switch to the (auto) position.
Note: The function can only operate with the ignition position cycled to ON.
Function Deactivation
To deactivate the function, rotate the light switch to a position other than the (auto) position.
Daytime Running Lights (DRL)
With the ignition cycled to ON, and the light switch turned to the position, if the dusk sensor detects sufficient external light, the Daytime Running Lights will turn on automatically while the other lights remain off. If the turn signals are operated, the brightness of the corresponding Daytime Running Lights will be decreased for as long as the turn signals are on.
Parking Lights
With the ignition in STOP mode, rotate the headlight switch to the position to turn the parking lights on. All of the parking lights will turn on for eight minutes, and opening the door activates an audible warning. To leave only the lights on one side (right/left) illuminated, you must move the multifunction lever (located on the left side of the steering wheel) to the side that you want to remain on. With the parking lights on, the warning light on the instrument panel will illuminate. Note: Cycling the ignition to ON mode turns off the parking lights, which were only illuminated on one side.
Headlight Off Delay
The “Headlight Off Delay” function delays the turning off of the headlights after the vehicle’s engine has been stopped. The function can be activated from the Information and Entertainment System by selecting the following functions in sequence on the main menu:
- “Settings.”
- “Lights.”
- “Headlight Off Delay.”
Reference Link
Download Link: https://www.alfaromeousa.com/owners/owners-service-manual