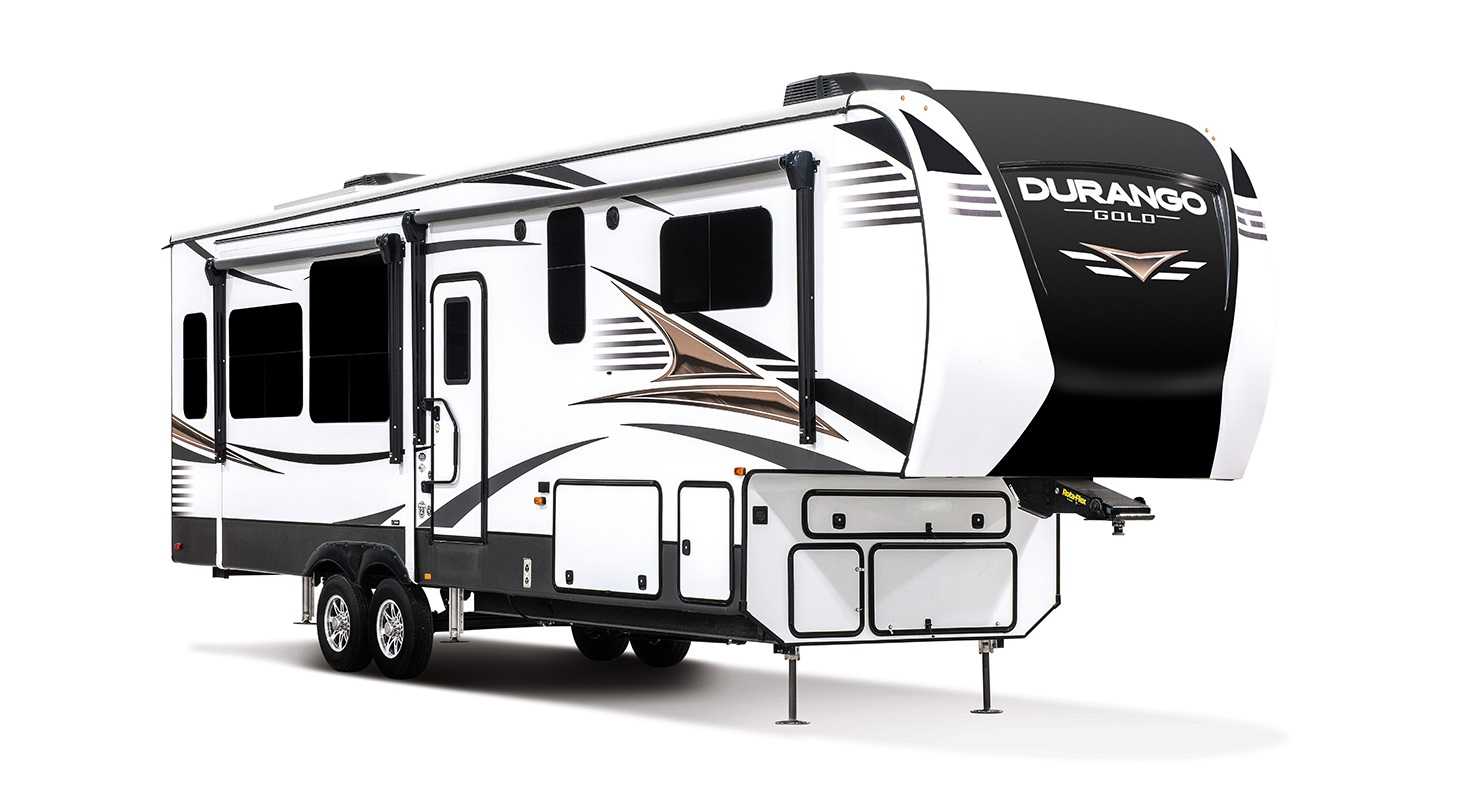
2021 alliance RV Avenue Heating, Cooling and Ventillation User Manual
This guide covers the 2021 Alliance RV Avenue’s innovative Heating, Cooling, and Ventilation systems, which maximize comfort and temperature management for a pleasant ride in all weather.
Air Conditioning
Alliance RV main living quarters (downstairs) will utilize a “direct cool” Coleman air conditioner. These units are mounted on the exterior roof of the RV with a combination shroud mounted on the inside ceiling of the RV. We have opted for most of the RV to be cooled with this direct cool unit as it is significantly more efficient than your typical a ducted system. The front/upper deck of the RV will utilize a ducted Coleman air conditioner system. Due to the nature of the design in the front/upper deck containing multiple rooms and areas that can be isolated with doors, a ducted system is utilized.
Each air conditioner will be operated by its own individual thermostat.

Furnace
Avenue will be heated with a SF-Q series Suburban furnace that provides 35,000 BTU’s. An exterior access door allows for ease of service. The furnace is operated with the Airxcel thermostat that is tied to the main air conditioner unit. The main air conditioner unit is the control that operates the central air conditioner in the RV.
Operating the Furnace
DO NOT OPERATE THE FURNACE WHILE VEHICLE IS IN MOTION OR BEING TOWED
NOTE: During initial firing of this furnace, a burn-off of excess paint and oils remaining from manufacturing process may cause “smoking” for 5 – 10 minutes
- Stop! Read the furnace user’s manual supplied with the furnace.
- Turn the manual valve (if equipped) or the valve at the outside propane tank to the “OFF” position. Do not force
- Set the thermostat above room temperature to begin blower operation. A slight delay will occur before the blower comes on. Allow blower to run for 5 minutes for combustion chamber purge cycle. If blower does not come on or stops before ignition cycle, go to shut down and contact your dealer.
- After 5 minutes, move thermostat lever below room temperature. Blower will remain on. Wait approximately 2 minutes for blower to go off.
- Open manual shut-off valve (if equipped) or the valve at the outside propane tank. Correct operating characteristics depend on the valve being positioned fully open. Never attempt to operate with a valve partially closed. NOTE: This furnace is equipped with a valve shut-off switch. If the furnace is started with shut-off switch in “OFF” position, the furnace motor will run for 30 seconds, then shut off. During this sequence, no gas will flow to the burner and the furnace will lock out requiring the user to cycle either the thermostat or unit power to reset the furnace. Ensure the shut-off switch is in the “ON” position for proper operation.
- Set the thermostat to desired setting. If set above room temperature, blower will come on.
- Allow 30 seconds for main burner to light after blower comes on. This furnace is equipped with an ignition device which automatically lights the burner. Do Not try to light the burner by hand.
- If the burner does not light, repeat steps 1 thru 8.
- If after three 3 attempts with no ignition, go to shut down and contact your dealer. Do not continue to cycle the furnace. NOTE: If the furnace locks out, the blower will go off in 5 minutes and remain off until it is reset by reactivating the thermostat.
To Turn the Furnace Off
- Set the thermostat to lowest setting, then turn the thermostat to the “OFF” position.
- Turn the manual shut off valve (if equipped) to the “OFF” position.
Thermostat
The display indicates the mode and the room temperature. When the mode button is pressed once, the thermostat will wake. When the mode button is pressed again, the mode will change. Press the up or down button to wake the thermostat, the set temperature will display, and the mode will flash. Press the up or down button again to change the set temperature. The thermostat will go back to sleep after 5 seconds of no activity.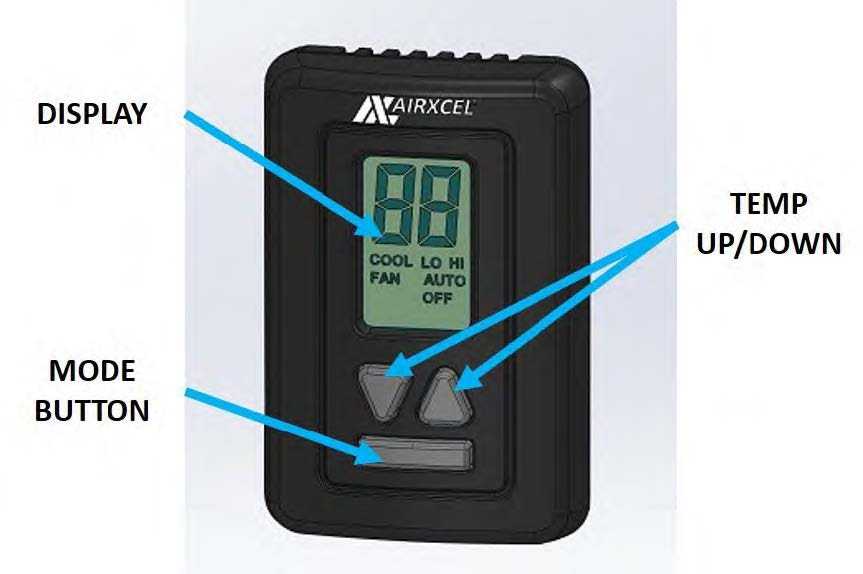
There is a three-minute anti-short cycle for cooling. After the cooling system has been de-energized, the system will not energize again for three minutes, this is to protect the compressor on the ac unit. You can bypass the anti-short cycle function by changing the mode to off.
NOTE: Operating your cooling system when the outdoor temperature is below 50 degrees Fahrenheit can cause damage to your cooling equipment. Hold the mode button down for 5 seconds to change from Fahrenheit to Celsius.
Your RV is equipped with an electric fireplace. You will be able to use this to help knock the chill off on cold days, this fireplace is not intended to heat your entire RV, nor will it do so. You can operate the fireplace at the control panel on the fireplace itself or wit the remote.
Fireplace
Your RV is equipped with an electric fireplace. You will be able to use this to help knock the chill off on cold days, this fireplace is not intended to heat your entire RV, nor will it do so.
You can operate the fireplace at the control panel on the fireplace itself or wit the remote
Control Panel
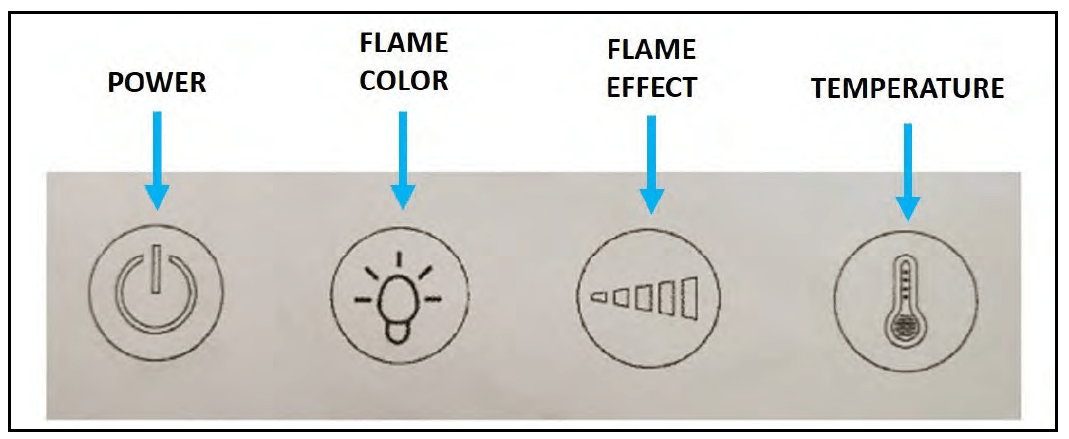
- Power button – Press this button to turn the fireplace on. The unit will beep. Press again to turn the fireplace off.
NOTE: The fan will continue to run for 60 seconds without heat. - Flame Color – Press this button to change the flame color. The unit will beep – press once for orange, press twice for an orangish blue, press three times for blue
- Flame Effect – Press this button to change the flame effect. The unit will beep. Press again to decrease the flame intensity. There are 6 light settings for your selection. The flame optics will go lower under the sequence of 6,5,4,3,2,1. Pressing the button again will stop the flame effect.
- Temperature – Press this button to set the temperature. The unit will beep. Press to set the desired temperature. When desired ambient temperature is reached, the heater will automatically stop heating. When the ambient temperature drops below the set point, the heater will resume heating.
Remote Control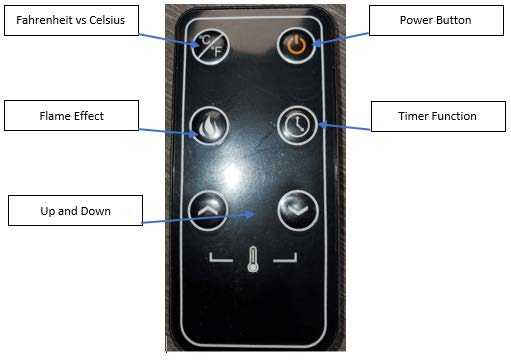
- Fahrenheit Vs. Celsius – Press this button to toggle between the two temperature scales.
- Flame Effect ‐ Press this button to change the flame effect. The unit will beep. Press again to decrease the flame intensity. There are 6 light settings for your selection. The flame optics will go lower under the sequence of 6,5,4,3,2,1. Pressing the button again will stop the flame effect.
- Up and Down – Press these buttons to set the desired temperature.
- Power Button – Turn the unit on and off with this button.
- Time Function – Press this button for the timer function. The letters “0H” to “8H” will appear on the LED screen. “OH” means there is no set running time and the heater will run continuously. The letters “1H” thru “8H” means the number of hours that the heater will operate before shutting off.
NOTE: The battery in the remote is a CR2025 battery.
Ventilation
MAXXAIR fans are located in the kitchen and master bathroom areas. These high‐powered fans are an industry staple that operates very easily. These fans are crucial in your RVs ventilation and assist with minimizing condensation, especially in extended use and extreme temperature situations. Your MAXXAIR fans will be controlled by remote wall-mounted controls. There is a manual override for opening and closing of the lid on the unit at the ceiling.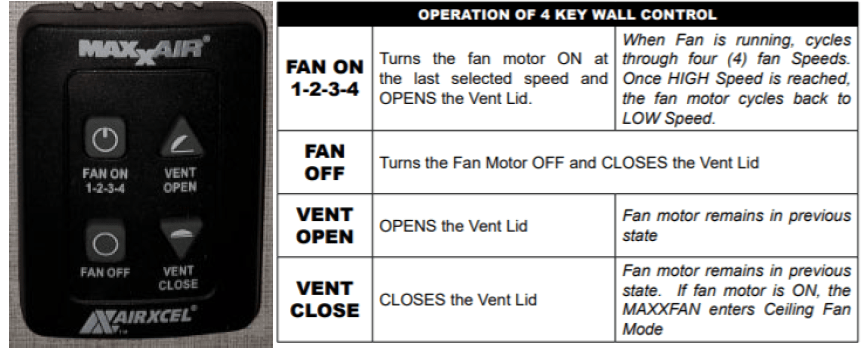
Range Hood
The microwave situated above your stove has a built‐in fan. This will be covered in the Appliances section to follow.
Useful Links:
View Full User Guide: alliance RV Avenue 2021 User Manual

