Kia Stinger 2021
The Kia Stinger is a luxury sports sedan that was first introduced in 2017 as a 2018 model-year vehicle. However, as of my knowledge cutoff in September 2021, I do not have specific information about the 2021 Kia Stinger or any subsequent updates or introductions.
The Kia Stinger made a significant impact on the automotive market when it was initially unveiled. It showcased Kia’s commitment to producing high-performance vehicles with an emphasis on style, technology, and driving dynamics. The Stinger aimed to compete with established luxury sports sedans from brands like BMW, Audi, and Mercedes-Benz.
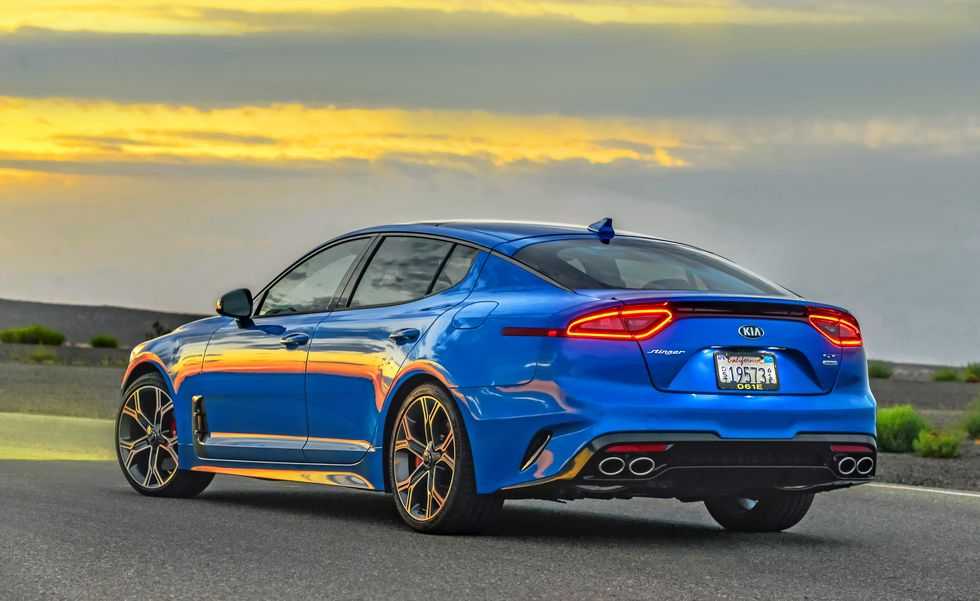
The Stinger boasts a sleek and aggressive exterior design, with a long hood, short overhangs, and a fastback silhouette. It features a spacious and well-appointed interior with modern amenities and advanced safety features. The cabin provides a driver-focused layout, emphasizing comfort and control.
Performance-wise, the Stinger offers a range of engine options, including turbocharged four-cylinder and V6 engines, delivering strong acceleration and dynamic handling. It is available with rear-wheel drive or all-wheel drive, providing flexibility for different driving preferences and conditions.
In terms of technology, the Stinger is equipped with a touchscreen infotainment system that supports smartphone integration, navigation, and other connectivity features. It also offers driver-assistance systems, such as adaptive cruise control, blind-spot monitoring, and lane-keeping assist, to enhance safety and convenience.
For the most up-to-date information on the 2021 Kia Stinger or any subsequent model year introductions, I recommend visiting the official Kia website or contacting a Kia dealership.
Storing positions into memory using the buttons on the door
Storing driver’s seat positions
- Press the Parking button while the engine starts/stop button is ON.
- Adjust the driver’s seat, including leg extension if equipped, and outside rearview mirrors and head-up display comfortable for the driver.
- Press the SET button on the control panel. The system will beep once.
- Press one of the memory buttons (1 or 2) within 4 seconds after pressing the SET button. The system will beep twice when memory has been successfully stored.
When recalling an adjustment memory button while sitting in the vehicle, you can be surprised by the setting chosen if the memory has been adjusted by someone else. If that occurs, immediately push the seat position control knob in the direction of the desired position to stop further undesired movement.
Recalling positions from memory
- Press the Parking button while the engine starts/stop button is ON.
- To recall the position in the memory, press the desired memory button (1 or 2). The system will beep once, then the driver’s seat will automatically adjust to the stored position.
Adjusting the control switch for the driver’s seat while the system is recalling the stored position will cause the movement to stop and move in the direction that the control switch is moved.
Easy access function (if equipped)
When exiting the vehicle, the steering wheel will move away from the driver and the seat will move rear-ward when the engine is turned off.
When entering the vehicle, the steering wheel will move toward the driver and the seat will move forward when the Engine Start/Stop Button is pressed to the ACC position or START position.
You can activate or deactivate this feature. Refer to “User settings” in chapter 4.
Driver position memory system reset
If the Driver position memory system reset fails to work, initialize the system as follows.
How to initialize:
- Stop the car and open the driver’s door with the Engine start/stop button in ON and the automatic shift lever in P (parking) position.
- Pull the driver’s seat forward as far as possible and have the seatback upright as much as possible using the driver’s seat forward adjustment and seatback angle (recline) movement switches.
- Push a SET button and seat forward movement switch button for 2 seconds simultaneously.
CAUTION
- If the alarm sound and driver seat adjustment stop while initialization is in process, re-start initialization.
- Make sure that there are no obstacles around the driver’s seat before proceeding with initialization.
- Once initialization is completed, adjust seats conforming to your ideal driving position and save the customized seat settings.
Initialization in the process :
- Initialization begins as the alarm sounds.
- The seat and seatback will automatically move backward. The alarm sound will continue while the system is in operation.
- Initialization will be all set after the seat and seatback move to the center with an alarm sound being raised. If, however, any of the following occur, the initialization process will come to a stop and the alarm sound will stop as well.
- When pushing the driving position memory system button
- When pushing the driver’s seat height adjustment switch
- When changing the shift lever from the P position to other positions
- When the driving speed exceeds 2 mph (3 km/h)
- When the driver’s door is closed
Headrest (for a front seat)
The driver’s and front passenger’s seats are equipped with a headrest for the occupant’s safety and comfort. The headrest not only provides comfort for the driver and front passenger but also helps protect the head and neck in the event of a rear-end collision. For maximum effectiveness in case of an accident, the headrest should be adjusted so the middle of the headrest is at the same height as the center of gravity of an occupant’s head. Generally, the center of gravity of most people’s heads is similar to the height of the top of their eyes. Also, adjust the headrest as close to your head as possible. For this reason, the use of a cushion that holds the body away from the seatback is not recommended.
Adjusting the height up and down
To raise the headrest, pull it up to the desired position (1). To lower the headrest, push and hold the release button (2) on the headrest support and lower the headrest to the desired position (3).
Forward and backward adjustment
The headrest may be adjusted forward to 4 different positions by pulling the headrest forward to the desired detent. To adjust the headrest to it’s furthest backward position, Pull the headrest fully forward to the farthest position and release it. Adjust the headrest so that it properly supports the head and neck.
NOTICE
If you recline the seatback towards the front with the headrest and seat cushion raised, the headrest may come in contact with the sun visor or other parts of the vehicle.
To remove the headrest:
- Recline the seatback (2) with the recline switch (1).
- Raise the headrest as far as it can go.
- Press the headrest release button (3) while pulling the headrest up (4).
Rear seat adjustment Headrest
The rear seat is equipped with headrests in all the seating positions for the occupant’s safety and comfort. The headrest not only provides com-fort for passengers but also helps protect the head and neck in the event of a collision. For maximum effectiveness in case of an accident, the headrest should be adjusted so the middle of the headrest is at the same height of the center of gravity of an occupant’s head. Generally, the center of gravity of most people’s heads is similar to the height as the top of their eyes. Also, adjust the headrest as close to your head as possible. For this rea-son, the use of a cushion that holds the body away from the seatback is not recommended.
Adjusting the height up and down
To raise the headrest, pull it up to the desired position (1). To lower the headrest, push and hold the release button (2) on the headrest support and lower the headrest to the desired position (3).
Removal and reinstallation
To remove the headrest, raise it as far as it can go then press the release button (1) while pulling the headrest upward (2). To reinstall the headrest, put the headrest poles (3) into the holes while pressing the release button (1). Then adjust it to the appropriate height and ensure that it locks in position.
Armrest
To use the armrest, pull it forward from the seatback.
Folding the rear seat
The rear seatbacks may be folded to facilitate carrying long items or to increase the luggage capacity of the vehicle.
To fold down the rear seatback
- Make sure the rear seat belt webbing is in the guide to prevent the seat belt from being damaged.
- Set the front seatback to the upright position and if necessary, slide the front seat forward.
- Lower the rear headrests to the lowest position.
- Pull on the seatback folding lever(1), then fold the seat toward the front of the vehicle.
- To use the rear seat, lift and push the seat back backward. Push the seat back firmly until it clicks into place. Make sure the seatback is locked in place.
- Return the rear seat belt to the proper position.
2023 Kia Stinger Specs, Price, Features, Mileage (Brochure)
Reference Link
Download Link: https://owners.kia.com/content/owners/en/manuals.html