2017 Winnebago Brave Owner’s Manual
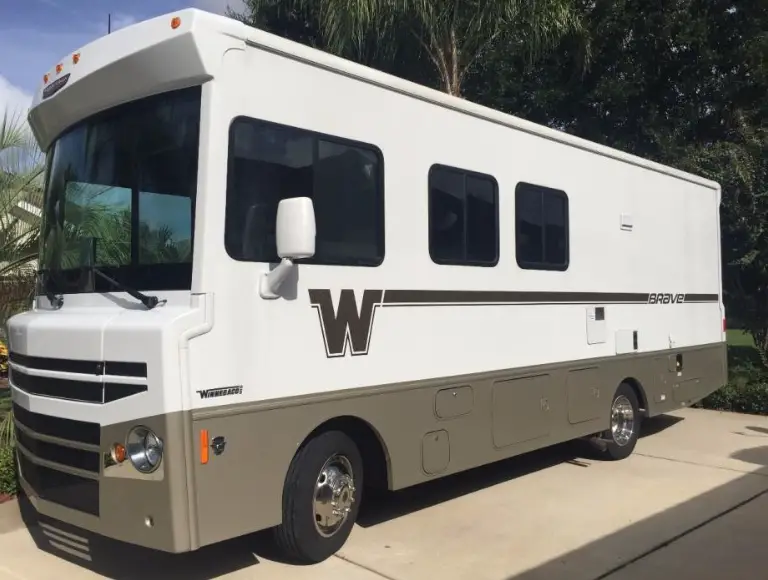
The 2017 Winnebago Brave pays tribute to a classic time while accepting modern comforts. It is a Class A motorhome that is both nostalgic and modern. The Brave is perfect for travelers who want a unique mix of vintage charm and modern conveniences on their trips. Its exterior design is reminiscent of the past, and its inner spaces are well thought out and updated. It has reliable engines that make it easy and comfortable to drive, and its well-appointed living areas, functional kitchens, advanced entertainment systems, and built-in technology combine the best of the old and the new, making the 2017 Winnebago Brave a symbol of exploration and comfort.
DRIVING YOUR MOTORHOME
SEATS – DRIVER/CO-PILOT
The driver and co-pilot seats may be independently adjusted to suit individual preferences. The seats may be swiveled to provide easy entrance and exit. The swivel feature also allows the seats on most models to be turned toward the living area for additional seating while the unit is parked.
WARNING: Assure the seat is in its forward and locked position for travel. Do not adjust the seat while the vehicle is in motion. Failure to comply may result in injuries.
To Face Driver Seat Rearward
- Tilt the steering wheel all the way up.
- Put the left armrest down.
- Swivel the seat to the right until it just contacts the steering wheel, then slide the seat ahead all the way.
- Lift the recliner lever and let the seat back tilt ahead to clear the steering wheel.
- Swivel the seat the rest of the way to face the living area.
- Tilt the steering wheel down.
- Reverse the procedure to face the seat forward.
SEAT BELTS
Seats intended for occupancy while the vehicle is in motion are equipped with seat belts for the protection of the driver and passengers.
- Lap Belts
The lap belts must be worn as low as possible and fit snugly across the hip area. Always sit erect and well back into the seat. To gain full protection of the safety belt, never let more than one person use the same safety belt at any one time, and do not let the safety belts become damaged by pinching them in the doors or in the seat mechanism. After any serious accident, any seat belts which were in use at the time must be inspected and replaced if necessary. - Adjustment
To lengthen the belt, swivel the tab end at a right angle to the belt and pull the strap to the desired length. To shorten, pull the loose end of the belt. - To Fasten
Be sure the belt is not twisted. Grasp each part of the belt assembly and push the tongue into the buckle. Adjust to a snug fit by pulling the loose end away from the tongue. - To Release
Press the button in the center of the buckle and slide the tongue out of the buckle.
WARNING
- Snug and low belt positions are essential. This will ensure that the force exerted by the lap belt in a collision is spread over the strong hip area and not across the abdomen, which could result in serious injury.
- Only seats equipped with seat belts are to be occupied while the vehicle is in motion. Swivel seats must be in the locked, forward-facing position while the vehicle is in motion.
Lap/Shoulder Belts
- Fastening
Hold the belt just behind the tongue. Next, bring the belt across the body and insert the tongue into the buckle until the latch engages. - Unfastening
Press the release button on the buckle. Hold onto the tongue when you release it from the buckle to keep it from retracting too rapidly.
When the lap-shoulder belt is in use, the lap belt must ride low across the hip area and the shoulder belt must ride diagonally over the shoulder toward the buckle. The shoulder belt is designed to lock only during a sudden stop, sudden body movement or a collision. At all other times, it will move freely with the occupant.
WARNING: Never wear the shoulder belt in any position other than as stated above. Failure to do so could increase the chance or extent of injury in a collision.
Seat Belt Care and Cleaning
- Be careful not to damage the belt webbing and hardware. Take care not to pinch them in the seat or doors.
- Inspect the belts and hardware periodically. Check for cuts, frays, and loose parts. Damaged parts should be replaced. Do not remove or modify the belt system.
- Keep belts clean and dry. If the belts need cleaning, use only a mild soap and water solution. Do not use hot water. Do not use abrasive cleaners, bleach, or dyes. These products may weaken the belts.
- Replace any belt assembly that was used during a severe impact. Replace the complete assembly even if damage is not apparent.
CHILD RESTRAINTS
A properly installed and secured child restraint system can help reduce the chance or severity of personal injury to a child in an accident or during a sudden maneuver. Children may have a greater chance of being injured in an accident if they are seated in a child restraint system that is not properly secured.
A child restraint system is designed to be secured in a vehicle seat by a lap belt or the lap belt portion of a lap-shoulder belt.
When purchasing a child restraint system, follow these guidelines:
- Look for the label certifying that it meets all applicable safety standards.
- Make sure that it will attach to your vehicle and restrain your child securely and conveniently so that you are able to install it correctly each time it is used.
- Be certain that it is appropriate for the child’s height, weight, and development. The instructions and/or the regulation label attached to the restraint typically provide this information.
- Review the instructions for installation and use of the restraint. Be sure that you understand them fully and can install the restraint properly and safely in your vehicle.
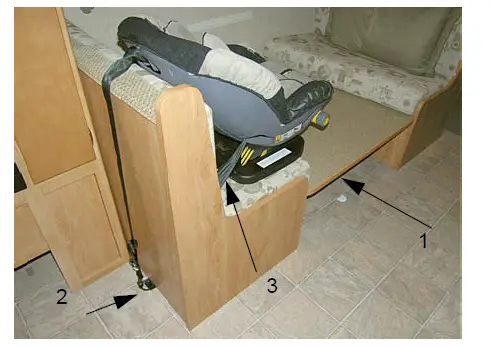
Tether Anchor Loop
If your coach has a dinette, it may be equipped with a child seat tether anchor loop located on the floor or wall directly behind the forward-facing dinette seat.
NOTE: The dinette table must be in the lowered position when a child seat is in use.

- Lower the dinette table.
- Route the tether over the top of the dinette seat back and hook it to the anchor loop on the floor.
- Fasten the lap belt.
Further Information
See the child seat manufacturer’s specific instructions for proper attachment and adjustment of the tether and seat belts.
KEYS
Your motorhome is supplied with several keys. In addition to the chassis manufacturer’s ignition key, you receive keys for the entrance door and exterior compartment doors. Keys have an identification number, either a small metal tag or stamped into the key head. These numbers are recorded on the vehicle’s component model/serial sheet, which is included in your InfoCase. In case keys are lost or stolen, your dealer or a locksmith can provide you with duplicate keys or modify the locks.
MIRRORS – POWER ELECTRIC
Always adjust mirrors for maximum rear visibility before driving off. Make sure the seat is adjusted for proper vehicle control and that you are sitting back squarely into the seat.
Mirror Adjustment Control
The mirror control is located on the driver-side armrest panel or the dash. The ignition key must be on to adjust the mirrors.
Move Selector Switch L or R to select a mirror. The Center “neutral” position disables arrows to avoid unintentionally moving a mirror.
Mirror Heaters
The mirrors may also contain heating elements to de-fog or de-ice the mirror glass during cold weather operations. A switch for the mirror heaters is located on the dash. To turn it on, press the switch UP. Press DOWN to turn it off.
Mirror Arm/Head Adjustment
If you cannot adjust a mirror properly using the control switch, the mirror may need a coarse adjustment by rotating the mirror head.
Mirror Head Pivot Lock
- Loosen Allen’s head set screws to pivot the mirror head.
- Torque 75-100 in./lbs.
NOTE: Set screws may be located on the opposite side of the mirror arm. The passenger side mirror is similar.
BRAKE-SHIFT INTERLOCK
The Brake-Shift Interlock is a safety feature that prevents the shift lever from being moved from the Park position unless the ignition is ON and the service brake pedal is pressed.
NOTE: If the brake light fuse is blown, the interlock feature will not work properly and an alternate method must be used. See the chassis manual provided in your InfoCase for detailed instructions on what to do in this situation.
PARK BRAKE – FOOT PEDAL
The park brake foot pedal and release lever are located beneath the left side of the dash. Step the pedal down fully to apply and pull the brake release knob to disengage.
TOW/HAUL TRANSMISSION MODE
This mode locks out Overdrive and helps reduce gear “hunting” by the automatic transmission while towing. It also improves power delivery and uses engine braking to help control vehicle speed when descending hills. This mode may also be useful when the coach is fully loaded or when driving into a strong headwind.
Further Information
See the chassis manual in your InfoCase for further operating instructions and cautions.
FAQ’s
A: The 2017 Winnebago Brave is a Class A motorhome that combines vintage design elements with modern comforts, offering a unique and nostalgic travel experience.
A: The 2017 Winnebago Brave is often equipped with a gasoline engine, providing a balance of power and performance.
A: The 2017 Winnebago Brave typically offered multiple floorplan options to cater to different preferences and needs.
A: The interior of the 2017 Winnebago Brave includes thoughtfully designed living areas, functional kitchens, comfortable furnishings, and modern entertainment systems.
A: The length of the 2017 Winnebago Brave varies based on the specific floor plan, but it typically falls within the range of 26 to 32 feet.
A: Depending on the floorplan, the 2017 Winnebago Brave can comfortably accommodate 4 to 6 people.
A: The 2017 Winnebago Brave features technology like entertainment systems, touchscreen controls, energy-efficient lighting, and more.
A: The 2017 Winnebago Brave offers an ergonomic driver’s area, adjustable seats, and comprehensive instrumentation for a comfortable and confident driving experience.
A: The 2017 Winnebago Brave typically comes equipped with safety features such as airbags, anti-lock brakes, rearview cameras, and more.
A: Yes, the 2017 Winnebago Brave is designed for year-round travel, often featuring insulation, and efficient heating, and cooling systems.
A: The 2017 Winnebago Brave stands out with its vintage-inspired exterior design and modern interior comforts, making it an appealing choice for travelers seeking a blend of nostalgia and convenience.
A: Locate the slide-out control switch inside the vehicle. Press and hold the switch labeled “Slide-Out” until the room is fully extended. Release the switch to stop the extension.
A: The 2017 Winnebago Brave typically uses gasoline as fuel. Refer to the user manual or the fuel filler cap for specific fuel requirements.
A: You can visit the official Winnebago website, contact local dealerships, or explore RV enthusiast forums for detailed information and reviews about the 2017 Winnebago Brave’s features and options.
A: The 2017 Winnebago Brave is well-suited for travelers who appreciate a blend of vintage aesthetics and modern amenities, making it ideal for those seeking a unique and comfortable road trip or an extended adventure.
Useful Links
Winnebago Spirit 2019 User Manual
Winnebago Sunstar 2019 User Manual

