![]()
2017 Winnebago Via Owner’s Manual
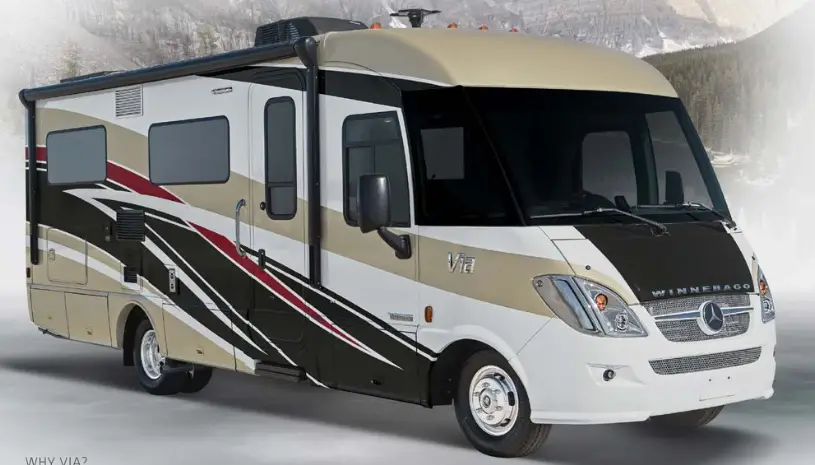
The 2017 Winnebago Via embodies a fusion of compact luxury and efficient design in a Class A motorhome, giving a unique mix of versatility and sophistication. With its sleek exterior, smartly configured interior, and a range of modern amenities, the Via caters to travelers seeking both elegance and practicality on their trips. Powered by a fuel-efficient diesel engine, it delivers a nimble and eco-conscious driving experience, while its intelligently designed living spaces, upscale furnishings, advanced entertainment systems, and integrated technology redefine the possibilities of compact yet comfortable travel, making the 2017 Winnebago Via a symbol of stylish exploration and refined mobility.
FRESH WATER SYSTEM
The Fresh Water System provides water to the galley sink, shower, bathroom lavatory, toilet, and water heater. Water may be supplied by either of two sources:
- A fresh water tank and water pump located within the motorhome, or
- Any external fresh water source to which the motorhome may be connected, is known as “city water”.
There are two ways to fill the fresh water tank on your coach – City Fill or Gravity Fill.
Water Pressure Regulators
Because city water pressure varies from location to location, we recommend obtaining an in-line water pressure regulator to prevent damage to any components, connections, and seals in your freshwater system. These devices simply connect in-line between the supply hose and the city water input on the coach. We recommend regulators that control water pressure to 50 psi. max. Water pressure regulators are commonly available at most RV dealerships and many large retail discount or home supply centers.
Method 1 – Filling the Fresh Water Tank Through City Fill Connection
Always fill the fresh water tank at an approved potable water filling facility or a known purified drinking water source.
The tank is filled through the City Water Connection (Fresh Water Inlet) located inside the water service center.
The Fresh Water valve (located in the water service center) routes the water from the city water hose to the freshwater tank for filling.
- Attach the hose to the Fresh Water Inlet.
- Open the Gravity Fill door (located behind a small, lockable door on the driver or passenger sidewall or back wall – depending on the model) to aid in tank venting and as an overflow when the tank is full.
- Turn the Fresh Water valve to the Tank Fill position.
- Turn the city water supply ON.
- Use the level display on the monitor panel to oversee the filling of the tank, or when the tank is full, water will flow from the tank vent tube beneath the coach and out of the Gravity Fill door.
NOTICE: Do not leave the freshwater connection unattended when filling the tank. Failure to comply may result in tank expansion and property damage. - Turn OFF the city water supply and disconnect the hose from the Fresh Water Inlet.
- Turn the Fresh Water valve to the Normal position to use the water pump. The Tank Fill position is only for pressure filling the water tank from the city water hose connection.
Using City Water
When connected to an outside source of water, the water bypasses the water pump and storage tank and supplies pressure directly to individual faucets and toilets. A check valve built into the pump prevents water from entering the pump and filling the storage tank.
- Connect a hose to Fresh Water Inlet as described in the previous steps.
- With the Fresh Water valve in the Normal position, turn the Water Pump switch(es) OFF.
NOTE: Always keep the Fresh Water valve in Normal position unless you are filling the tank. If this valve is left in the Tank Fill position while using the city water, water will keep flowing into the tank and out the tank vent tube onto the ground and the water pump will run without delivering water to the faucets.
Disconnecting from City Water
- Turn the city water supply OFF.
- Open a faucet on the couch (such as the exterior wash station, if equipped) to relieve line pressure.
- Disconnect the hose from the coach and replace the cap on the Fresh Water Inlet.
NOTE: Ensure the Fresh Water valve is in a NORMAL position to use the water pump. If the valve is in the Tank Fill position, the pump will run continuously without delivering water.
Method 2 – Filling the Fresh Water Tank Through Gravity Fill
WARNING: Potable water only. Sanitize, flush, and drain the water tank before using. See the owner’s manual for instructions, care, and maintenance information. Failure to maintain the tank can result in death or serious injury.
Always fill the fresh water tank at an approved potable water filling facility or a known purified drinking water source. The gravity tank fill tube is located behind a small, lockable door on the driver or passenger sidewall or back wall toward the back of the coach, depending on the model. Insert the hose into the fill opening and turn the water supply on. The tank is full when water flows from the tank vent tube beneath the coach and out of the Gravity Fill door.
Using Tank Water (Gravity Fill)
Turn the Water Pump switch ON. While the switch is on, the water pump will automatically supply tank water as needed.
WATER PUMP
When your coach is not connected to a city water supply, water is supplied from the fresh water tank by a water system demand pump. A demand pump is designed to run only when you are using water. When you open a faucet, the waterline pressure drops and the pump begins to run, and it will continue to run as long as the faucet is open. When you close the faucet, the line pressure backs up to the pump, and it shuts itself off.
The pump is self-priming and will run briefly to build up line pressure when the Water Pump switch is first turned on. See “Initial Waterline Priming” for instructions on using the water system for the first time.
Water Pump Strainer
The pump is equipped with a cleanable strainer to capture any possible tank-borne particles that could damage pump components.
NOTE: We recommend that you check and clean the strainer after each tankful of water during the first few uses of the Water Pump system. Thereafter, remember to check it at least yearly, and be sure to empty water from it if using the blowout winterization procedure.
To Clean Pump Strainer
• Ensure all Water Pump switches are OFF.
• Twist the inlet cap (bowl) “counter-clockwise” to unscrew from the strainer assembly.
• Remove the bowl and pull the strainer screen out of the bowl to tap out any particles and rinse clean.
• Insert the strainer screen back into the bowl, then screw the bowl back onto the strainer assembly.
Water Pump Switch
The Water Pump switch is located near the monitor panel (some models may have an additional switch in the water service center, near the exterior shower, or within the bathroom area for your convenience).
While the switch is “ON”, the pump will automatically supply water as it is needed.
We recommend that you turn the Water Pump switch off whenever you will be away from the vehicle or not using the water system. In time, a slow leak in a faucet could drain the water tank, fill the holding tank, and discharge the house batteries.
Initial Waterline Priming
- Ensure that all water drain valves are closed, including the water heater valve.
- Turn the Water Pump switch to the “OFF” position.
- Fill the water tank.
- Open all faucets, hot and cold.
- Turn ON the Water Pump switch.
- Close each faucet as it begins to deliver a steady stream of water (close cold water first.) Leave hot water faucets on until they also deliver a steady stream of water. This will ensure that the water heater is filled with water.
- Check to ensure the Water Pump stops soon after all faucets have been closed.
- The Water Pump is now ready for automatic operation. The pump will start when a faucet is opened and stop when the faucet is closed.
Further Information
Refer to the Water Pump manufacturer’s operation, care, and maintenance information provided in your InfoCase.
- Model 25P – Located beneath a removable panel in the rear corner bed.
- Model 25T – Located behind a removable access panel in the rear driver-side compartment.
COLD WATER FILTER
To obtain filtered cold water for drinking or cooking, simply open the galley sink cold water faucet.
NOTE: Only the cold water faucet is filtered.
The cold waterline flows through an activated carbon filter that removes chlorine and odors for taste-free drinking water.
Replacing the Cold Water Filter Cartridge
You should replace the filter cartridge every season and when water flow from the faucet is too slow for convenience. The cartridge must be replaced at least every 12 months.
- Place a container beneath the filter to catch any water remaining in the waterlines during filter removal.
- Twist the filter cartridge “counter-clockwise” about one-quarter turn, then pull it down and out of the filter socket.
- Insert a new water filter cartridge up into the filter socket as far as possible and twist it “clockwise” one-quarter turn until it stops.
- Before using the water for drinking, run a few gallons of water through the filter and discard the water to avoid consuming carbon dust or particles that may have been present in the new filter cartridge.
Diverter Plug
- Install the diverter plug into the filter socket for winterization or if water must be used while the filter is removed from the socket. The diverter plug is installed in the same manner as the water filter.
- See “Winterization Procedure” at the end of this section for further information.
- When removing the couch from storage, always disinfect and flush the water system thoroughly before installing a new filter. See “Disinfecting Your Fresh Water System” elsewhere in this section for more information.
NOTE: After the system has been thoroughly flushed, remove the diverter plug and store it for future use.
FAQ’s
A: Insert the key into the ignition, turn it to the “On” position, and then turn it further to the “Start” position. Release the key once the engine starts.
A: Press the “Level” button on the control panel. The leveling jacks will automatically extend and level the vehicle. Once the leveling is complete, the system will indicate that it’s safe to exit the vehicle.
A: Locate the slide-out control switch on the interior panel. Press and hold the switch labeled “Slide-Out” until the room is fully extended. Release the switch to stop the extension.
A: The recommended tire pressure can be found in the user manual or on a label located near the driver’s seat. Make sure to check the tire pressure regularly and adjust it according to the specifications.
A: Locate the awning control switch inside the vehicle. Press and hold the switch to extend or retract the awning. Be cautious of overhead obstacles when operating the awning.
A: Start the generator by pressing the “Generator” button on the control panel. The generator will provide power to the appliances and systems in the vehicle. Follow the manufacturer’s guidelines for maintenance and usage.
A: Use the thermostat control to set the desired temperature. Press the “Cool” mode to activate the air conditioning system. Adjust the fan speed and vents as needed for comfort.
A: Locate the dump valve area and connect the appropriate hoses. Open the black water valve first, followed by the gray water valve, to empty the tanks. Rinse the tanks using the built-in flushing system if available.
A: The 2017 Winnebago Via typically uses diesel fuel. Refer to the user manual or the fuel filler cap for specific fuel requirements.
A: Use the provided power cord to connect to a campground electrical pedestal. Plug the cord into the appropriate outlet on the vehicle and the pedestal. Make sure to set the electrical system to “Shore Power” mode.
A: Follow the manufacturer’s guidelines for winterization. Typically, drain the water system, add antifreeze, and ensure all water lines are protected from freezing.
A: Open the microwave door and place your food or beverage inside. Set the cooking time and power level using the microwave’s control panel. Press the “Start” button to begin cooking.
A: Use the control panel or remote to power the entertainment system. Select the desired source (TV, DVD player, etc.) and adjust the volume and settings as needed.
A: Depending on the floor plan, the sleeping area may be a fold-out sofa or a fixed bed. Follow the instructions in the user manual to prepare the sleeping space for use.
A: Regularly wash the exterior to prevent dirt and debris buildup. Use mild soap and water, and avoid abrasive materials that could damage the finish. Wax the exterior periodically to protect the paint.
Useful Links
Winnebago Forza 2019 User Manual
Winnebago Era 2019 User Manual