
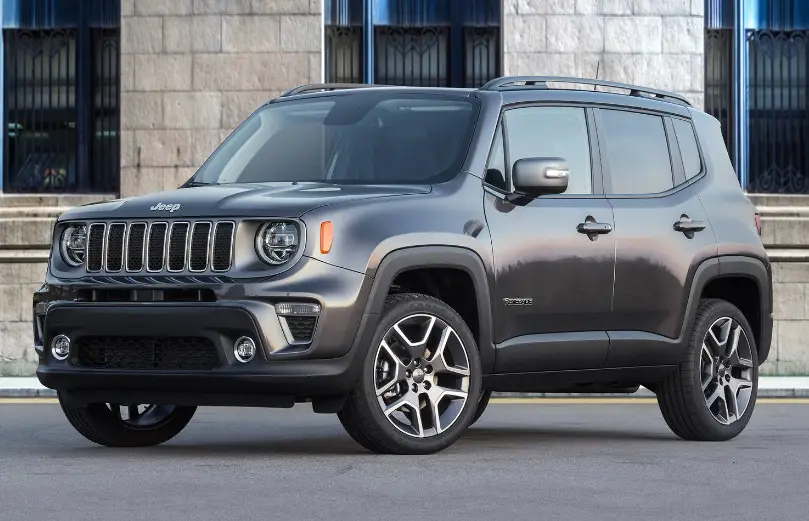

2022 Jeep Renegade Fuses Instruction Guide
Fuses are critical components of the electrical system in your 2022 Jeep Renegade. They function as protective barriers, keeping electrical circuits from becoming overloaded and potentially causing damage or fires. Each fuse is meant to interrupt the circuit in the event of an electrical surge, protecting various vehicle operationsRegular examinations and, if necessary, replacements of blown fuses are critical to ensuring the continued operation of the vehicle’s electrical components. Knowing how to properly identify, remove, and replace fuses is also an important skill for any Renegade owner. Understanding your 2022 Jeep Renegade’s fuse system allows you to repair minor electrical issues and efficiently maintain the vehicle’s electrical components. If you require more knowledge, feel free to go deeper into certain regions or functions linked to the fuses in the Renegade!
FUSES
General Information
WARNING!
- When replacing a blown fuse, always use an appropriate replacement fuse with the same amp rating as the original fuse.
- Never replace a fuse with another fuse of higher amp rating. Never replace a blown fuse with metal wires or any other material. Failure to use proper fuses may result in serious personal injury, fire and/or property damage.
- Before replacing a fuse, make sure that the ignition is off and that all the other services are switched off and/or disengaged.
- If the replaced fuse blows again, contact an authorized dealer.
- If a general protection fuse for safety systems (air bag system, braking system), power unit systems (engine system, gearbox system) or steering system blows, contact an authorized dealer.
The fuses protect electrical systems against excessive current.
When a device does not work, you must check the electrical circuit inside the fuse for a break/melt.
Also please be aware that using power outlets for extended periods of time with the engine off may result in vehicle battery discharge.

Blade Fuses
- Fuse Element
- Blade Fuse with a good/functional fuse element
- Blade fuse with a bad/not functional fuse element (blown fuse)
Access To The Fuses
The fuses are grouped into four controllers located in the engine compartment, under the instrument panel and on the inside of the left side cargo trim panel.
Engine Compartment Fuses/Distribution Unit
The engine compartment fuse panel is located on the left side of the engine compartment.

Engine Compartment Fuse Location
Removing Fuse Cover and Locking Screw

Fuse Panel & Cover Location
- Mounting Screw
- Fuse Cover
Proceed as follows:
-
Slowly turn the screw counterclockwise.
-
Slowly release the screw.
-
Remove the fuse cover by sliding it upward.
Mounting Fuse Cover and Locking Screw Proceed as follows:
-
Properly secure the fuse cover to the box, slide completely from top to bottom.
-
Press downward on the screw, using the special screwdriver supplied.
-
Slowly turn the screw clockwise.
-
Release the screw.
|
Cavity |
Maxi Fuse |
Cartridge Fuse |
Micro Fuse |
Description |
|
* If Equipped |
||||
|
F01 |
70 Amp Tan |
– |
– |
Module Body Computer |
|
F02 |
70 Amp Tan |
– |
– |
Module Body Computer, Rear Distribution Unit |
|
F03 |
– |
20 Amp Blue |
– |
Controller Power Supply Body Computer |
|
F04 |
– |
30 Amp Pink |
– |
Brake Control Electronics Module |
|
F05 |
70 Amp Tan |
– |
– |
Electric Power-Assisted Steering |
|
F06 |
70 Amp Tan |
– |
– |
Engine Cooling Fan |
|
F08 |
– |
30 Amp Pink |
– |
Automatic Transmission, GSM |
|
F09 |
– |
– |
5 Amp Tan |
Control Module Engine |
|
F10 |
– |
– |
15 Amp Blue |
Horn |
|
F11 |
– |
– |
5 Amp Tan |
Supply Secondary Loads |
|
F14 |
– |
– |
15 Amp Blue |
WCAC Pump/Active Grille Shutters |
|
F15 |
40 Amp Orange |
– |
– |
Brake Control Module Pump |
|
F16 |
– |
– |
5 Amp Tan |
Engine Control Module Power, Automatic Transmission |
|
Cavity |
Maxi Fuse |
Cartridge Fuse |
Micro Fuse |
Description |
|
* If Equipped |
||||
|
F17 |
– |
– |
30 Amp Green |
Supply Primary Loads |
|
F18 |
– |
– |
5 Amp Tan |
Intelligent Battery Sensor |
|
F19 |
– |
– |
7.5 Amp Brown |
Air Conditioner 1.3L Compressor |
|
F20 |
– |
– |
5 Amp Tan |
Electronic Power Four-Wheel Drive |
|
F21 |
– |
– |
15 Amp Blue |
Fuel Pump |
|
F22 |
– |
– |
10 Amp Red |
Power Control Module Engine |
|
F23 |
– |
– |
30 Amp Green |
Heated Windshield * |
|
F24 |
– |
– |
15 Amp Blue |
Electronic Unit Supply Automatic Transmission |
|
F82 |
– |
20 Amp Yellow |
– |
Power Control Module Engine |
|
F83 |
– |
40 Amp Green |
– |
Air Conditioning Fan |
|
F84 |
– |
– |
30 Amp Green |
Power Supply All Wheel Drive |
|
F87 |
– |
– |
5 Amp Tan |
Gear Selector Automatic Transmission |
|
F88 |
– |
– |
7.5 Amp Brown |
Heated Outside Mirrors |
|
F89 |
– |
30 Amp Green |
– |
Heated Rear Window |
Body Controller Fuse Center
The controller is located at the left side of the steering column at the bottom of the instrument panel.
For the fuse replacement see an authorized dealer.

|
Cavity |
Mini Fuse |
Description |
|
F31 |
7.5 Amp Brown |
Flashes/Electrical Movement Front Seats/Fan Air Conditioning |
|
F33 |
20 Amp Yellow |
Power Window Front (Passenger Side) |
|
F34 |
20 Amp Yellow |
Power Window Front (Driver Side) |
|
F36 |
15 Amp Blue |
Supply Uconnect System, Air Conditioning, USB Port, Rear Ceiling Lights (With Sunroof), E-Call, SGW |
|
F37 |
10 Amp Red |
System Power Forward Collision Warning Plus, All Wheel Drive (AWD), IPC, Brake Pedal Switch (NC) |
|
F38 |
20 Amp Yellow |
Central Locking |
|
F42 |
7.5 Amp Brown |
Power Under Lock and Key, Brake Control Electronics Module, Electric Power-Assisted Steering |
|
F43 |
20 Amp Yellow |
Bi-directional Pump Washer |
|
Cavity |
Mini Fuse |
Description |
|
F47 |
20 Amp Yellow |
Power Rear Window (Driver Side) |
|
F48 |
20 Amp Yellow |
Power Rear Window (Passenger Side) |
|
F49 |
7.5 Amp Brown |
Supply ParkSense, SGW, Mirror, Heated Front Seats, Stabilizer Battery, ESC System, S&S Inhibition Command, Blind Spot, Rain/Light Sensor, Humidity Sensor |
|
F50 |
7.5 Amp Brown |
Supply Air Bag |
|
F51 |
7.5 Amp Brown |
Air Conditioning, Lane Departure Warning, Terrain Selector, Trailer Tow Module, Compass Module, Rear View Camera |
|
F53 |
7.5 Amp Brown |
Supply IPC/Starter Device/System Keyless Enter ‘n Go™ |
|
F94 |
15 Amp Blue |
Power Socket |
Rear Cargo Fuse/Relay Distribution Unit
To access the fuses, remove the access door from the left rear panel of the rear cargo area.

Rear Fuse Access Door
The fuses may be contained in two units. Fuse Holder No. 1 and Fuse Holder No. 2 (if equipped with trailer towing) are located closest to the rear of the vehicle.

Rear Cargo Fuse Cavities
- Fuse Holder No.
Cavity
Mini Fuse
Description
F1
30 Amp Blue
Power Inverter
F2
20 Amp Yellow
HIFI Audio System
F3
20 Amp Yellow
MY SKY
F5
30 Amp Green
Power Seat (Driver Side)
F6
7.5 Amp Brown
Lumbar Adjustment Front Seat (Driver Side)
F8
20 Amp Yellow
Heating Front Seats
Fuse Holder No. 2
|
Cavity |
Mini Fuse |
Description |
|
F5 |
15 Amp Blue |
Controller Exterior Lighting Lights (Drivers Side) |
|
F6 |
15 Amp Blue |
Controller Exterior Lighting Lights (Passenger Side) |
Fuse Holder No. 2
|
Cavity |
Mini Fuse |
Description |
|
F1 |
20 Amp Yellow |
Sun Visor (Retractable Roof) Or External Fuse |
|
F2 |
20 Amp Yellow |
HIFI Audio System |
|
F3 |
20 Amp Yellow |
MY SKY |
|
F5 |
30 Amp Green |
Power Seat (Driver Side) |
|
F6 |
7.5 Amp Brown |
Lumbar Adjustment Front Seat (Driver Side) |
|
F8 |
20 Amp Yellow |
Heating Front Seats |
On the controller there is also a 20 amp fuse for the sun visor of the retractable roof.
BULB REPLACEMENT
General Information
-
Before you replace a bulb, check the contacts to be sure they are not oxidized.
-
Replace the bulbs with the same type and wattage.
-
After replacing a light bulb, always check the correct orientation.
-
Before replacing a bulb that is not functioning, check that the fuse is intact.
NOTE:
Lens fogging can occur under certain atmospheric conditions. This will usually clear as atmospheric conditions change to allow the condensation to change back into a vapor. Turning the lamps on will usually accelerate the clearing process.
Replacement Bulbs, Names, And Part
Numbers
In the instance a bulb needs to be replaced, this section includes bulb description and replacement part numbers.
NOTE
Based upon equipment options and current vehicle status, some lamps may not be equipped. See an authorized dealer for LED bulb replacement.
|
Interior Bulbs |
|
|
Lamps |
Bulb Number |
|
Front Courtesy Light |
C5W |
|
Front Courtesy Lights (Sun Visors) |
C5W |
|
Rear Dome Light (Models Without Retractable Roof) |
C5W |
|
Rear Interior Lights (Models With Retractable Roof) |
C5W |
|
Interior Lights |
W5W |
|
Dome Light (Glove Compartment) |
W5W |
|
Exterior Bulbs |
|
|
Lamps |
Bulb Number |
|
Low Beam/High Beam Headlamps (LED Version) |
LED |
|
Low Beam/High Beam Headlamps |
H13 |
|
Front Position/Daytime Running Lights (DRL)/Front Turn Indicator |
PSY24W |
|
Front Direction Indicator Lamps (If Equipped With LED Headlamps) |
PSY24W |
|
Front Fog Lamps |
H11 |
|
Front Fog Lamps (LED Versions) |
LED |
|
Side Indicators (Front And Side View Mirror) |
WY5W |
|
Tail/Brake Lights/Turn Indicators (LED Versions) |
LED |
|
Tail/Brake Lights/Turn Indicators |
P21W |
|
Center High Mounted Stop Lamp (CHMSL) |
LED |
|
Reverse |
W16W |
|
License Plate Lamp |
W5W |
Replacing Exterior Bulbs
CAUTION!
During bulb replacement do not touch the new glass bulb with your fingers. Oil contamination will severely shorten bulb life. If the bulb comes in contact with any oily surface, clean the bulb with rubbing alcohol.
Headlamps
Hi/Lo Beam Light Halogen
See the following steps to replace:
- Open the engine compartment and remove the headlamp bulb cap.
 Headlamp Bulb Cap
 - Rotate the headlamp bulb socket counterclockwise then pull outwards.
 Headlamp Bulb Socket
 - Push on the locking tab on the headlamp bulb connector and remove the bulb and socket.
 Headlamp Bulb
 Headlamp Bulb
 - Install the new headlamp bulb making sure it is properly locked.
- Install the headlamp bulb and socket; turn it clockwise making sure it is properly locked.
WARNING!
Carry out the operation of replacing lamps only with the engine off. Also make sure that the engine is cold, to avoid the danger of burns.
LED Headlamps
For replacement see an authorized dealer. Position Lights/Daytime Running Lights/Fog Lights See the following steps to replace:
-
Turn the front wheels completely.
-
Use a suitable tool to remove the access door.

Position Light/Daytime Running Light/Fog Light Access
- Screws
- Access Door
-
Remove the electrical connector.

-
-
Bulb Socket
-
-
Install the new bulb and socket into the housing, and engage the two tabs, making sure that it is properly locked.
-
Reconnect the electrical connector.
-
Reinstall the access door.
Front Fog Lights
See the following steps to replace:
-
Turn the front wheels completely.
-
Use a suitable tool to remove the access door.
 Position Light/Daytime Running Light/Fog Light Access
-
Screws
-
Access Door
-
- By pushing the electrical connector tab remove the electrical connector.
-
Rotate the bulb counterclockwise, and then replace the bulb.
-
Insert the new bulb in the socket, making sure the bulb is locked into place.
-
Reconnect the electrical connector.
-
Reinstall the access door.
-
For replacement see an authorized dealer.
-
Operating from inside the engine compartment using a suitable tool release the retaining clip.
-
Remove lamp assembly by sliding it toward the outside.

-
Remove the electrical connector by pushing the tab then disconnect the electrical connector.
-
Rotate counterclockwise to release the bulb socket from the lamp assembly, and remove it.
 Bulb Removal
 - Remove the bulb from the socket.
 Bulb
Bulb -
Insert the new bulb in the socket.
-
Reinstall the bulb and socket into the lamp assembly by turning it clockwise, making sure it is locked into place.
-
Reconnect the electrical connector.
-
Reinstall the lamp assembly on the car, making sure it is locked into place.
Side Indicators on External Rear View Mirrors – If Equipped
CAUTION!
The procedure is described as a guideline. For the replacement of the lamp it is recommended that you contact an authorized dealer.
See the following steps to replace:
- Remove the mirror cap on the outside rear view mirror.
 Removing The Mirror Cap
 Transparent Lens Location
 - Remove the transparent lens assembly as shown.
 Transparent Lens Removed
 - Remove the bulb socket and bulb from the transparent lens assembly by rotating the socket counterclockwise.
 Bulb Removal
 -
Remove the bulb from the bulb socket by pulling the bulb straight out.
-
Insert the new bulb, making sure that it is locked into place.
-
Reinstall the socket into the transparent lens assembly.
-
Reinstall the cover on the outside rear view mirror, making sure it is locked into place.
Rear Tail Lamps Contain the following:
-
Position Lights
-
Stop Lights
-
Direction Indicator
-
REVERSE Lights
-
Open the liftgate.
-
Using a suitable tool remove the door as shown.
 Trim Panel Door
 -
Using a suitable tool remove fastener.
-
Disconnect the electrical connector by pushing the release.
 Rear Lamp Fastener And Electrical Connector
-
Electrical Connector
-
Fastener
-
- Remove the rear tail lamp, sliding it toward the outside as shown.
 Tail Lamp Removal
 - Unscrew the screws and remove the rear tail lamp holder.
 Rear Lamp Assembly
Mounting Screws - Replace the bulb as necessary.
 Rear Tail Lamp Holder
- Tail Light
- Reverse Bulb
- Position Light/Stop Light/Turn Signal
-
Insert the new bulb, making sure it is properly locked.
-
Reassemble the lamp assembly on the rear tail lamp housing, tightening the screws.
-
Reposition the rear tail lamp on the car.
-
Secure the fastener of the rear tail lamp and reconnect the electrical connector.
-
Reinstall the door making sure it locked into place.
-
Finally close the liftgate.
LED Rear Tail Lamps
For replacement see an authorized dealer. Reverse Lights – If Equipped With LED Tail Lamps See the following steps to replace:
- Use a suitable tool to remove the screws and remove the access door.
 Reverse Light Access
-
- Screw
- Screw
- Access Door
- By pushing the electrical connector tab remove the electrical connector.
 Reverse Light Assembly
- Bulb
- Rotate the bulb counterclockwise, and then replace the bulb.
- Insert the new bulb in the socket, making sure the bulb is locked into place.
- Reconnect the electrical connector.
- Reinstall the access door.
Center High Mounted Stop Lamp (CHMSL)
The CHMSL is LED. For replacement see an authorized dealer.
FAQs
Fuses are protective mechanisms in the Renegade that break the circuit in the event of an electrical overload, preventing damage to electrical components.
In the Renegade, the fuse box is usually either in the engine compartment or under the dashboard on the driver’s side.
A blown fuse frequently has a visible broken filament or is discolored. The fuse diagram in the owner’s manual can also assist in identifying the precise fuse.
To restore operation, replace the blown fuse with one of the same amperage. To avoid electrical problems, always use the correct amperage.
No, it is not advised. Using a larger amp fuse can harm the electrical system and endanger your safety.
Fuses safeguard a variety of systems, including lighting, audio, power windows, air conditioning, and other electrical components.
The Renegade normally employs blade-type fuses of various amperages (e.g., 10A, 20A, 30A) that are common in most modern vehicles.
While there is no specified interval, it is recommended that fuses be inspected during routine maintenance or while troubleshooting electrical difficulties.
Yes, severe temperatures or moisture can have an impact on fuse functioning. Check that the fuse box is properly sealed and free of moisture or corrosion.
Yes, the ECM may have its own fuses in the fuse box. For specifics, consult the owner’s handbook.
It is not suggested to modify or add extra fuses to the fuse box since it can jeopardize the vehicle’s electrical system and safety.
To avoid electrical shocks or damage, always turn off the car and remove the correct fuse with the proper equipment.
Jeep usually keeps spare fuses in the fuse box or puts a modest selection in the owner’s toolbox.
Typically, the fuse diagram can be found in the owner’s manual, inside the fuse box cover, or on the manufacturer’s website.
Seek the assistance of a trained technician to assess and address potential electrical system concerns that are not fuse-related.
Useful Link
View Full PDF : 2022 Jeep Renegade Owner’s Manual |Auto User Guide 2022 Jeep Renegade Keys and Smart Key Operations