
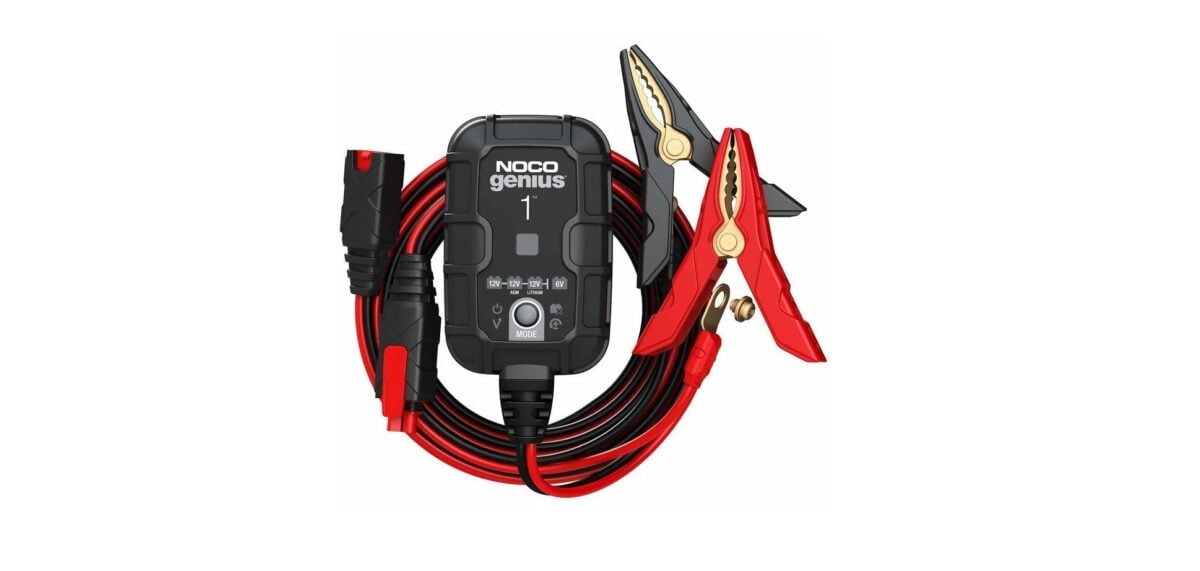

How to charge with Noco Genius1 Smart Battery Charger jumper
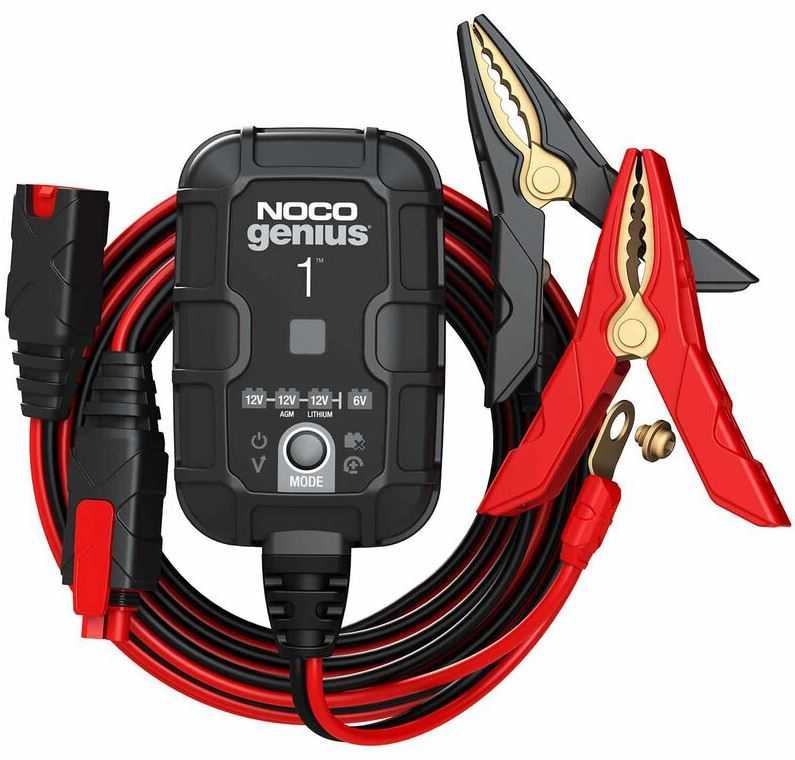
Released in 2021, the Noco Genius1 Smart Battery Charger for 6V and 12V lead-acid and lithium-ion batteries offers automatic voltage detection, a compact design, and advanced maintenance. Every car owner needs this versatile device to boost performance, extend battery life, and accommodate many battery types.
How To Use
Charging Modes
The GENIUS1 has six (6) modes: Standby, 12V, 12V AGM, 12V LITHIUM, 6V and Force. Some charge modes must be pressed and held for three (3) to five (5) seconds to enter the mode. These “Press and Hold” modes are advanced charging modes that require your full attention before selecting. It is important to understand the differences and purpose of each charge mode. Always check with the battery manufacturer to confirm the right charge mode for your specific battery.
Do not operate the charger until you confirm the appropriate charge mode for your battery. Below is a brief description:
|
Mode |
Explanation (Peak Voltage Measured At 25°C, Amperage Rating Is Bulk Amperage When Above 0°C) |
|
Standby |
In Standby mode, the charger is not charging or providing any power to the battery. Energy Save is activated during this mode, drawing microscopic power from the electrical outlet. Canbus is enabled in Standby mode. When in Standby, the orange Standby LED will illuminate. |
|
No Power |
|
|
12V |
For charging 12-volt Wet Cell, Gel Cell, Enhanced Flooded, Maintenance-Free and Calcium batteries. When selected, the 12V white LED will illuminate. |
|
14.5V | 1A | Up To 30Ah Batteries |
|
|
12V AGM |
For charging 12-volt AGM batteries. When selected, the 12V AGM white LED will illuminate. |
|
14.8V | 1A | Up To 30Ah Batteries |
|
|
12V LITHIUM |
For charging 12-volt lithium-ion batteries, including lithium iron phosphate. When selected, the 12V Lithium blue LED will illuminate. For use on batteries with Battery Management Systems (BMS) only. |
|
14.6V | 1A | Up To 30Ah Batteries |
|
|
6V Press & Hold (3 Seconds) |
For charging 6-volt Wet Cell, Gel Cell, Enhanced Flooded, Maintenance-Free and Calcium batteries. When selected, the 6V white LED will illuminate. |
|
7.25V | 1A | Up To 30Ah Batteries |
|
|
Force Mode Press & Hold (5 Seconds) |
For charging batteries with a voltage lower than 1V. Press and Hold for five (5) seconds to enter Force Mode. The selected charge mode will then operate under Force Mode for five (5) minutes before returning to standard charging in the selected mode. |
|
1A | Up To 30Ah Batteries |
Using 6V. [Press & Hold for 3 seconds]
6V charge mode is designed for 6-volt lead-acid batteries only, like Wet Cell, Gel Cell, Enhanced Flooded, Maintenance-Free and Calcium batteries. Press and hold for three (3) seconds to enter 6V Charge Mode. Consult the battery manufacturer before using this mode.
Using 12V Lithium.
12V Lithium charge mode is designed for 12-volt lithium-ion batteries only, including lithium iron phosphate.
CAUTION. USE THIS MODE WITH EXTREME CARE. THIS MODE SHOULD ONLY BE USED WITH 12-VOLT LITHIUM BATTERIES THAT HAVE A BUILT-IN BATTERY MANAGEMENT SYSTEM (BMS). LITHIUM-ION BATTERIES ARE MADE AND CONSTRUCTED IN DIFFERENT WAYS AND SOME MAY OR MAY NOT CONTAIN A BATTERY MANAGEMENT SYSTEM (BMS). CONSULT THE LITHIUM BATTERY MANUFACTURER BEFORE CHARGING AND ASK FOR RECOMMENDED CHARGING RATES AND VOLTAGES. SOME LITHIUM-ION BATTERIES MAY BE UNSTABLE AND UNSUITABLE FOR CHARGING.
Force Mode. [Press & Hold for 5 seconds]
Force mode allow the charger to manually begin charging when the connected battery’s voltage is too low to be detected. If battery voltage is too low for the charger to detect, press and hold the mode button for 5 seconds to activate Force Mode, then select the appropriate mode. All available modes will flash. Once a charge mode is selected, the Charge Mode LED and Charge LED will alternate between each other, indicating Force Mode is active. After five (5) minutes the charger will return to the normal charge operation and low voltage detection will be reactivated.
CAUTION. USE THIS MODE WITH EXTREME CARE. FORCE MODE DISABLES SAFETY FEATURES AND LIVE POWER IS PRESENT AT THE CONNECTORS. ENSURE ALL CONNECTIONS ARE MADE PRIOR TO ENTERING FORCE MODE, AND DO NOT TOUCH CONNECTIONS TOGETHER. RISK OF SPARKS, FIRE, EXPLOSION, PROPERTY DAMAGE, INJURY, AND DEATH.
Connecting to the Battery.
Do not connect the AC power plug until all other connections are made. Identify the correct polarity of the battery terminals on the battery. The positive battery terminal is typically marked by these letters or symbol (POS, P, +). The negative battery terminal is typically marked by these letters or symbols (NEG, N, -). Do not make any connections to the carburettor, fuel lines, or thin, sheet metal parts.
FOLLOW THESE STEPS WHEN THE BATTERY IS INSTALLED IN THE VEHICLE.
WARNING: A SPARK NEAR THE BATTERY MAY CAUSE A BATTERY EXPLOSION.
TO REDUCE THE RISK OF A SPARK NEAR THE BATTERY:
- Position AC and DC cords to reduce risk of damage by hood, door, or moving engine part.
- Stay clear of fan blades, belts, pulleys, and other parts that can cause injury to persons.
- Check the polarity of battery terminals. The POSITIVE (POS, P, +) battery terminal usually has a larger diameter than the NEGATIVE (NEG, N, -) battery terminal.
- Determine which battery terminal is grounded (connected) to the chassis. If the negative battery terminal is grounded to the chassis (as in most vehicles), see Step 5. If a positive battery terminal is grounded to the chassis, see Step 6.
- For negative-grounded vehicles only, connect the POSITIVE (RED) battery clamp or eyelet terminal connector from the battery charger to the POSITIVE (POS, P. +) ungrounded battery terminal. Connect a NEGATIVE (BLACK) battery clamp or eyelet terminal connector to the vehicle chassis or engine block away from the battery. Connect to a heavy gauge metal part of the frame or engine block.
- For positive-grounded vehicles only, connect the NEGATIVE (BLACK) battery clamp or eyelet terminal connector from the battery charger to the NEGATIVE (NEG, N, -) ungrounded battery terminal. Connect the POSITIVE (RED) battery clamp or eyelet terminal connector to the vehicle chassis or engine block away from the battery. Connect to a heavy gauge metal part of the frame or engine block.
- Connect the battery charger into a suitable electrical outlet. Do not face the battery when making this connection.
- When disconnecting the battery charger, disconnect in the reverse sequence, removing the negative first (or positive first for positive ground systems).
FOLLOW THESE STEPS WHEN BATTERY IS OUTSIDE VEHICLE. WARNING: A SPARK NEAR THE BATTERY MAY CAUSE A BATTERY EXPLOSION.
TO REDUCE THE RISK OF A SPARK NEAR THE BATTERY:
- Check polarity of battery terminals. The POSITIVE (POS, P, +) battery terminal usually has a larger diameter than the NEGATIVE (NEG, N, -) battery terminal.
- Attach at least a 24-inch-long 6-gauge (AWG) insulated battery cable to the NEGATIVE (NEG, N, -) battery terminal.
- Connect the POSITIVE (RED) battery clamp or eyelet terminal connector from the battery charger to the POSITIVE (POS, P. +) battery terminal.
- Position yourself and free the end of the cable as far away from battery as possible – then connect a NEGATIVE (BLACK) battery clamp or eyelet terminal connector to the free end of the cable.
- Connect the battery charger to a suitable electrical outlet. Do not face the battery when making this connection.
- When disconnecting the charger, always do so in reverse sequence of the connecting procedure and break the first connection while as far away from the battery as practical.
- A marine (boat) battery must be removed and charged on shore. To charge it on board requires equipment specially designed for marine use.
Begin Charging
- Verify the voltage and chemistry of the battery.
- Confirm that you have connected the battery clamps or eyelet terminal connectors properly and the AC power plug is plugged into an electrical outlet.
- [First-time use] The charger will begin in Standby mode, indicated by an orange LED. In Standby, the charger is not providing any power.
- Press the mode button to toggle to the appropriate charge mode (press and hold for three seconds to enter an advanced charge mode) for the voltage and chemistry of your battery.
- The mode LED will illuminate the selected charge mode and the Charge LEDs will illuminate (depending on the health of the battery) indicating the charging process has started.
- The charger can now be left connected to the battery at all times to provide maintenance charging.
Auto-Memory: The charger has built in auto-memory and will return to the last charge mode when connected. To change modes after the first use, press the mode button.
Charging Times
The estimated time to charge a battery is shown below. The size of the
battery (Ah) and its depth of discharge (DOD) greatly affect its charging time. The charge time is based on an average depth of discharge to a fully charged battery and is for reference purposes only. Actual data may differ due to battery conditions. The time to charge a normally discharged battery is based on a 50% DOD. Temperature will also impact charging times. The GENIUS1 features thermal compensation that automatically adjusts charging profiles to maximize charging performance.
|
Battery Size Ah |
Approx. Time to Charge In Hours 6V 12V |
|
|
8 |
6.0 |
6.0 |
|
12 |
9.0 |
9.0 |
|
18 |
13.5 |
12.0 |
|
24 |
18.0 |
18.0 |
|
30 |
22.5 |
22.5 |
Understanding Charge LEDs.
The charger has one (1) Charge LED. This Charge LED indicates the connected battery(s) state-of-charge (SOC). See the explanation below:
|
LED |
Explanation |
|
Pulsing Red LED |
The Charge LED will slowly pulse “on” and “off” when the battery is less than 75% fully charged. |
|
Pulsing Green LED |
Bulk charge complete, optimizing battery for extended life. |
|
Solid Green LED |
When the battery is 100% charged, the Charge LED will be solid green. |
|
Maintenance Green LED |
After the battery is fully charged, the charger will continue monitoring the battery, and provide ongoing maintenance and optimization. The 100% Charge LED will pulse “on” and “off” slowly during these cycles. The charger can be left connected to the battery indefinitely. |
Understanding Error LEDs.
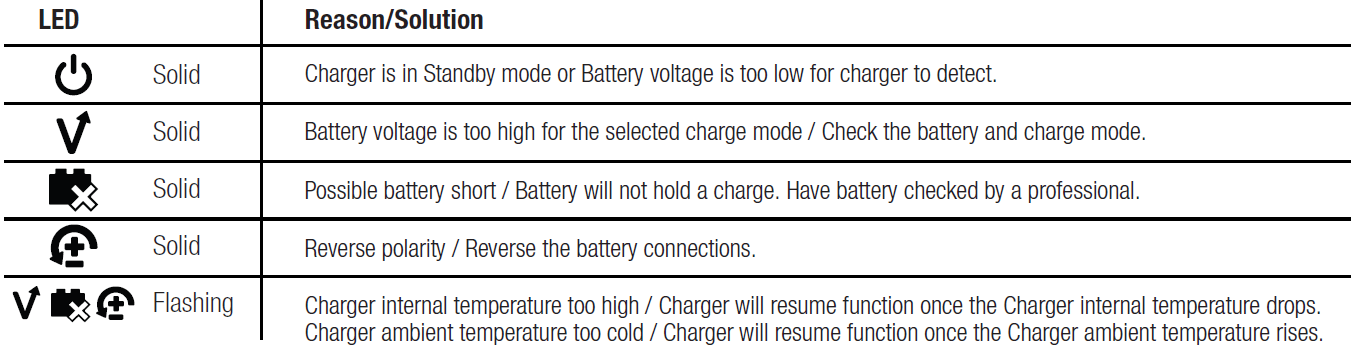
Error Conditions will be indicated by the following LEDs.
Description
- Charge LED indicates the connected battery(s) state of charge.
- Mode LED Indicates the Charge Mode the charger is currently in.
- Push the MODE button to cycle through charge Modes.
- [Press and Hold] Mode LED Mode button must be pressed and held for 3 seconds to enter the mode.
- Standby LED Illuminates when the charger is in Standby Mode, the charger is not charging or providing any power to the battery.
- Overvoltage Error LED Illuminates solid Red; Battery Voltage is above Protect voltage.
- Bad Battery Error LED Illuminates solid Red when the connected battery will not hold a charge.
- Reverse Polarity Error LED Illuminates solid Red when reverse polarity is detected.
- Mode Button Push to cycle through charging Modes.

Technical Specifications
- Input Voltage AC: 120-240 VAC, 50-60Hz
- Working Voltage AC: 120-240 VAC, 50-60Hz.
- Output Power: 15W Max
- Charging Voltage: Various
- Charging Current: 1A (12V), 1A (6V)
- Low-Voltage Detection: 1V (12V), 1V (6V)
- Back Current Drain: <0.5mA
- Operating Temperature: – 4°F to 104°F (-20°C to 40°C)
- Storage Temperature: -22°F to 140°F (-30°C to 60°C)
- Type of Batteries: 6V & 12V
- Battery Chemistries: Wet, Gel, MF, CA, EFB, AGM, Lithium.
- Battery Capacity: Up to 30Ah, Maintains All Battery Sizes
- Housing Protection: IP60
- Cooling: Natural Convection
- Dimensions (W x D x H): 2.32 x 1.26 x 3.62 Inches (59 x 32 x 92mm)
- Weight: 0.77 Pounds (0.35kg)
FAQs About Noco Genius1
It’s a versatile, portable smart battery charger and maintainer, capable of charging, maintaining, or jump-starting 12-volt batteries.
It uses smart technology to monitor and maintain the battery, adjusting the charge as needed and preventing overcharging.
The Noco Genius1 is compatible with a wide range of 6-volt and 12-volt lead-acid batteries, including AGM, gel, and flooded batteries.
The Noco Genius1 Smart Battery Charger Jumper comes with a 3-year limited warranty with covers any defects in materials and workmanship.
The Noco Genius1 Smart Battery Charger Jumper is priced affordably, typically around $29.95.