
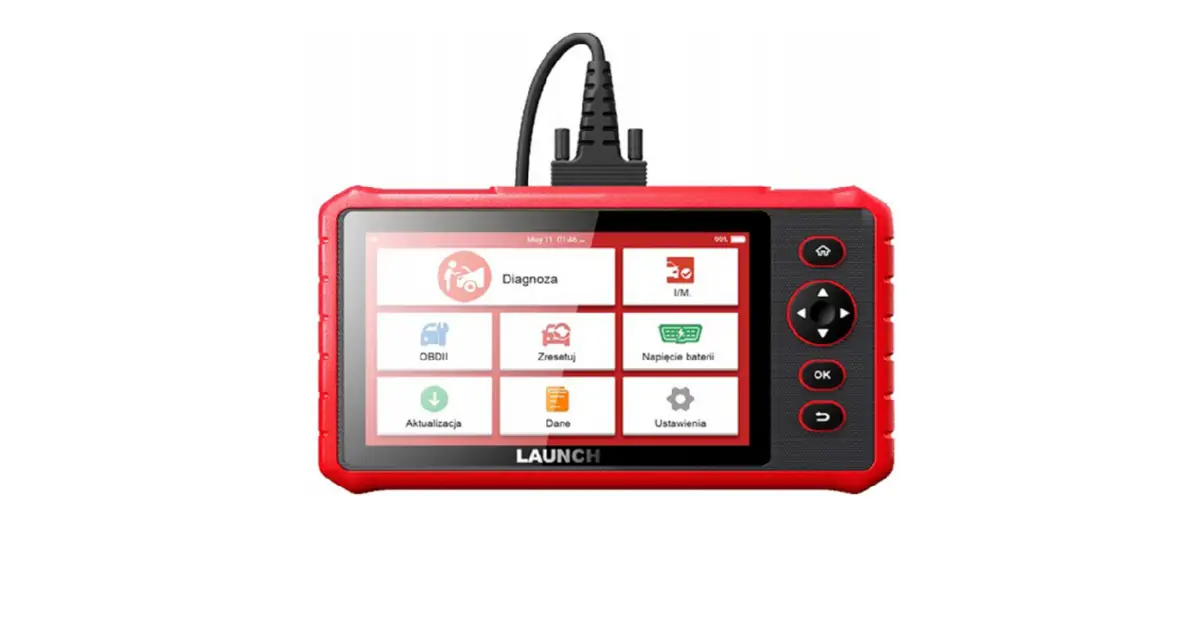

Launch CRP909X OBD2 Scanner

The Launch CRP909X OBD2 Scanner, released in June 2020, diagnoses engine, gearbox, ABS, and SRS systems. Its 7-inch touchscreen, WiFi updates, and support for over 57 car models make it vital for experts and DIYers.
User Manual
Skip to PDF contentComponents and Controls
Controls
| NO. | Name | Descriptions |
| 1 | DB-15 Diagnostic Connector | Connect to the vehicle’s DLC (Data Link Connector) via diagnostic cable. |
| 2 | Power |
|
 the button for about 5 seconds to turn on.
| 3 | Home | Press  the button to return to the home (Job menu) screen. the button to return to the home (Job menu) screen. |
| 4 | Select | Move  button for up and down selection. button for up and down selection. |
Move  button for left and right selection, Or turn the page up and down when more than one page is displayed. button for left and right selection, Or turn the page up and down when more than one page is displayed. |
||
| 5 | OK | Press the OK button to confirm a selection (or action) from a menu list. |
| 6 | Return | Press  the button to exit the current program or return to the previous screen. the button to exit the current program or return to the previous screen. |
| 7 | Speakers | Support sound play. |
| 8 | Foldable Stand | Flip out the Foldable Stand to any angle and work comfortably at your desk, or hang it on the steering wheel. |
| 9 | 5 V DC Charging Port | Connect to external DC power for charging the tool. |
Technical Specifications
- Screen: 7” touch screen
- RAM: 2 G
- ROM: 16 GB
- OBDII input voltage range: 9~18 V DC
- Touch & Keypad input
- Charging via:
- 5 V DC charging cable
- Diagnostic cable through connection to vehicle’s DLC
- Dimension: 246 x 139.5 x 34 mm
- Working temperature: 0 to 50 °C (32 to 122 F°)
- Storage temperature: -20 to 70 °C (-4 to 158 F°)
Accessories Checklist
For detailed accessory items, please consult the local agency.
- Creader Professional 909X handset
- OBD II diagnostic cable
- 5 V DC charging cable
- Power adaptor
- User manual
Initial Use
Charging the Tool
There are two charging methods available:
Via Charging Cable: Plug one end of the included charging cable into the DC-IN port of the tool, and the other end to the external DC power. Via Diagnostic Cable: Insert one end of the diagnostic cable into the DB-15 connector of the tool, and the other end to the vehicle’s DLC. Once the charging LED illuminates solid green, it indicates that the battery is fully charged.
Getting Started
If it is the first time you have used this tool, you need to make some system settings.
- Press the [Power] button to power it on.
- The screen displays a welcome page. Tap “Start” to go to the next step.
- Choose the desired system language, and tap “OK” to confirm.

- Choose the desired time zone, and tap “Next” to enter the WLAN setup page.
- Slide the switch to ON, the system starts searching for all available wireless LANs. Choose the desired WLAN access point/network,

- If the network you chose is open, you can connect directly;
- If the selected network is encrypted, you have to enter the right security key (network password).
Note: If you choose “Ignore” in the WLAN setup, it will go to the date setting page. If the tool has been properly connected to the Internet, the system will automatically obtain the correct network date and time and navigate to step 6.
- After the network connection is done, tap “Next Step” to configure the email address. Input the email address, and tap “Next Step” to go to the next step.
Note: You are strongly recommended to fill in a valid email address. Once you configured this option, the system will automatically send the diagnostic report to your email box every time a complete Auto Detect process is successfully finished. - Carefully read all terms and conditions of the user agreement, check the box before the “Agree to all the above terms”, tab “OK” finish the sign-up process and navigate to the Job Menu.
FAQs
Here we list some frequently asked questions and answers related to this tool.
The system halts when reading the data stream. What is the reason?
It may be caused by a slackened connector. Please turn this tool off, firmly connect the connector, and switch it on again.
The screen of the main unit flashes at engine ignition start.
Caused by electromagnetic disturbing, and this is a normal phenomenon.
There is no response when communicating with the on-board computer.
Please confirm the proper voltage of the power supply and check if the throttle has been closed, the transmission is in the neutral position, and the water is in proper temperature.
What to do if the system fails to start auto VIN detection?
Please check the following possible reasons:
- Whether the tool is properly connected to the vehicle’s DLC.
- Whether the “Automatic detection on Connect” switch is OFF. If yes, slide it to ON.
Why are there so many fault codes?
Usually, it’s caused by poor connection or fault circuit grounding.
How to upgrade the system software?
- Switch the tool on and ensure a stable internet connection.
- Tap “Setting” on the Job Menu, select “About” -> “Version”, and tap “Detect the System Version” to enter the system upgrading page.
- Follow the on-screen instructions step by step to finish the process. It may take several minutes depending on the internet speed, please be patient. After the upgrade is successfully finished, the tool will automatically restart and enter the Job menu.
What if the tool cannot be switched on even after a period of recharging?
Please recharge it for at least 3 hours until the power LED lights up, and then it can be switched on.