
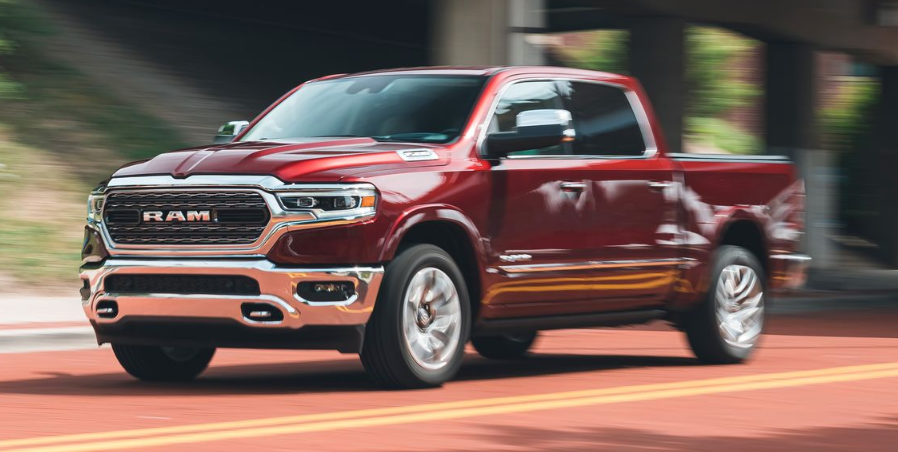
 2023 RAM 1500 LCD Display User Guide
This Guide covers the 2023 RAM 1500 LCD display’s functionality, settings, and customization choices to improve your driving experience and display important vehicle information.
2023 RAM 1500 Specs, Price, Features, Mileage (Brochure)
Video: 2023 RAM 1500 Dashboard Warning Indicators
INSTRUMENT CLUSTER DISPLAY
Depending on your vehicles trim level, features and options may vary. Your vehicle will be equipped with an instrument cluster display, which offers useful information to the driver. With the ignition in the OFF mode, opening/closing of a door will activate the display for viewing, and display the total miles, or kilometers, in the odometer. Your instrument cluster display is designed to display important information about your vehicle’s systems and features. Using a driver interactive display located on the instrument panel, your instrument cluster display can show you how systems are working and give you warnings when they are not. The steering wheel mounted controls allow you to scroll through the main menus and submenus. You can access the specific information you want and make selections and adjustments.
INSTRUMENT CLUSTER DISPLAY LOCATION AND CONTROLS
- Instrument Cluster Display Screen
- Instrument Cluster Display Controls
The system allows the driver to select information by pushing the following instrument cluster display control buttons located on the left side of the steering wheel.
Midline/Highline Instrument Cluster Display Control Buttons
- Left Arrow Button
- Up Arrow Button
- Right Arrow Button
- Down Arrow Button
- OK Button

Premium Instrument Cluster Display Control Buttons
- Left Arrow Button
- Up Arrow Button
- Right Arrow Button
- Down Arrow Button
- OK Button
- Menu Button
Up And Down Arrow Buttons:
Using the up or down arrow button allows you to cycle through the main menu Items.
Left And Right Arrow Buttons:
Using the left or right arrow button allows you to cycle through the submenu items of the main menu item.
NOTE:
- Holding the up / down or left / right arrow button will loop the user through the currently selected menu or options presented on the screen.
- Main menu and submenus wrap for continuous scrolling.
- Upon returning to a main menu, the last submenu screen viewed within that main menu will be displayed.
OK Button:
For Digital Speedometer:
- Pushing the OK button changes units (mph or km/h). Menu Button
- Press Menu button for Home Screen display.
- Navigate left or right to highlight desired tile. Press OK to select desired. Once OK is pressed, cluster will navigate to selected submenu (e.g. “Audio”).
NOTE:
Exiting Home Screen Speed Limit tile and Navigation tile with no Ethernet navigates to Speedometer submenu.
- Press up or down to select different screen within selected category.
- If Menu button is pressed while in this view, cluster will return to previously displayed screen.
- Press and hold OK button to enter edit mode.
- Instruction text may overlay lower tachometer
For Screen Setup:
- OK button allows user to enter menu and submenus.
- Within each submenu layer, the left and Right arrow buttons will allow the user to select the item of interest.
- Pushing the OK button makes the selection and a confirmation screen will appear (returning the user to the first page of the submenu).
- Pushing the up arrow button will exit each submenu layer and return to the main menu.
Custom Tile Configuration — If Equipped
To customize the instrument cluster further, you are able to select up to five tiles to display information based on your needs.
- Press the MENU button for the Home Screen display
- Navigate Left or Right to highlight desired tile
- Press OK to select the tile and navigate to the selected submenu and press OK again to add your selection to your tile view
- If equipped, the main menu options of the home screen are Driver Info, Vehicle Info, Navigation, Audio, and Off Road

Custom Tile Screen Example
You can customize your Instrument Cluster Display with up to five tiles that may consist of the following:
NOTE:
These options may vary based on your vehicle trim level.
- Navigation
- Route Set / Route Not Set
- Trip A / Trip B
- Vehicle Info
- Coolant Temp
- Trans Temp
- Oil Temp
- Oil Pressure
- Battery Voltage
- Oil Life
- Tire Pressure
- Fuel Economy
- Air Suspension
- Driver Info
- Driver Assist
- Audio
- Audio Info
- Off Road
- Selec-Terrain / Air Suspension Status
- Steering Angle
- Pitch
- Roll
- Trailer Tow
- Trailer Trip
- Trailer Brake
- Trailer Tire Pressure Monitor
OIL LIFE RESET
Use this QR code to access your digital experience.
Your vehicle is equipped with an engine oil change indicator system. The “Oil Change Required” message will display in the instrument cluster display for five seconds after a single chime has sounded, to indicate the next scheduled oil change interval. The engine oil change indicator system is duty cycle based, which means the engine oil change interval may fluctuate, dependent upon your personal driving style. Unless reset, this message will continue to display each time you place the ignition in the ON/RUN position. To turn off the message temporarily, push and release the OK or arrow buttons. To reset the oil change indicator system (after performing the scheduled maintenance), refer to the following procedure:
- Without pressing the brake pedal, push the ENGINE START/STOP button and place the ignition in the ON/RUN position (do not start the engine).
- Push and release the down arrow button to scroll downward through the main menu to “Vehicle Info.”
- Push and release the right arrow button to access the ”Oil Life” screen.
- Push and hold the OK button to reset oil life. If conditions are met, the gauge and numeric display will update to show 100%. If conditions are not met a pop-up message of “To reset oil life engine must be off with ignition in run” will be displayed (for five seconds), and the user will remain at the Oil Life screen.
- Push and release the up or down arrow button to exit the submenu screen.
NOTE:
If the indicator message illuminates when you start the vehicle, the oil change indicator system did not reset. If necessary, repeat this procedure.
DISPLAY MENU ITEMS
Push and release the up or down arrow button until the desired selectable menu icon is highlighted in the instrument cluster display.
Speedometer
Push and release the up or down arrow button until the speedometer menu item is highlighted in the instrument cluster display. Push and release the OK button to cycle the display between mph and km/h.
Driver Assist — If Equipped
The Driver Assist menu displays the status of the ACC and LaneSense systems.
Push and release the up or down arrow button until the Driver Assist menu is displayed in the instrument cluster display.
Adaptive Cruise Control (ACC) Feature
The instrument cluster display displays the current ACC system settings. The information displayed depends on ACC system status.
Push the ACC on/off button (located on the steering wheel) until one of the following displays in the instrument cluster display:
Adaptive Cruise Control Off
When ACC is deactivated, the display will read “Adaptive Cruise Control Off.”
Adaptive Cruise Control Ready
When ACC is activated but the vehicle speed setting has not been selected, the display will read “Adaptive Cruise Control Ready.”
Push the SET + or the SET- button (located on the steering wheel) and the following will display in the instrument cluster display:
ACC SET
When ACC is set, the set speed will display in the instrument cluster.
The ACC screen may display once again if any ACC activity occurs, which may include any of the following:
- Distance Setting Change
- System Cancel
- Driver Override
- System Off
- ACC Proximity Warning
- ACC Unavailable Warning
LaneSense — If Equipped
The instrument cluster display displays the current LaneSense system settings. The information displayed depends on LaneSense system status and the conditions that need to be met.
Vehicle Info
Push and release the up or down arrow button until the Vehicle Info menu icon is displayed in the instrument
cluster display. Push and release the left or right arrow button to scroll through the information submenus and push and release the OK button to select or reset the submenus.
BASE AND MIDLINE CLUSTER
- Tire Pressure Monitor System
- Air Suspension — If Equipped
- Coolant Temperature — If Equipped
- Trans Temperature
- Oil Temperature
- Oil Pressure — If Equipped
- Oil Life
- Battery Voltage — If Equipped
- Gauge Summary — If Equipped
- Coolant Temp
- Trans Temp
- Oil Temp
- Oil Pressure
- Engine Hours — If Equipped
PREMIUM CLUSTER
- Fuel Economy
- Average
- Current
- Range to Empty
- Gauge Summary
- Coolant Temperature — If Equipped
- Battery Voltage — If Equipped
- Trans Temperature
- Oil Summary
- Oil Temperature
- Oil Life
- Oil Pressure — If Equipped
- Tire Pressure Monitor System
- Stop/Start — If Equipped
- Air Suspension Status — If Equipped
- Engine Hours — If Equipped
Off Road – If Equipped
Push and release the up or down arrow button until the Off Road menu icon is displayed in the instrument cluster display. Push and release the left or right arrow button to scroll through the information submenus.
- Vehicle Dynamics
- Front Wheel Angle: displays the graphical and numerical value of calculated average front wheel angle from the steering wheel orientation.
- Transfer Case Lock Status: displays “Lock” graphic only during 4WD High, 4WD Auto, 4WD Low status.
- Axle Lock And Sway Bar Status (If Equipped): displays front and rear or rear only axle locker graphic, and sway bar connection graphic with text message (connected or disconnected).
- Pitch And Roll
- Displays the pitch and roll of the vehicle in the graphic with the angle number on the screen.
NOTE:
When vehicle speed becomes too high to display the pitch and roll, “- -” will display in place of the numbers, and the graphic will be grayed out. A message indicating the necessary speed for the feature to become available will also display.
Fuel Economy
Push and release the up or down arrow button until the Fuel Economy menu item is highlighted in the instrument cluster display. Push and hold the OK button to reset Average Fuel Economy.
- Current Fuel Economy
- Average Fuel Economy
- Range To Empty
Trip Info
Push and release the up or down arrow button until the Trip menu item is highlighted in the instrument cluster display. Push and release the right or left arrow button to enter the submenus of Trip A and Trip B.
The Trip A or Trip B information will display the following:
- Distance
- Average Fuel Economy
- Elapsed Time
Push and hold OK button to reset all information.
Navigation — If Equipped
Push and release the up or down arrow button until the Navigation display title is highlighted in the instrument cluster display, “Hold OK to Start Route” will display when no active route is set. “Hold OK to Cancel Route” will display when active route is set. Use the left or right arrow button to zoom in or out on the display.
Stop/Start — If Equipped
Push and release the up or down arrow button until the Stop/Start icon/title is highlighted in the instrument cluster display. The screen will display the Stop/Start status.
Trailer Tow — If Equipped
Push and release the up or down arrow button until the Trailer Tow menu item is highlighted in the instrument
cluster display. Push and release the right or left arrow button to cycle through the following trailer tow information:
- Trip (trailer specific) Distance: Push and hold the OK button to reset the distance.
- Integrated Trailer Brake Module (ITBM):
- Braking Output
- Trailer Type
- ITBM Gain
- Trailer Tire Pressure Monitoring: The Instrument Cluster Display will display the Trailer Tire Pressure for a connected trailer with sensors that match the active trailer profile. When a low tire is present, the low tire value will be displayed in red, and the affected low tire will have a red glow. “Trailer Tire Low“ will be displayed on the center bottom of the Instrument Cluster Display screen.
- Trailer Light Check — If Equipped: Push and hold the OK button to begin the Trailer Light Test sequence.
Audio
Push and release the up or down arrow button until the Audio Menu icon/title is highlighted in the instrument cluster display. This menu will display the audio source information, including the Song name, Artist name, and audio source with an accompanying graphic.
Phone Call Status
When a call is incoming, a Phone Call Status pop-up will display on the screen. The pop-up will remain until the phone is answered or ignored.
NOTE:
The call status will temporarily replace the previous media source information displayed on the screen. When the pop-up is no longer displayed, the display will return to the last used screen.
Stored Messages
Push and release the up or down arrow button until the Messages Menu item is highlighted. This feature shows stored warning messages, such as “Oil Change
Required”. Push and release the right or left arrow button to cycle through stored messages.
Settings
Head Up Display (HUD) — If Equipped
NOTE:
The HUD feature Settings are available at any vehicle speed.
Screen Setup Driver Selectable Items
Push and release the left or right arrow button until the Settings Menu Icon/Title is highlighted in the instrument cluster display. Push and release the OK button to enter the submenus and follow the prompts on the screen as needed. The Settings feature allows you to change what information is displayed in the instrument cluster as well as the location that information is displayed.
NOTE:
Depending on the vehicles trim level and current status, some options may not be available. The Settings feature is only available when the vehicle speed is less than 5 mph.
MIDLINE AND HIGHLINE CLUSTER
| Upper Left or Right | ||
| None | Time | Current Econ |
| Compass | Range | Trip A Distance |
| Outside Temp | Average Econ | Trip B Distance |
| Trailer Trip – If Equipped | Oil Pressure – If Equipped | Oil Temperature – If Equipped |
| Trailer Brake – If Equipped | Coolant Temp – If Equipped | Battery Voltage – If Equipped |
| Transmission Temperature – If Equipped | Oil Life – If Equipped | |
| Favorite Menus | ||
| Speedometer | Vehicle Info | Performance |
|
Off Road |
Driver Assist (show/hide) – If Equipped | Fuel Economy (show/hide) |
| Trip Info (show/hide) | Trailer Tow – If Equipped (show/hide) | Audio (show/hide) |
| Messages (Stored) | Settings | Diagnostics |
| Left Side and Right Side – If Equipped | ||
| None | Range To Empty | Average Econ |
| Oil Temp | Transmission Temp | Coolant Temp |
| Oil Life | Menu Icon | |
| Lower Left and Lower Right – If Equipped | ||
| None | Time | Current Econ |
| Compass | Range To Empty | Trip A Distance |
| Outside Temp | Average Econ | Trip B Distance |
| Trailer Trip – If Equipped | Trailer Brake – If Equipped | Oil Pressure |
| Coolant Temperature | Oil Temperature | Battery Voltage |
| Transmission Temperature | Oil Life | |
Current Gear
- Off
- On
Odometer
- No Decimal Point
- Decimal Point
Defaults (Restores All Settings To Default Settings)
- Cancel
- Restore
PREMIUM CLUSTER
Display Style
- Modern
- Traditional
| Upper Left or Right | ||
| None | Time | Current Econ |
| Compass | Range | Trip A Distance |
| Outside Temp | Average Econ | Trip B Distance |
| Trailer Trip – If Equipped | ||
| Upper Center | ||
| None | Badge | Compass |
| Outside Temp | Time | Range To Empty |
| Upper Center | ||
| Average Econ | Current Econ | Trip A Distance |
| Trip B Distance | Trailer Trip | Audio (show/hide) |
Current Gear
- Off
- On
Odometer
- No Decimal Point
- Decimal Point
- Hide
Fuel Gauge
- Hide Range
- Show Range
| Favorite Menus | ||
| Performance | Trip Info (show/hide) | Navigation |
|
Off Road |
Trailer Tow – If Equipped (show/hide) | Audio (show/hide) |
HEAD UP DISPLAY (HUD) — IF EQUIPPED
Use this QR code to access your digital experience.
NOTE:
The HUD feature Settings are available at any vehicle speed. Some information like speed limit or Driver Assist may not appear on the HUD unless your vehicle is equipped Traffic Sign Assist or Driver Assist systems.
Push and release the up or down arrow button until the Settings Menu icon/title is highlighted in the instrument cluster display. Push and release the left or right arrow button until the HUD Menu icon/title is highlighted in the instrument cluster display. Push and release the OK button to enter HUD. Use the up or down arrow button to select a setting, then push and release the OK button to adjust the setting.
Content and Layout
When “Display On” is selected, the HUD will display on the windshield. When it is not selected, nothing displays on the windshield.
HUD ON/OFF
- Content and Layout
- Simple: Speed, Speed Limit
- Standard: Speed, Speed Limit, Navigation

Standard Mode
When “Standard” mode is selected, the HUD image is split into thirds with the speed limit indicator shown to the left, vehicle speed in the center, and turn-by-turn navigation to the right.
- Advanced: Speed, Speed Limit, Navigation, Driver Assist (ACC/Cruise, LaneSense, Highway Assist/Highway Assist+), Gear

Advanced Mode
When “Advanced” mode is selected, the HUD displays the vehicle speed, turn-by-turn navigation, speed limit, driver assist function(s), and current gear.
- Custom 1: Speed, Speed Limit
- Custom 2: Speed, Speed Limit, Navigation
- Custom 3: Speed, Speed Limit, Navigation, Driver Assist (ACC/Cruise, LaneSense, Highway Assist/Highway Assist+)
- Custom 4: Speed, Speed Limit, Navigation, Driver Assist (ACC/Cruise, LaneSense, Highway Assist/Highway Assist+), Gear
Display Height
Brightness
NOTE:
- The HUD basic settings (Brightness, Display Height and Non Custom layouts), are controlled through the Settings Screen in the Instrument Cluster.
- HUD custom content layout preferences can be selected through your touchscreen. For more information, please refer to your Uconnect Owner’s Manual Supplement.
BATTERY SAVER ON/BATTERY SAVER MODE MESSAGE — ELECTRICAL LOAD REDUCTION ACTIONS — IF EQUIPPED
This vehicle is equipped with an Intelligent Battery Sensor (IBS) to perform additional monitoring of the electrical system and status of the vehicle battery.
In cases when the IBS detects charging system failure, or the vehicle battery conditions are deteriorating, electrical load reduction actions will take place to extend the driving time and distance of the vehicle. This is done by reducing power to or turning off non-essential electrical loads. Load reduction is only active when the engine is running. It will display a message if there is a risk of battery depletion to the point where the vehicle may stall due to lack of electrical supply, or will not restart after the current drive cycle. When load reduction is activated, the message “Battery Saver On Some Systems May Have Reduced Power” will appear in the instrument cluster. These messages indicate the vehicle battery has a low state of charge and continues to lose electrical charge at a rate that the charging system cannot sustain.
NOTE:
- The charging system is independent from load reduction. The charging system performs a diagnostic on the charging system continuously.
- If the Battery Charge Warning Light is on it may indicate
- The battery was recently replaced and was not charged a problem with the charging system. completely.
The following are electrical loads that may be switched off (if equipped), and vehicle functions which can be affected by load reduction:
- Heated Seats / Vented Seats / Heated Wheel
- Rear Defroster And Heated Mirrors
- HVAC System
- 115 Volts AC Power Inverter System
- Audio and Telematics System
Loss of the battery charge may indicate one or more of the following conditions:
- The charging system cannot deliver enough electrical power to the vehicle system because the electrical loads are larger than the capability of charging system. The charging system is still functioning properly.
- Turning on all possible vehicle electrical loads (e.g. HVAC to max settings, exterior and interior lights, over-loaded power outlets +12 Volts, 115 Volts AC, USB ports) during certain driving conditions (city driving, towing, frequent stopping).
- Installing options like additional lights, upfitter electrical accessories, audio systems, alarms and similar devices.
- Unusual driving cycles (short trips separated by long parking periods).
- The vehicle was parked for an extended period of time (weeks, months).
- The battery was discharged by an electrical load left on when the vehicle was parked.
- The battery was used for an extended period with the engine not running to supply radio, lights, chargers, + 12 Volt portable appliances like vacuum cleaners, game consoles and similar devices.
What to do when an electrical load reduction action message is present (“Battery Saver On” or “Battery Saver Mode”)
During a trip:
- Reduce power to unnecessary loads if possible:
- Turn off redundant lights (interior or exterior).
- Check what may be plugged in to power outlets + 12 Volts, 115 Volts AC, USB ports.
- Check HVAC settings (blower, temperature).
- Check the audio settings (volume).
After a trip:
- Check if any aftermarket equipment was installed (additional lights, up fitter electrical accessories, audio systems, alarms) and review specifications if any (load and Ignition Off Draw currents).
- Evaluate the latest driving cycles (distance, driving time and parking time).
- The vehicle should have service performed if the message is still present during consecutive trips and the evaluation of the vehicle and driving pattern did not help to identify the cause.
Useful Link
View Full PDF:2023 RAM 1500 Auto User Guide
2023 RAM 1500 Instrument Panel User Guide
2023 RAM 1500 Specs, Price, Features, Mileage (Brochure)