
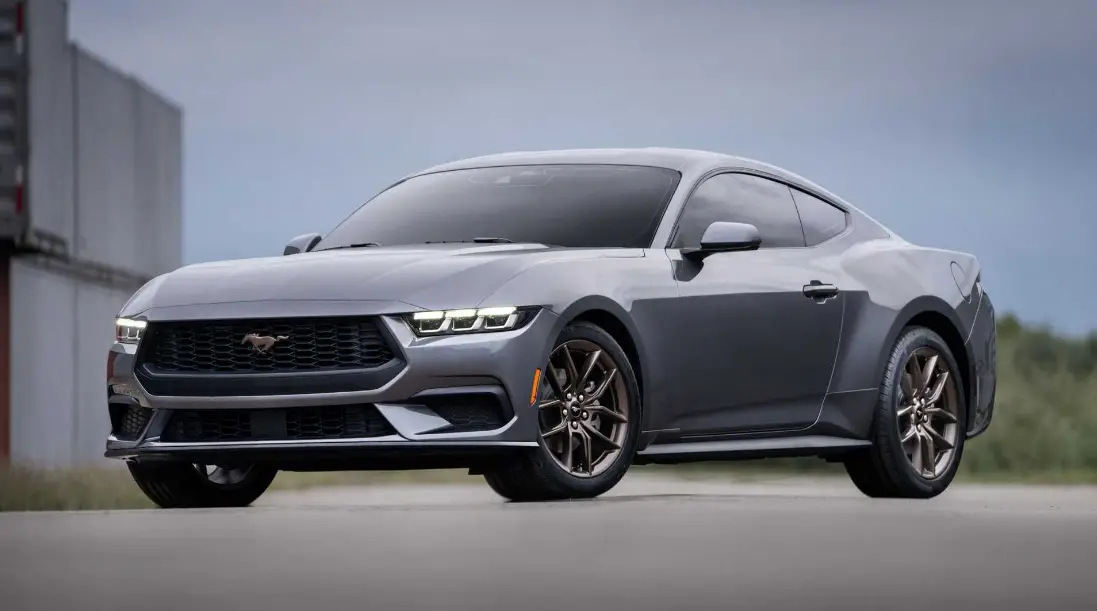

2023 FORD Mustang Engine Oil and Fluids User Guide
This Guide covers 2023 Ford Mustang engine oil and fluids. To keep your Mustang operating smoothly and at top performance, review suggested oil types, fluid specs, and maintenance advice.
2024 Ford Mustang Specs, Price, Features, Mileage (Brochure)
Video: 2023 FORD Mustang Engine Oil and Fluids
https://www.youtube.com/watch?v=_jN4QYTVjy4
ENGINE OIL DIPSTICK

- A Minimum.
- B Nominal.
- C Maximum.
ENGINE OIL CHECK
- Make sure that your vehicle is on level ground.
- Check the oil level before starting the engine, or switch the engine off after warm up and wait 15 minutes for the oil to drain into the oil pan.
Note: Checking the oil level too soon could result in an inaccurate reading. - Remove the dipstick and wipe it with a clean, lint-free cloth.
- Reinstall the dipstick and make sure it is fully seated.
- Remove the dipstick again to check the oil level.
Note: If the oil level is between the maximum and minimum marks, the oil level is acceptable. Do not add oil. - If the oil level is at the minimum mark, immediately add oil.
- Reinstall the dipstick. Make sure it is fully seated.
- Note: The oil consumption of new engines reaches its normal level after approximately 3,000 mi (5,000 km).
- Note: Increases in oil level can occur from frequent short trips that do not allow the engine to get to operating temperature, as well as frequent idling or low speed driving for long periods of time.
- Note: If oil levels are continuously noted above the maximum mark, schedule a visit to your authorized dealer.
Adding Engine Oil
- WARNING: Do not add engine oil when the engine is hot. Failure to follow this instruction could result in personal injury.
- WARNING: Do not remove the filler cap when the engine is running.
Do not use supplemental engine oil additives because they are unnecessary and could lead to engine damage that the vehicle warranty may not cover.
- Clean the area surrounding the engine oil filler cap before you remove it.
- Remove the engine oil filler cap.
- Add engine oil that meets our specifications. See Capacities and Specifications (page 337).
- Reinstall the engine oil filler cap. Turn it clockwise until you feel a strong resistance.
- Note: Do not add oil further than the maximum mark. Oil levels above the maximum mark may cause engine damage.
- Note: Immediately soak up any oil spillage with an absorbent cloth.
Engine Oil Pressure Warning Lamp
WARNING: If it illuminates when you are driving do not continue your journey, even if the oil level is correct. Have your vehicle checked.
 It illuminates when you switch the ignition on.
- If it illuminates when the engine is running this indicates a malfunction. Stop your vehicle as soon as it is safe to do so and switch the engine off. Check the engine oil level. If the oil level is sufficient, this indicates a system malfunction. Have your vehicle checked as soon as possible.
OIL CHANGE INDICATOR RESET
Use the information display controls on the steering wheel to reset the oil change indicator.
From the main menu scroll to:
| Message | Action and description |
| Settings | Press the right arrow button, then from this menu scroll to the following message. |
| Advanced Settings | Press OK |
| Vehicle | Press the right arrow button, then from this menu scroll to the following message. |
| Oil Life | Press the right arrow button, then from this menu scroll to the following message. |
| Message | Action and description |
| Hold OK to Reset |
|
|
|
|
CHANGING THE ENGINE AIR FILTER – 2.3L ECOBOOST™/ 5.0L
WARNING: To reduce the risk of vehicle damage and personal burn injuries, do not start your engine with the air cleaner removed and do not remove it while the engine is running.
Note: Failure to use the correct air filter element may result in severe engine damage. Your warranty may not cover these damages.
Only use the specified replacement air filter. See Motorcraft Parts.
- For EcoBoost equipped vehicles: When servicing the air cleaner, no foreign material must enter the air induction system. The engine and turbocharger are susceptible to damage from even small particles.
- Change the air filter element at the proper intervals. Refer to Scheduled Maintenance Information.

- Release the two clamps that secure the air filter housing cover.
- Carefully lift the air filter housing cover.
- Remove the air filter element from the air filter housing.
- Wipe any dirt or debris from the air filter housing and cover to make sure no dirt gets in the engine and that you have a good seal.
- Install a new air filter element. Be careful not to crimp the filter element edges between the air filter housing and cover. This could cause filter damage and allow unfiltered air to enter the engine if it is not properly seated.
- Replace the air filter housing cover.
- Engage the clamps to secure the air filter housing cover to the air filter housing.
CHANGING THE ENGINE AIR FILTER – 5.0L, MACH 1
WARNING: To reduce the risk of vehicle damage and personal burn injuries, do not start your engine with the air cleaner removed and do not remove it while the engine is running.
- See the scheduled maintenance information for the appropriate intervals for changing the air filter element.
- When changing the air filter element, use only the Motorcraft™ air filter element listed. See the Motorcraft part numbers in the Capacities and Specifications chapter.


- Remove the two sensor wire harness retainers from the air box studs located on the front side of the air box.
- Remove the four studs that fasten the upper air box housing to the lower air box housing.
- Separate the upper air box housing from the lower air box housing.
- Loosen the air filter clamp enough to allow the filter to slip off the housing easily.
- Remove the air filter from the air filter housing.
- Wipe the newly-exposed air filter outlet tube clamping area clean to remove any dirt or debris.
- Install a new air filter, taking care not to damage the air filter element. Align the tab on the closed end of the filter with the notch in the air filter housing.
- Tighten the air filter clamp down.
Note: Do not overtighten the clamp or studs when reinstalling. - Reinstall the upper air box piece to the lower air box piece. Tighten the 4 studs down.
- Reinstall the two sensor wire harness retainers to the mating air box studs.
ENGINE COOLANT CHECK
- WARNING: Do not remove the coolant reservoir cap when the engine is on or the cooling system is hot. Wait 10 minutes for the cooling system to cool down. Cover the coolant reservoir cap with a thick cloth to prevent the possibility of scalding and slowly remove the cap. Failure to follow this instruction could result in personal injury.
- WARNING: Do not put coolant in the windshield washer reservoir. If sprayed on the windshield, coolant could make it difficult to see through the windshield.
- WARNING: To reduce the risk of personal injury, make sure the engine is cool before unscrewing the coolant pressure relief cap. The cooling system is under pressure. Steam and hot liquid can come out forcefully when you loosen the cap slightly.
When the engine is cold, check the concentration and level of the coolant at the intervals listed in the scheduled maintenance information. See Scheduled Maintenance.
- Note: Make sure that the coolant level is between the MIN and the MAX marks on the coolant reservoir.
- Note: Coolant expands when it is hot. The level may extend beyond the MAX mark.
Maintain coolant concentration within 48% to 50%, which equates to a freeze point between -29°F (-34°C) and -35°F (-37°C). Coolant concentration should be checked using a refractometer. We do not recommend the use of hydrometers or coolant test strips for measuring coolant concentration.
Adding Coolant
- WARNING: Do not add coolant further than the MAX mark.
- WARNING: Do not add coolant when the vehicle is on or the cooling system is hot. Failure to follow this instruction could result in personal injury.
- WARNING: Do not remove the coolant reservoir cap when the engine is on or the cooling system is hot. Wait 10 minutes for the cooling system to cool down. Cover the coolant reservoir cap with a thick cloth to prevent the possibility of scalding and slowly remove the cap. Failure to follow this instruction could result in personal injury.
- WARNING: Do not put coolant in the windshield washer reservoir. If sprayed on the windshield, coolant could make it difficult to see through the windshield.
- Note: Do not use stop leak pellets, cooling system sealants, or non-specified additives as they can cause damage to the engine cooling or heating systems. Resulting component damage may not be covered by the vehicle Warranty.
- Note: Automotive fluids are not interchangeable.
It is very important to use prediluted coolant approved to the correct specification in order to avoid plugging the small passageways in the engine cooling system. See Capacities and Specifications. Do not mix different colors or types of coolant in your vehicle. Mixing of engine coolants or using an incorrect coolant may harm the engine or cooling system components and may not be covered by the vehicle Warranty.
- Note: If prediluted coolant is not available, use the approved concentrated coolant diluting it to 50/50 with distilled water. See Capacities and Specifications. Using water that has not been deionised may contribute to deposit formation, corrosion and plugging of the small cooling system passageways.
- Note: Coolants marketed for all makes and models may not be approved to our specifications and may cause damage to the cooling system. Resulting component damage may not be covered by the vehicle Warranty.
- If the coolant level is at or below the minimum mark, add prediluted coolant immediately.
To top up the coolant level do the following:
- Unscrew the cap slowly. Any pressure escapes as you unscrew the cap.
- Add prediluted coolant approved to the correct specification. See Capacities and Specifications (page 337).
- Add enough prediluted coolant to reach the correct level.
- Replace the coolant reservoir cap. Turn the cap clockwise until it contacts the hard stop.
- Check the coolant level in the coolant reservoir the next few times you drive your vehicle. If necessary, add enough prediluted engine coolant to bring the coolant level to the correct level.
If you have to add more than 1.1 qt (1 L) of engine coolant per month, have your vehicle checked as soon as possible. Operating an engine with a low level of coolant can result in engine overheating and possible engine damage.
In case of emergency, you can add a large amount of water without engine coolant in order to reach a vehicle service location. In this instance, qualified personnel:
- Must drain the cooling system.
- Chemically clean the coolant system.
- Refill with engine coolant as soon as possible.
Water alone, without engine coolant, can cause engine damage from corrosion, overheating or freezing.
Do not use the following as a coolant substitute:
- Alcohol.
- Methanol.
- Brine.
- Any coolant mixed with alcohol or methanol antifreeze.
Alcohol and other liquids can cause engine damage from overheating or freezing.
Do not add extra inhibitors or additives to the coolant. These can be harmful and compromise the corrosion protection of the coolant.
Recycled Coolant
We do not recommend the use of recycled coolant as an approved recycling process is not yet available.
Note: Dispose of used coolant in the appropriate manner.
Follow your community’s regulations and standards for recycling and disposing of automotive fluids.
Severe Climates
If you drive in extremely cold climates:
- It may be necessary to increase the coolant concentration above 50%.
- A coolant concentration of 60%provides improved freeze point protection.
- Coolant concentrations above 60%decrease the overheat protection characteristics of the coolant and may cause engine damage.
If you drive in extremely hot climates:
- You can decrease the coolant concentration to 40%.
- A coolant concentration of 40%provides improved overheat protection.
- Coolant concentrations below 40%decrease the overheat and corrosion protection characteristics of the coolant and may cause engine damage.
Vehicles driven year-round in non-extreme climates should use prediluted coolant for optimum cooling system and engine protection.
Coolant Change
At specific mileage intervals, as listed in the scheduled maintenance information, the coolant should be changed. Add prediluted coolant approved to the correct specification. See Capacities and Specifications (page 337).
Fail-Safe Cooling
Fail-safe cooling allows you to temporarily drive your vehicle before any incremental component damage occurs. The fail-safe distance depends on ambient temperature, vehicle load and terrain.
How Fail-Safe Cooling Works
 If the engine begins to overheat, the coolant temperature gauge moves toward the red zone:
 A warning lamp illuminates and a message may appear in the information display.
If the engine reaches a preset over-temperature condition, the engine automatically switches to alternating cylinder operation. Each disabled cylinder acts as an air pump and cools the engine.
When this occurs, your vehicle still operates, however:
- Engine power is limited.
- The air conditioning system turns off.
Continued operation increases the engine temperature, causing the engine to completely shut down. Your steering and braking effort increases in this situation.
When the engine temperature cools, you can re-start the engine. Have your vehicle checked as soon as possible to minimize engine damage.
When Fail-Safe Mode Is Activated
- WARNING: Fail-safe mode is for use during emergencies only. Operate your vehicle in fail-safe mode only as long as necessary to bring your vehicle to rest in a safe location and seek immediate repairs. When in fail-safe mode, your vehicle will have limited power, will not be able to maintain high-speed operation, and may completely shut down without warning, potentially losing engine power, power steering assist, and power brake assist, which may increase the possibility of a crash resulting in serious injury.
- WARNING: Do not remove the coolant reservoir cap when the engine is on or the cooling system is hot. Wait 10 minutes for the cooling system to cool down. Cover the coolant reservoir cap with a thick cloth to prevent the possibility of scalding and slowly remove the cap. Failure to follow this instruction could result in personal injury.
Your vehicle has limited engine power when in the fail-safe mode, drive your vehicle with caution. Your vehicle does not maintain high-speed operation and the engine may operate poorly. Remember that the engine is capable of automatically shutting down to prevent engine damage. In this situation:
- Pull off the road as soon as safely possible and switch the engine off.
- If you are a member of a roadside assistance program, we recommend that you contact your roadside assistance service provider.
- If this is not possible, wait for a short period of time for the engine to cool.
- Check the coolant level. If the coolant level is at or below the minimum mark, add prediluted coolant immediately.
- When the engine temperature cools, you can re-start the engine. Have your vehicle checked as soon as possible to minimize engine damage.
Note: Driving your vehicle without repair increases the chance of engine damage.
Engine Coolant Temperature Management (If Equipped)
WARNING: To reduce the risk of crash and injury, be prepared that the vehicle speed may reduce and the vehicle may not be able to accelerate with full power until the coolant temperature reduces.
- If you tow a trailer with your vehicle, the engine may temporarily reach a higher temperature during severe operating conditions, for example ascending a long or steep grade in high ambient temperatures.
- At this time, you may notice the coolant temperature gauge moves toward the red zone and a message may appear in the information display.
- You may notice a reduction in vehicle speed caused by reduced engine power in order to manage the engine coolant temperature. Your vehicle may enter this mode if certain high-temperature and high-load conditions take place. The amount of speed reduction depends on vehicle loading, grade and ambient temperature. If this occurs, there is no need to stop your vehicle. You can continue to drive.
- The air conditioning may automatically turn on and off during severe operating conditions to protect the engine from overheating.
- When the coolant temperature decreases to the normal operating temperature, the air conditioning turns on.
- If the coolant temperature gauge moves fully into the red zone, or if the coolant temperature warning or service engine soon messages appear in your information display, do the following:
- Stop your vehicle as soon as it is safe to do so. Fully apply the parking brake, shift into park (P) or neutral (N).
- Leave the engine running until the coolant temperature gauge needle returns to the normal position. If the temperature does not drop after several minutes, follow the remaining steps.
- Switch the engine off and wait for it to cool. Check the coolant level.
- If the coolant level is at or below the minimum mark, add prediluted coolant immediately.
- If the coolant level is normal, restart the engine and continue.
MANUAL TRANSMISSION FLUID CHECK – 6-SPEED MANUAL TRANSMISSION –3160
Note: Make sure the vehicle is on a level surface.
- Clean the filler plug.

- Remove the filler plug.
- Start the engine and allow it to idle for two minutes with the clutch engaged.
- Add fluid through the filler hole.
- The correct fluid fill level is 0.0–0.1 in (0–3 mm) below the bottom edge of the filler hole.
- Install the filler plug.
- Tighten the filler plug until you feel a strong resistance.
Only use fluid that meets our specifications. See Capacities and Specifications.
MANUAL TRANSMISSION FLUID CHECK – 6-SPEED MANUAL TRANSMISSION –MT82
- Clean the filler plug. The filler plug is on the right-hand side of the transmission.

- Remove the filler plug.
- The correct fluid fill level is 0.0–0.1 in (0–3 mm) below the bottom edge of the filler hole.
- Add fluid through the filler hole.
- Install the filler plug.
- Tighten the filler plug until you feel a strong resistance.
Only use fluid that meets Ford specifications. See Capacities and Specifications.
AUTOMATIC TRANSMISSION FLUID CHECK
- If required, have an authorized dealer check and change the transmission fluid at the correct service interval. See Scheduled Maintenance.
- The automatic transmission does not have a transmission fluid dipstick.
- Refer to your scheduled maintenance information for scheduled intervals for fluid checks and changes. Your transmission does not consume fluid. However, if the transmission slips, shifts slowly or if you notice a sign of leaking fluid, contact an authorized dealer.
- Do not use supplemental transmission fluid additives, treatments or cleaning agents. The use of these materials may affect transmission operation and result in damage to internal transmission components.
BRAKE FLUID CHECK
- WARNING: Do not use any fluid other than the recommended brake fluid as this will reduce brake efficiency. Use of incorrect fluid could result in the loss of vehicle control, serious personal injury or death.
- WARNING: Only use brake fluid from a sealed container. Contamination with dirt, water, petroleum products or other materials may result in brake system damage or failure. Failure to adhere to this warning could result in the loss of vehicle control, serious personal injury or death.
- WARNING: Do not allow the fluid to touch your skin or eyes. If this happens, rinse the affected areas immediately with plenty of water and contact your physician.
- WARNING: The brake system could be affected if the brake fluid level is below the MIN mark or above the MAX mark on the brake fluid reservoir.

- Park your vehicle on a level surface.
- Look at the brake fluid reservoir to see where the brake fluid level is relative to the MIN and the MAX marks on the reservoir.
- Note: If the brake fluid level is between the MIN and the MAX marks on the reservoir, it is acceptable.
- Note: If the brake fluid level is below the MIN mark or above the MAX mark, have your vehicle checked as soon as possible.
- Note: To avoid fluid contamination, the reservoir cap must remain in place and fully tight, unless you are adding fluid.
Only use fluid that meets our specifications. See Capacities and Specifications.
Brake Fluid Service Interval
Brake fluid absorbs water over time which degrades the effectiveness of the brake fluid. Change the brake fluid at the specified intervals to prevent degraded braking performance.
For detailed interval information, see Scheduled Maintenance in your Owner’s Manual or your local maintenance guide.
CLUTCH FLUID CHECK – MANUAL TRANSMISSION
The clutch and brake systems share the same fluid reservoir. See Brake Fluid Check (page 270).
POWER STEERING FLUID CHECK
Your vehicle is equipped with an electric power steering (EPS) system. There is no fluid reservoir to check or fill.
Useful Links
View Full PDF: 2023 FORD Mustang Owner’s Manual | Auto User Guide
2024 Ford Mustang Specs, Price, Features, Mileage (Brochure)
Video: 2023 FORD Mustang Engine Oil and Fluids
https://www.youtube.com/watch?v=_jN4QYTVjy4